Appearance
How to Create a Test Feature
Test features help you organize related test cases — such as everything involved in "Login" or "Checkout".
This guide walks you through creating your first test feature and enhancing it with inputs that allow AI to suggest test cases automatically.
1. Open the "Test Cases" Tab and Click "Add Feature"
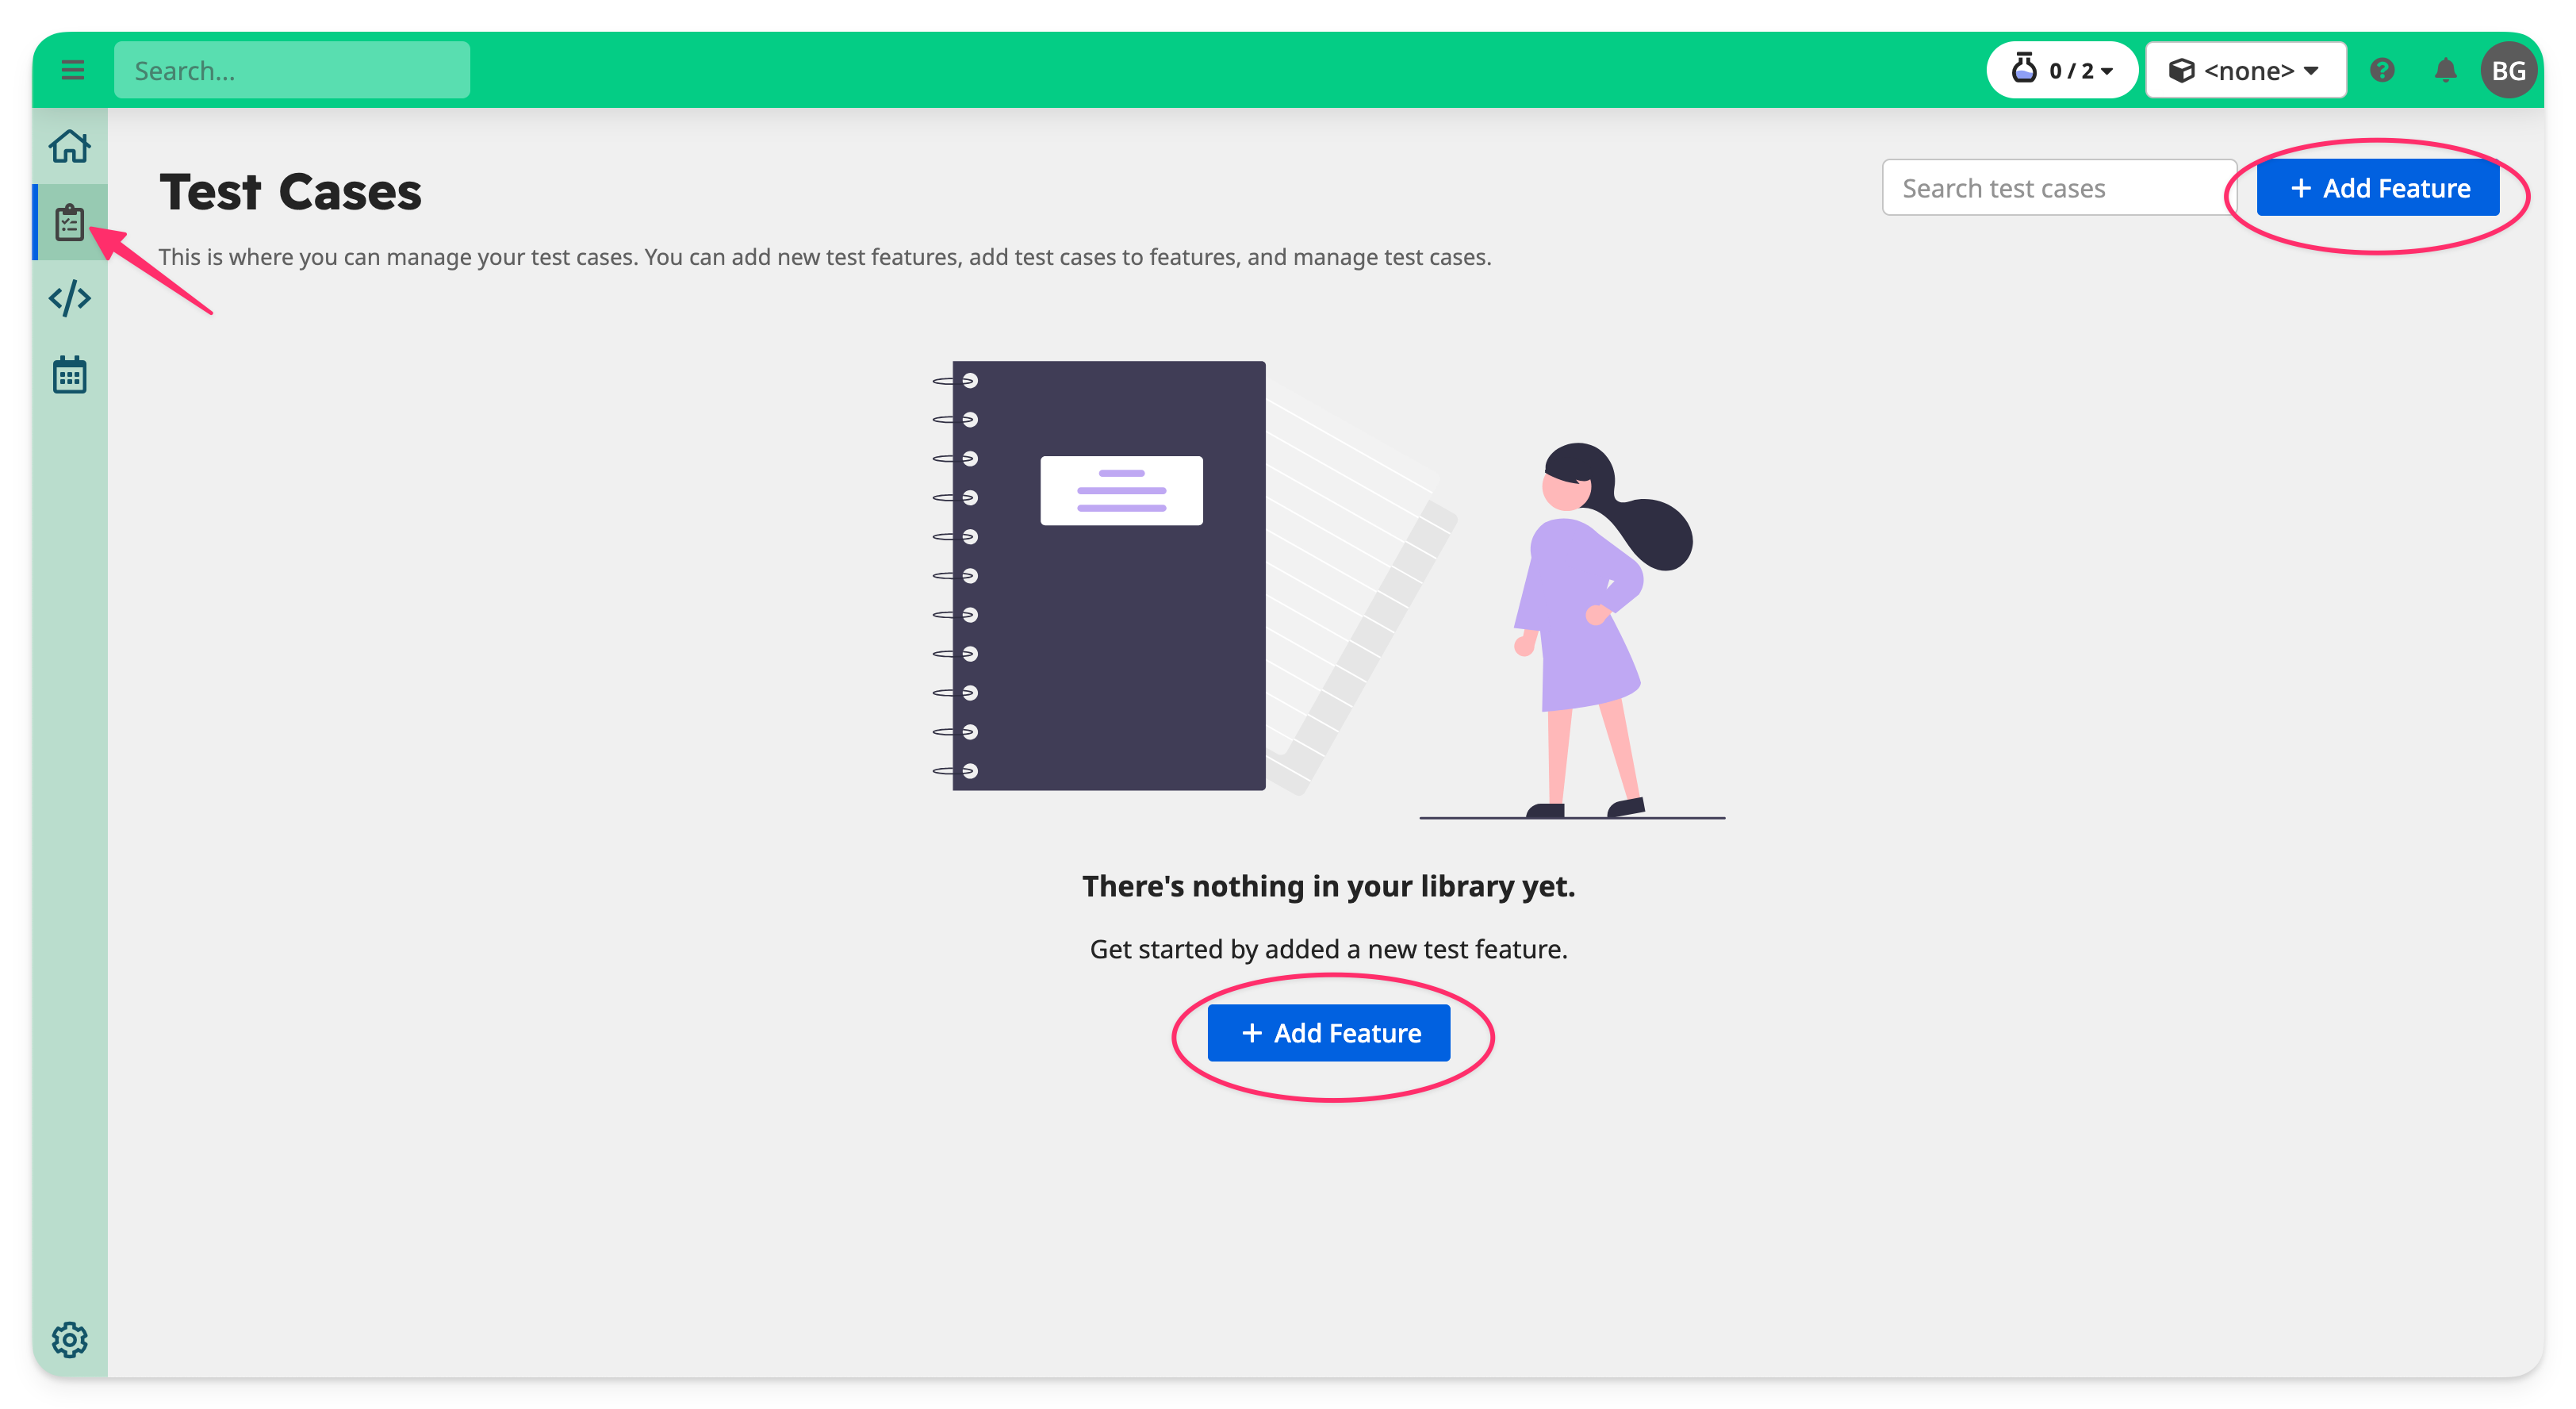
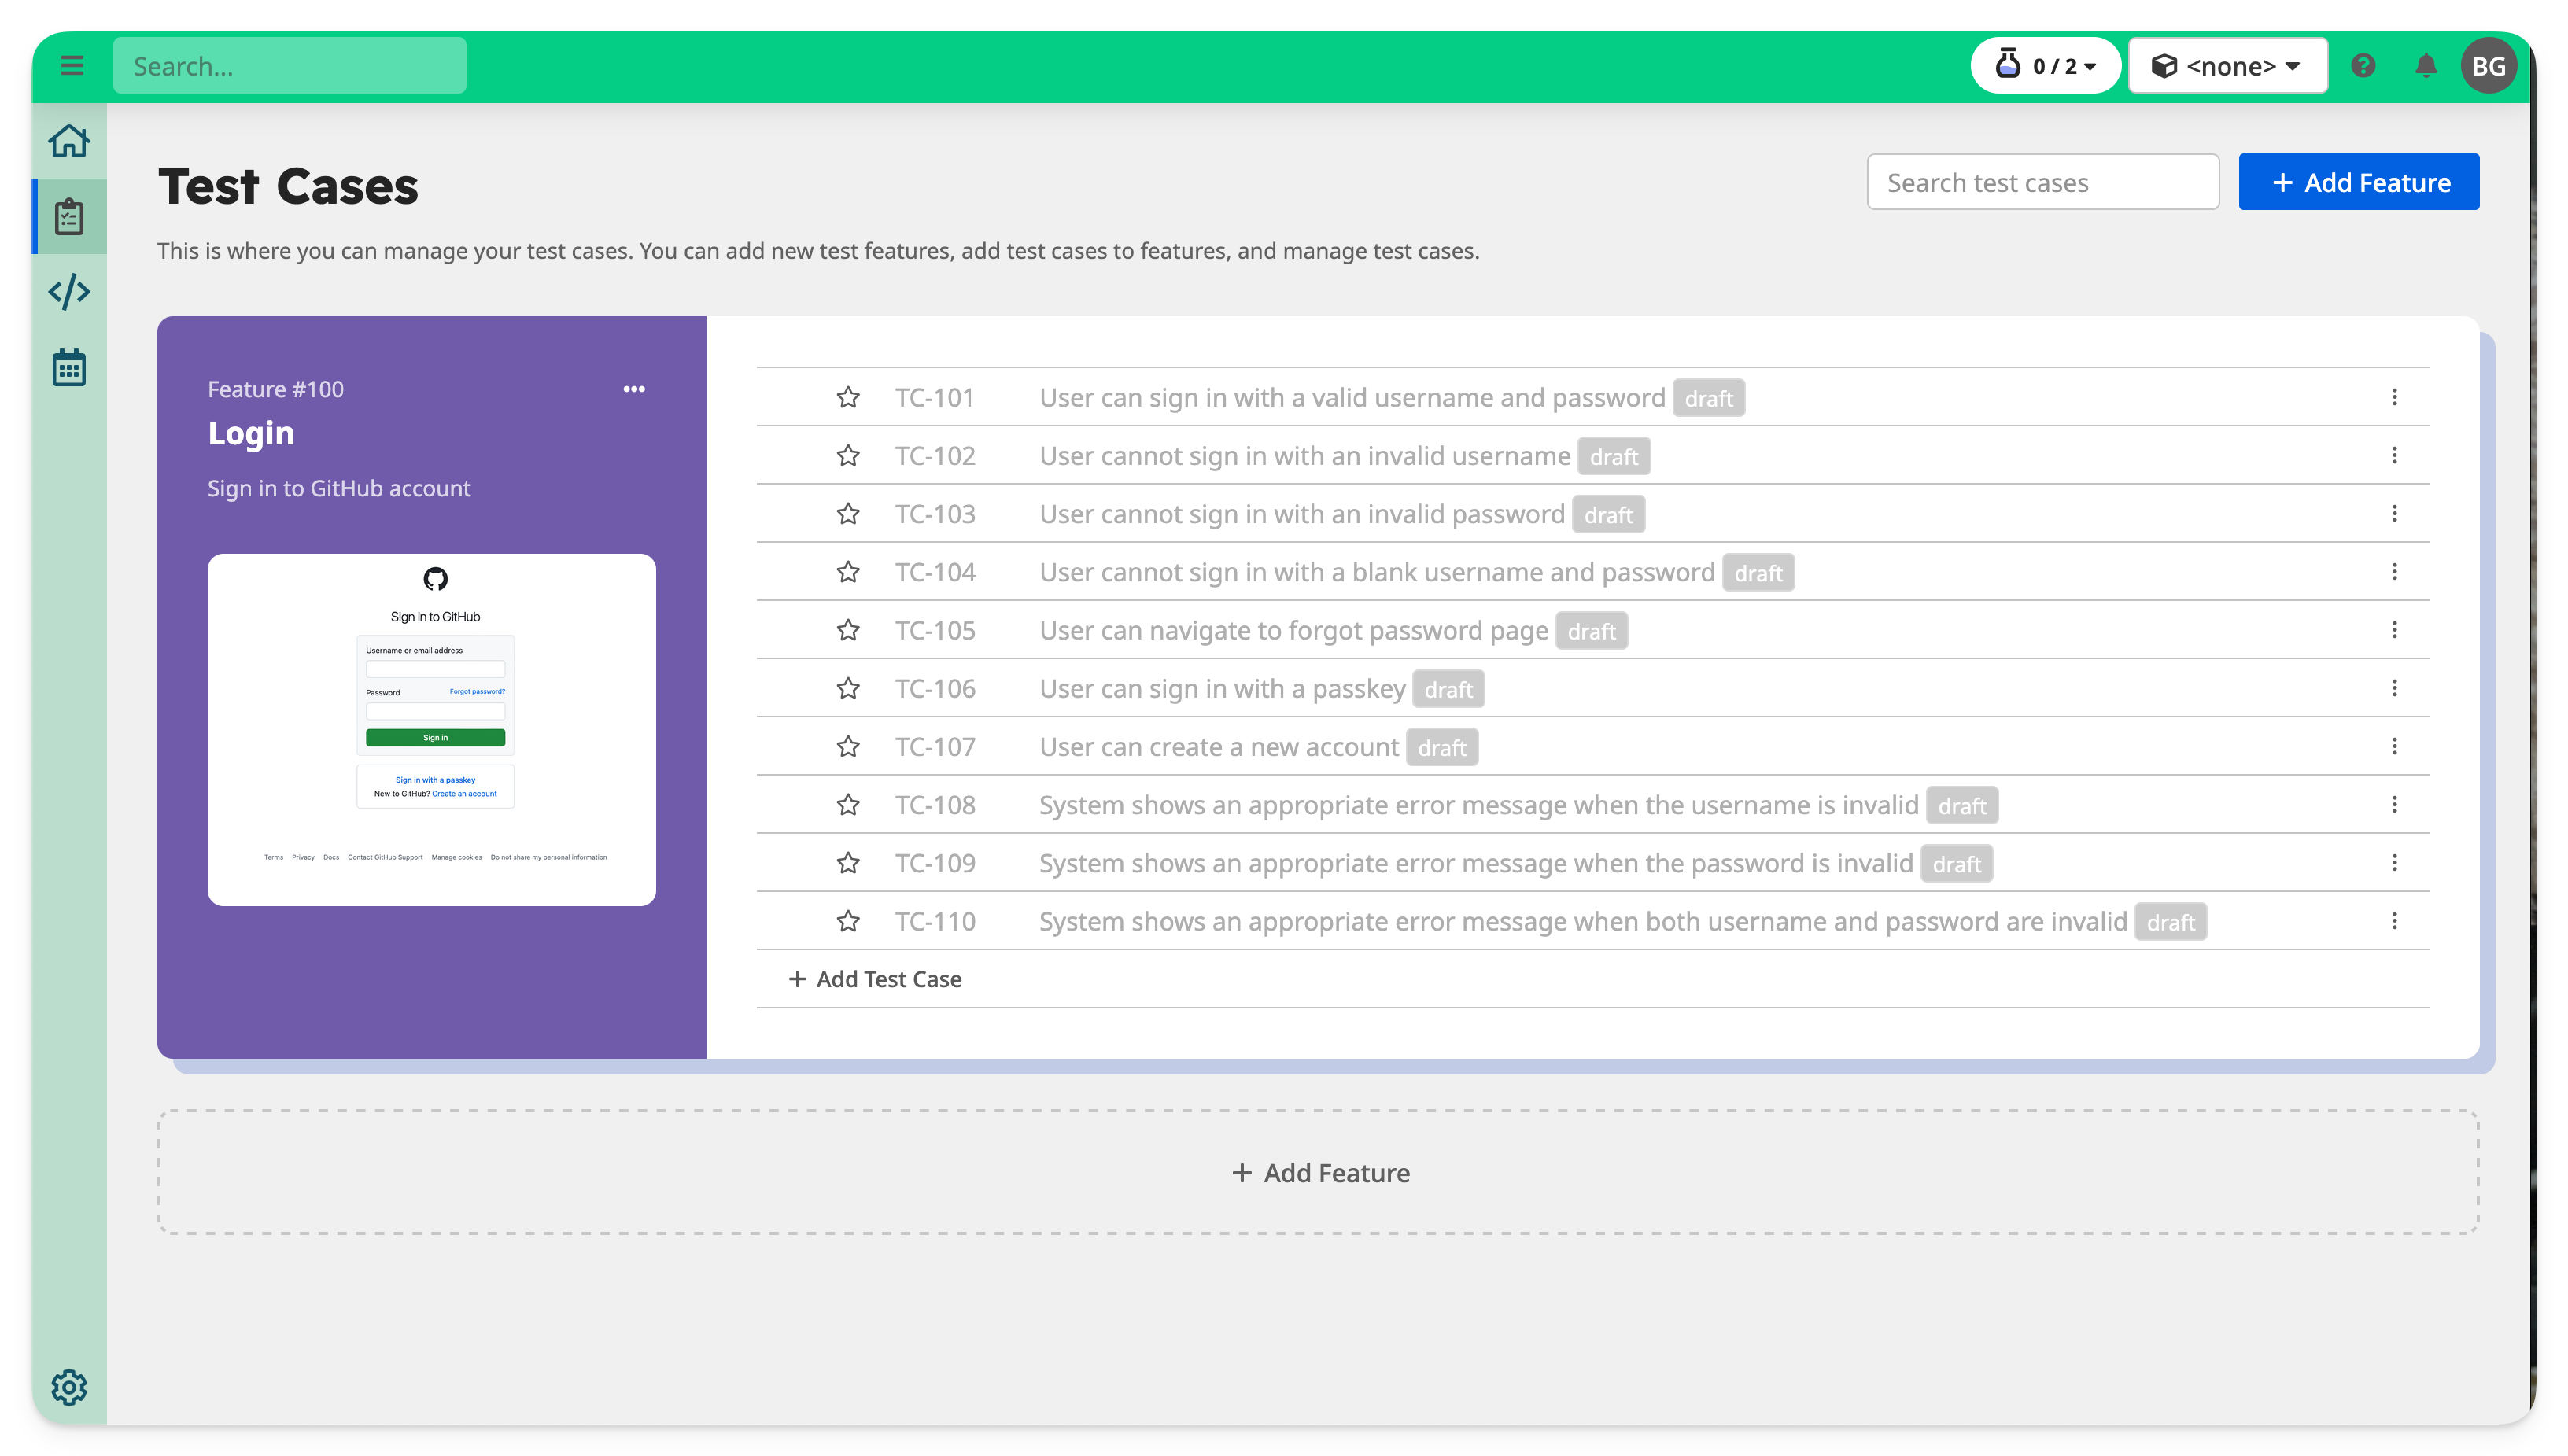
From the left-hand navigation menu, go to the Test Cases tab.
This brings you to a list of your existing test features and cases (if any). To create a new feature, click the + Add Feature button in the top-right corner.
2. Name the Feature and (Optionally) Upload a Screenshot
In the Add Feature dialog, enter a clear, descriptive name for your test feature — for example, "Login", "Signup Flow", or "Cart Management".
Optionally, upload a screenshot of the relevant part of your application. This allows the AI to analyze your UI and suggest test cases automatically in the next step.
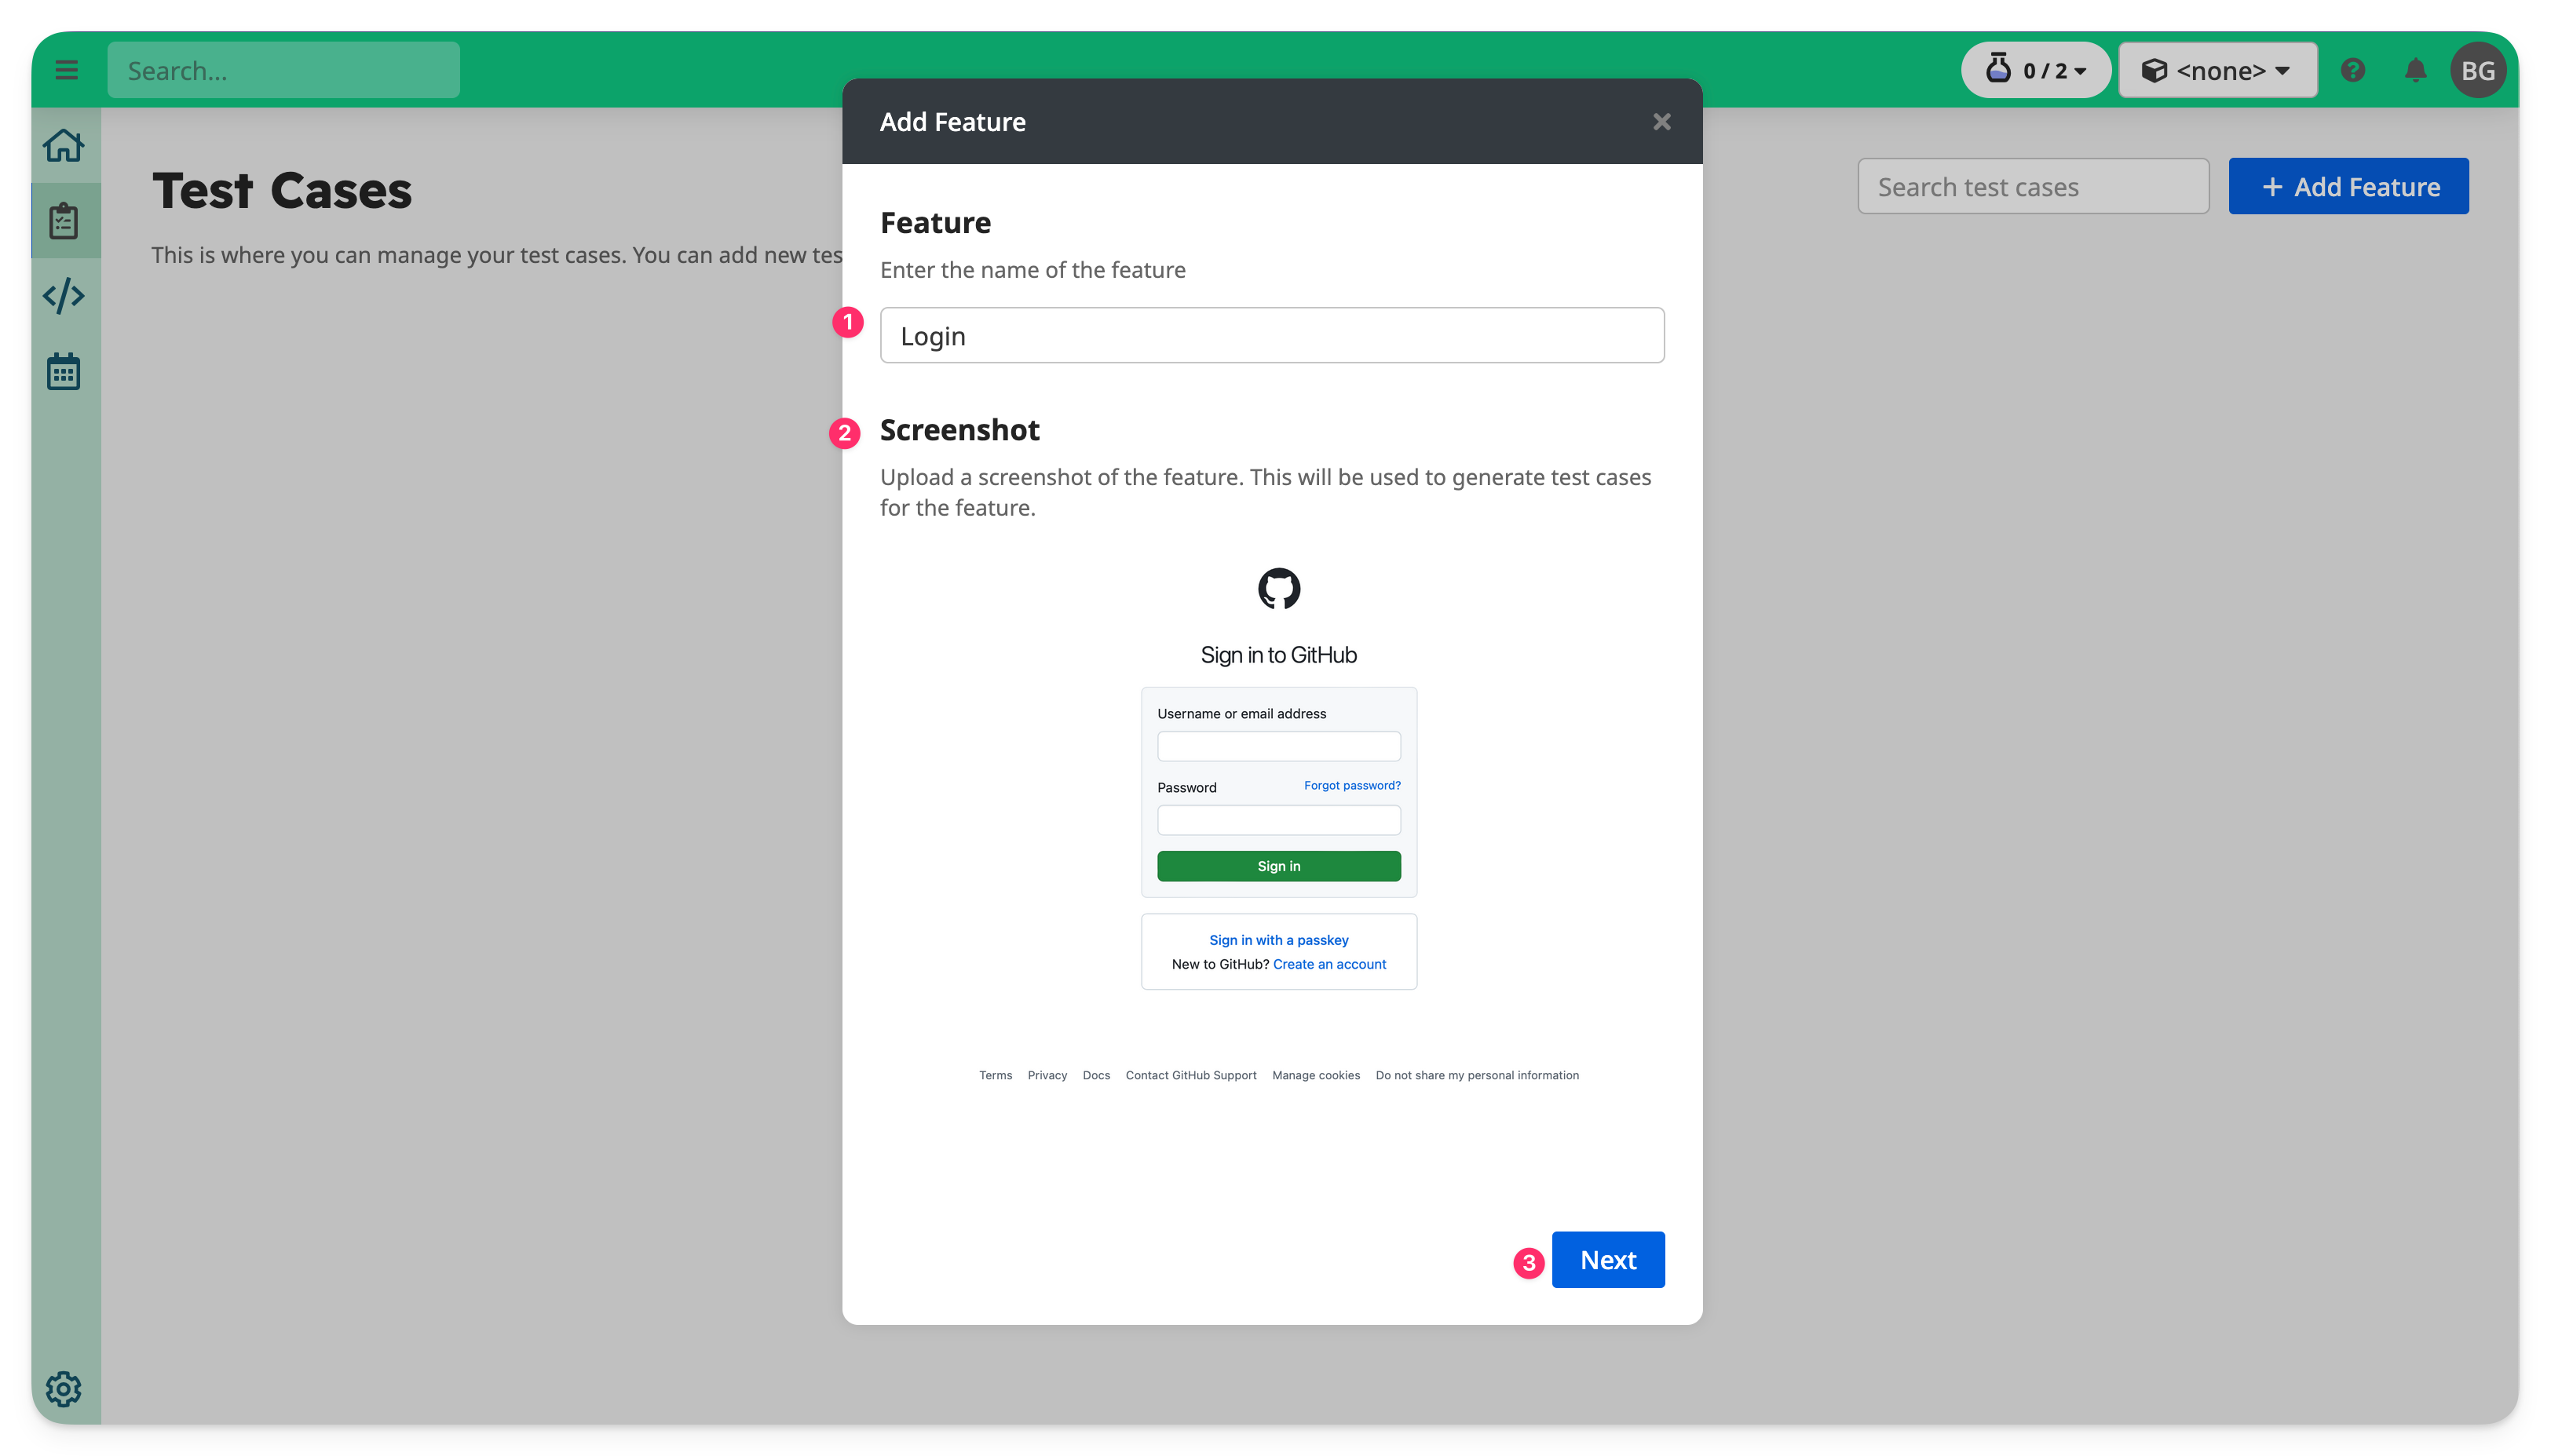
Click Next to continue.
3. Describe the Feature and Add Test Cases
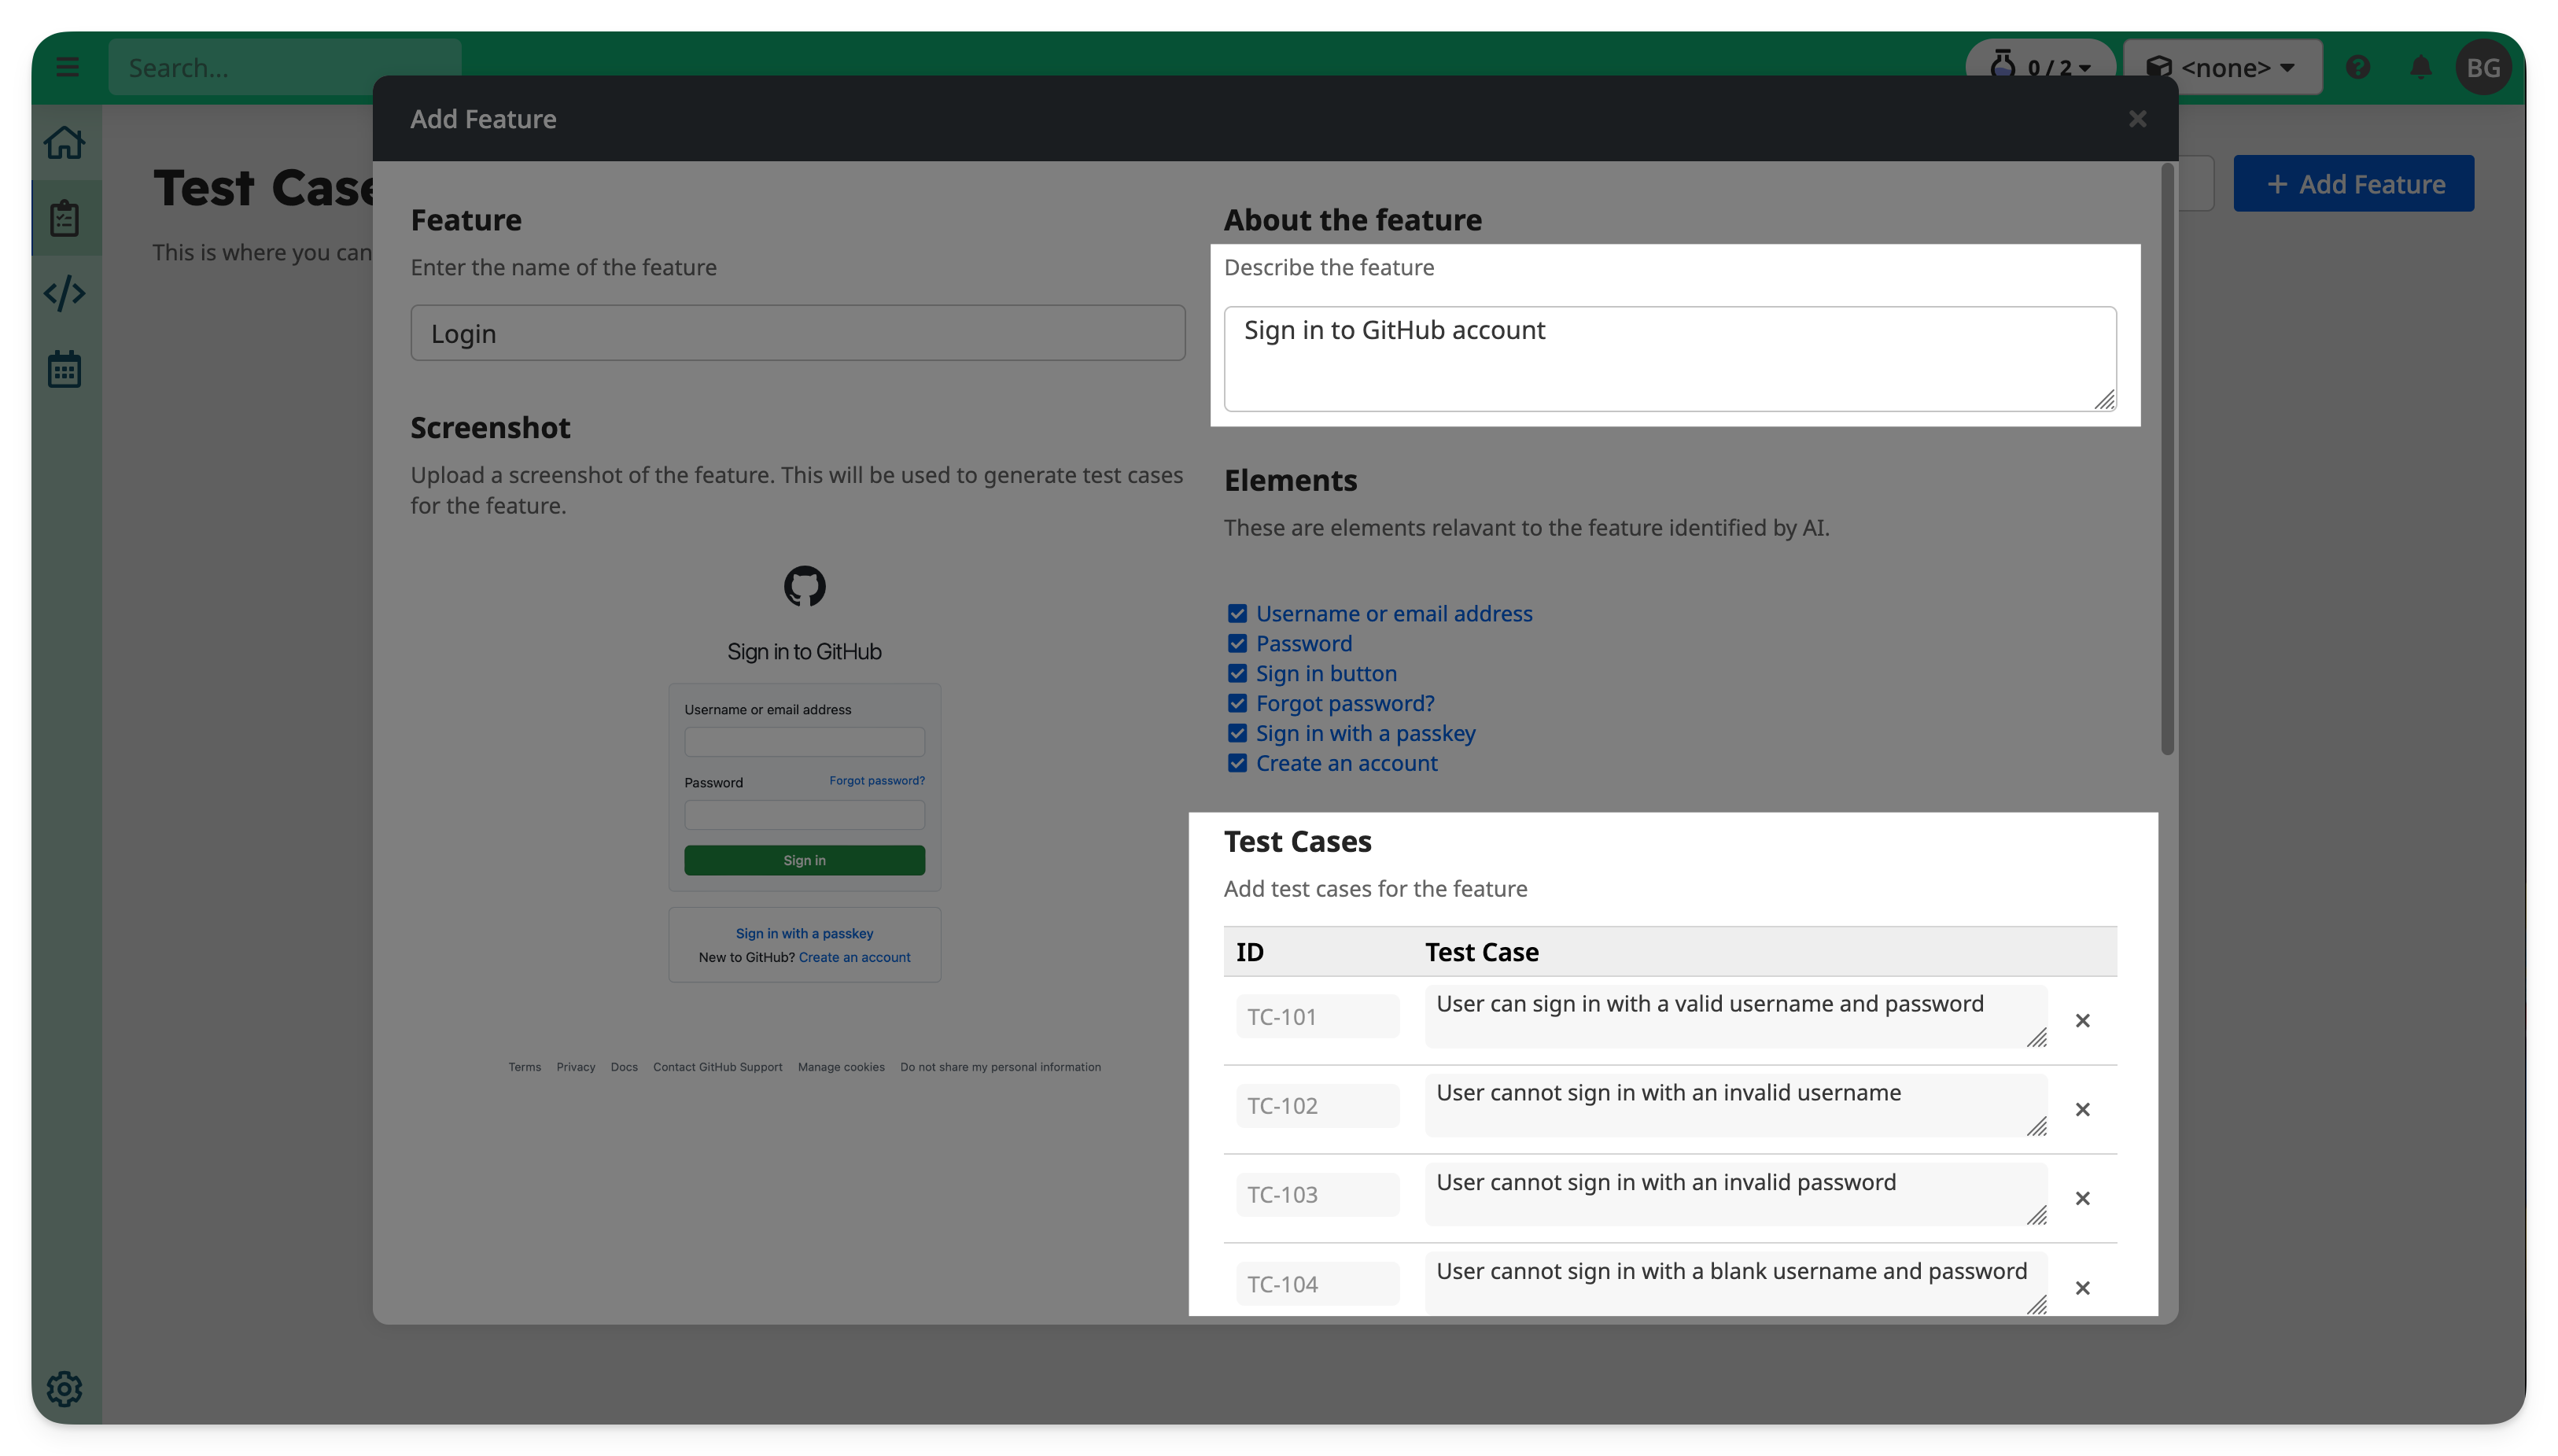
Next, describe the functionality of the feature, and add test cases.
If you uploaded a screenshot earlier, TAMI may help you write the description and suggest test cases.
You can click on Suggest to ask TAMI to generate more test cases.
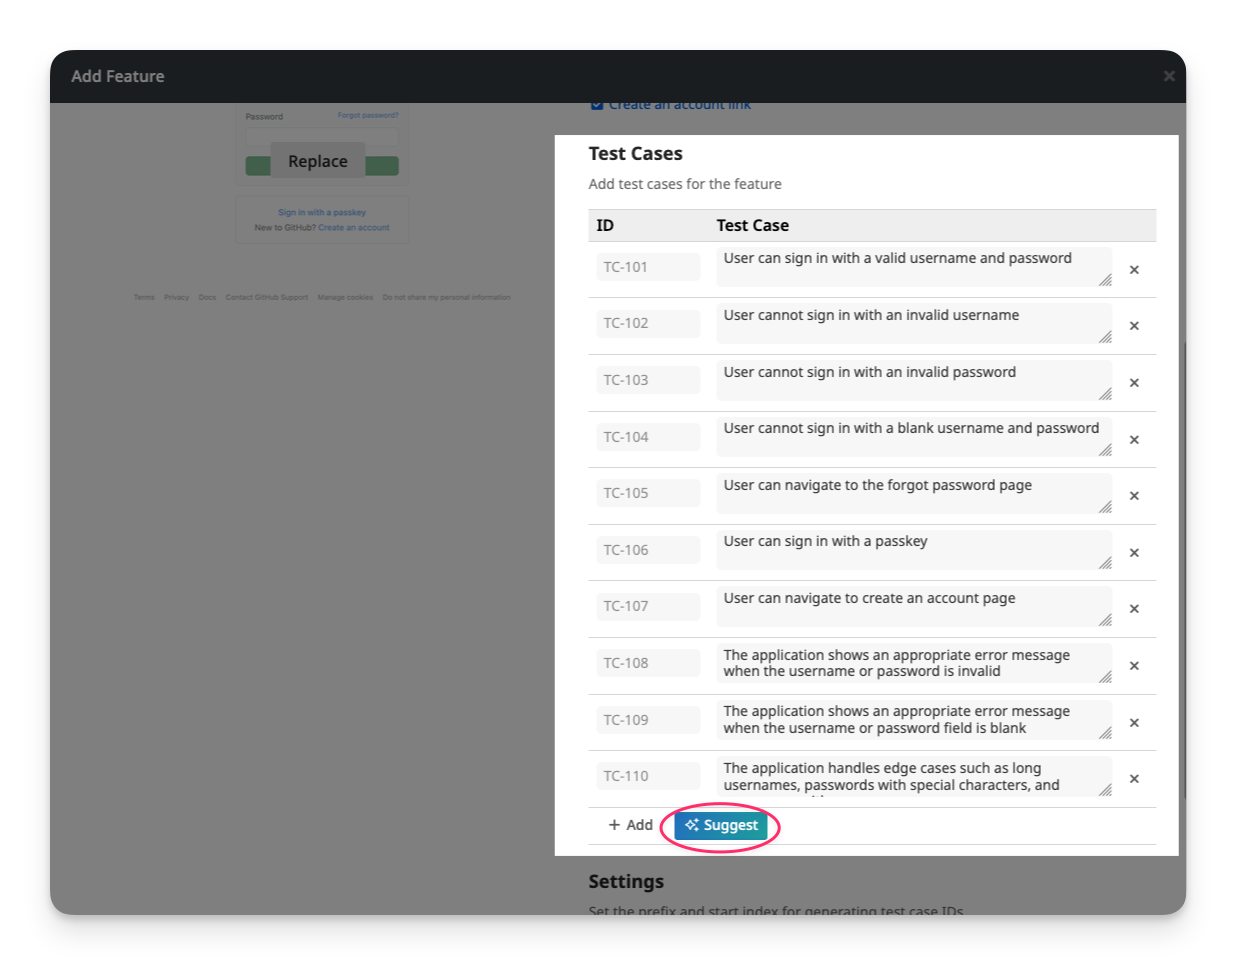
To manually add a test case, click + Add, then enter a title such as:
User can log in with valid username and password
When you're done, click Create.
4. Your Feature Is Ready
You’ll return to the Test Cases page, where your new feature now appears — along with any test cases you added.
You can now:
- Add more test cases to this feature
- Describe each test case in more detail
- Start automating your tests with scripts
- Collaborate with teammates and reviewers