Appearance
Getting Started with TAMI Studio
Welcome! In this guide, you’ll create and run your first automated test using TAMI Studio.
By the end, you’ll know how to:
- Define test features and test cases
- Write and run automated test scripts
- Use TAMI, your AI assistant, to help write tests faster
Before You Begin
To follow along, you’ll need a TAMI Studio account.
👉 You can sign up for free here.
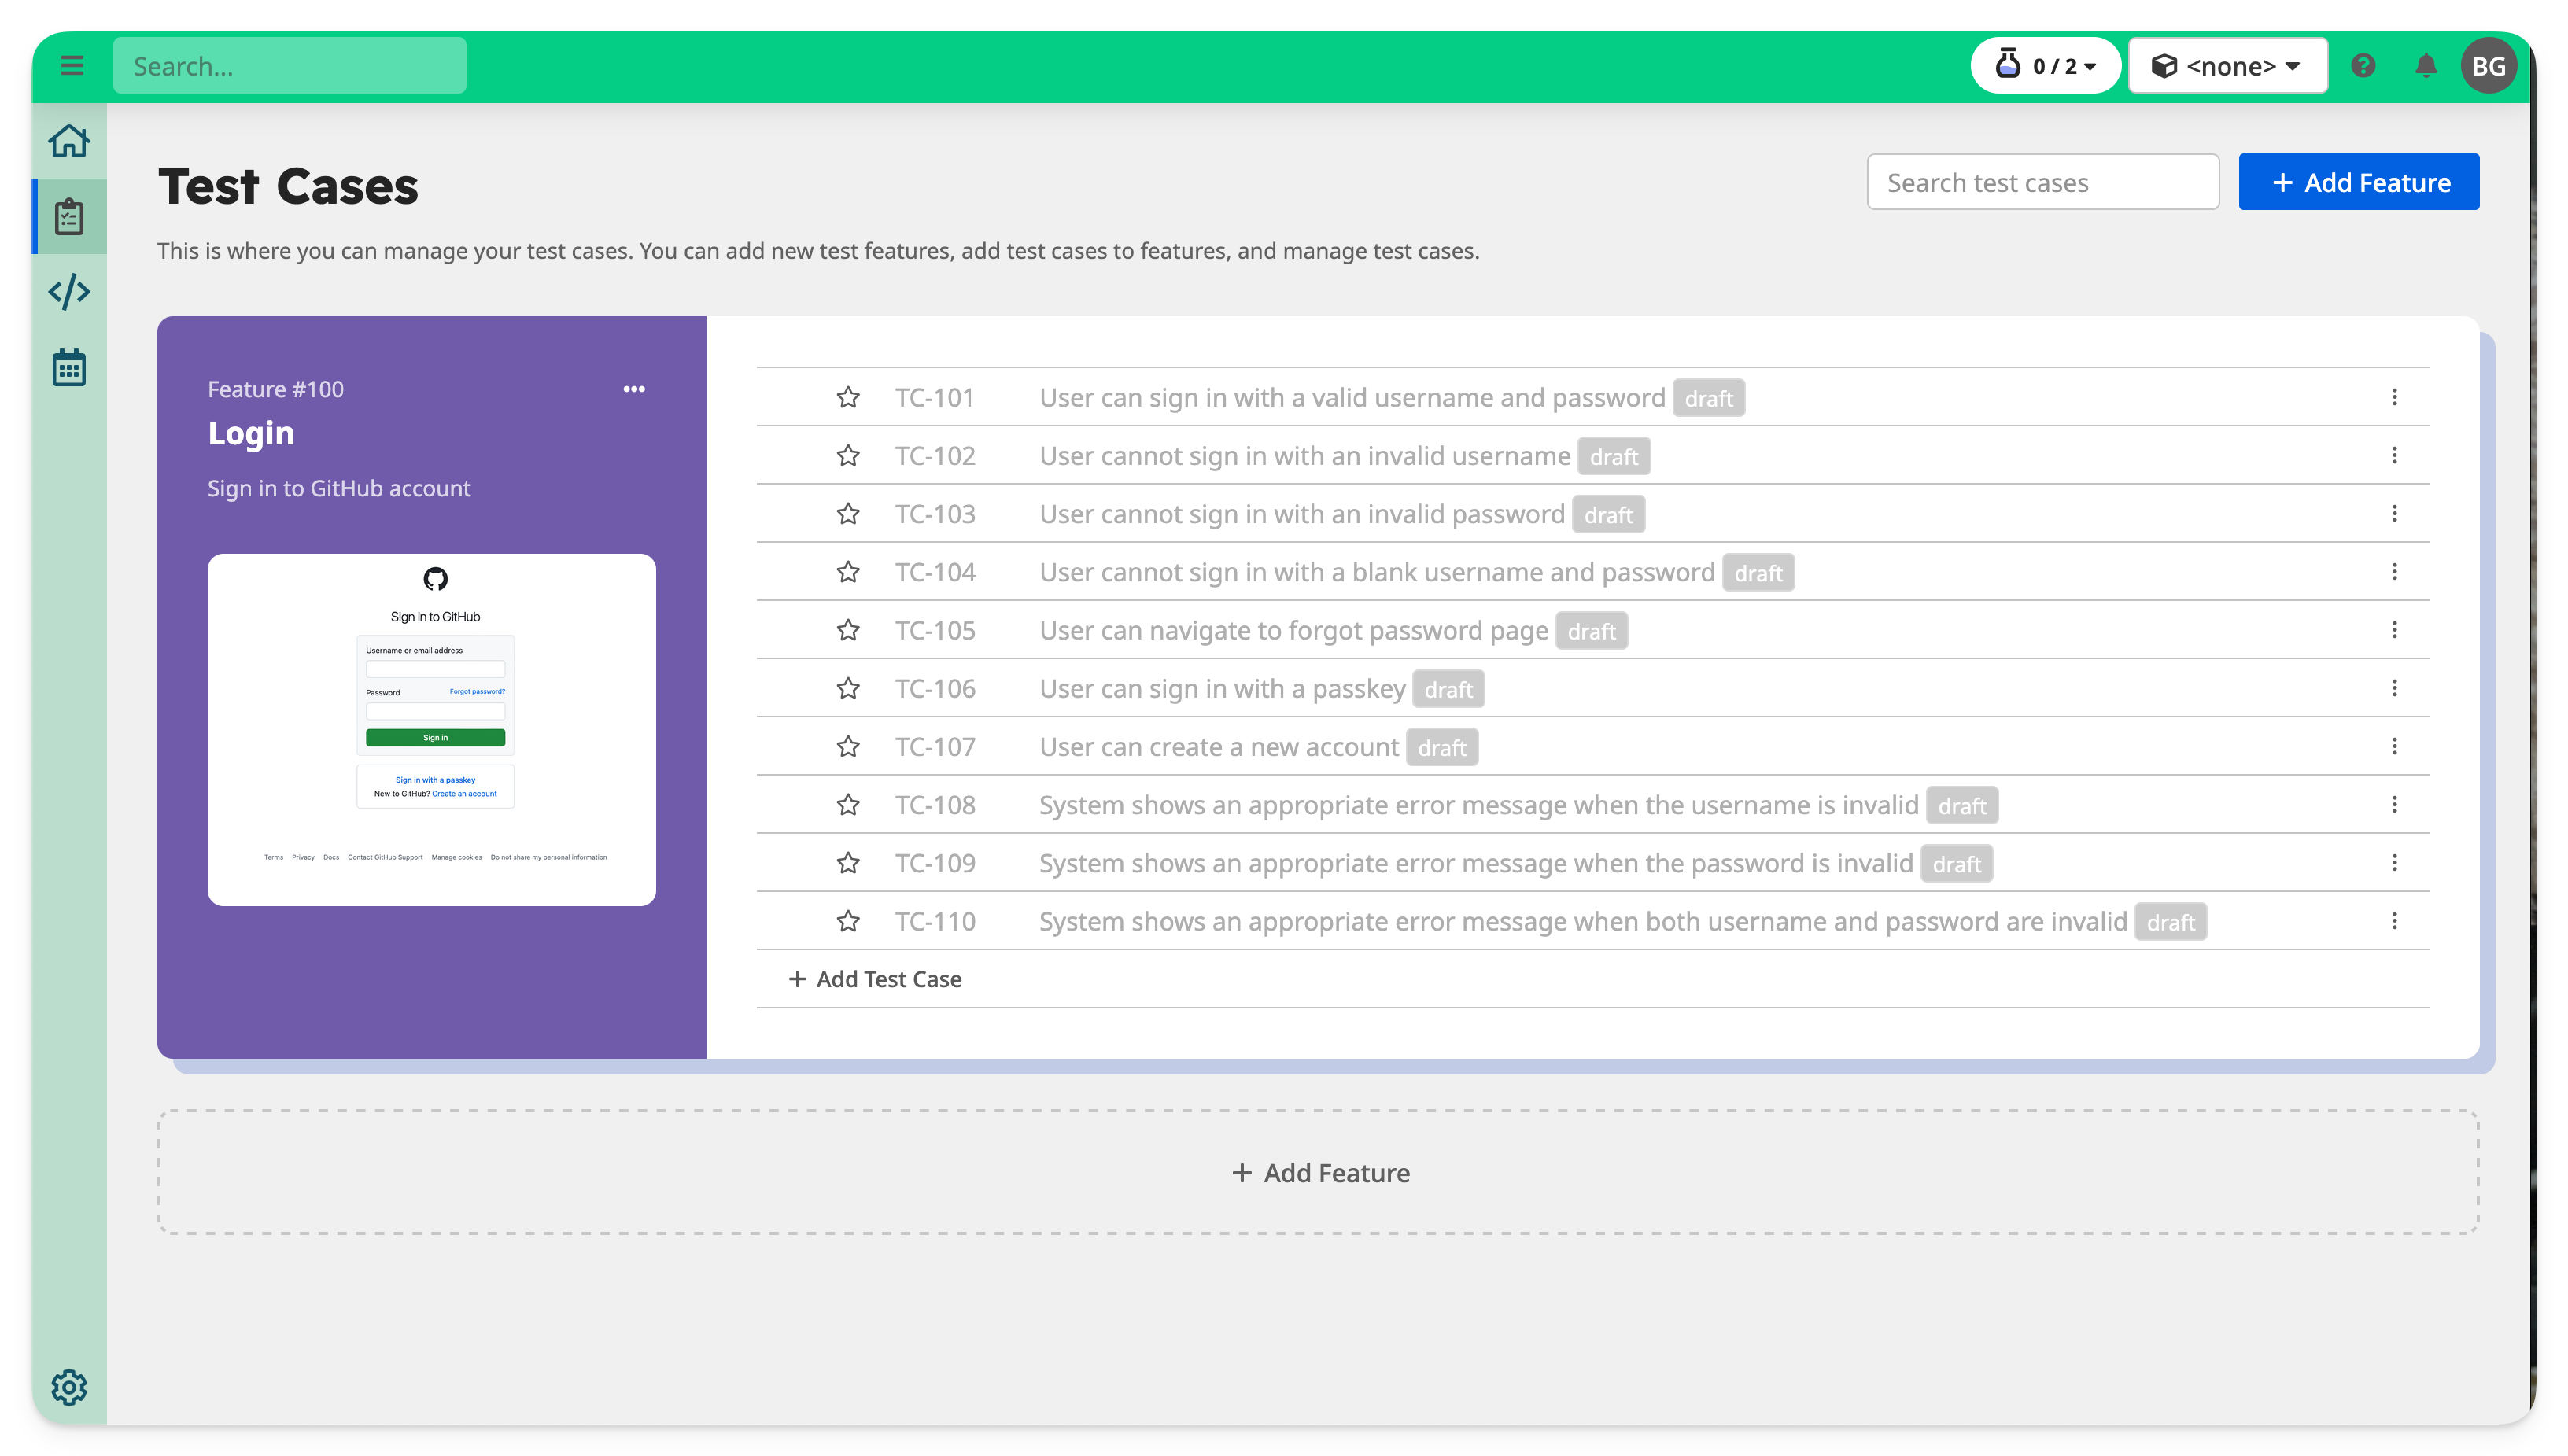
Create a Test Feature and Test Cases
👉 Navigate to the Test Cases tab from the left-hand menu.
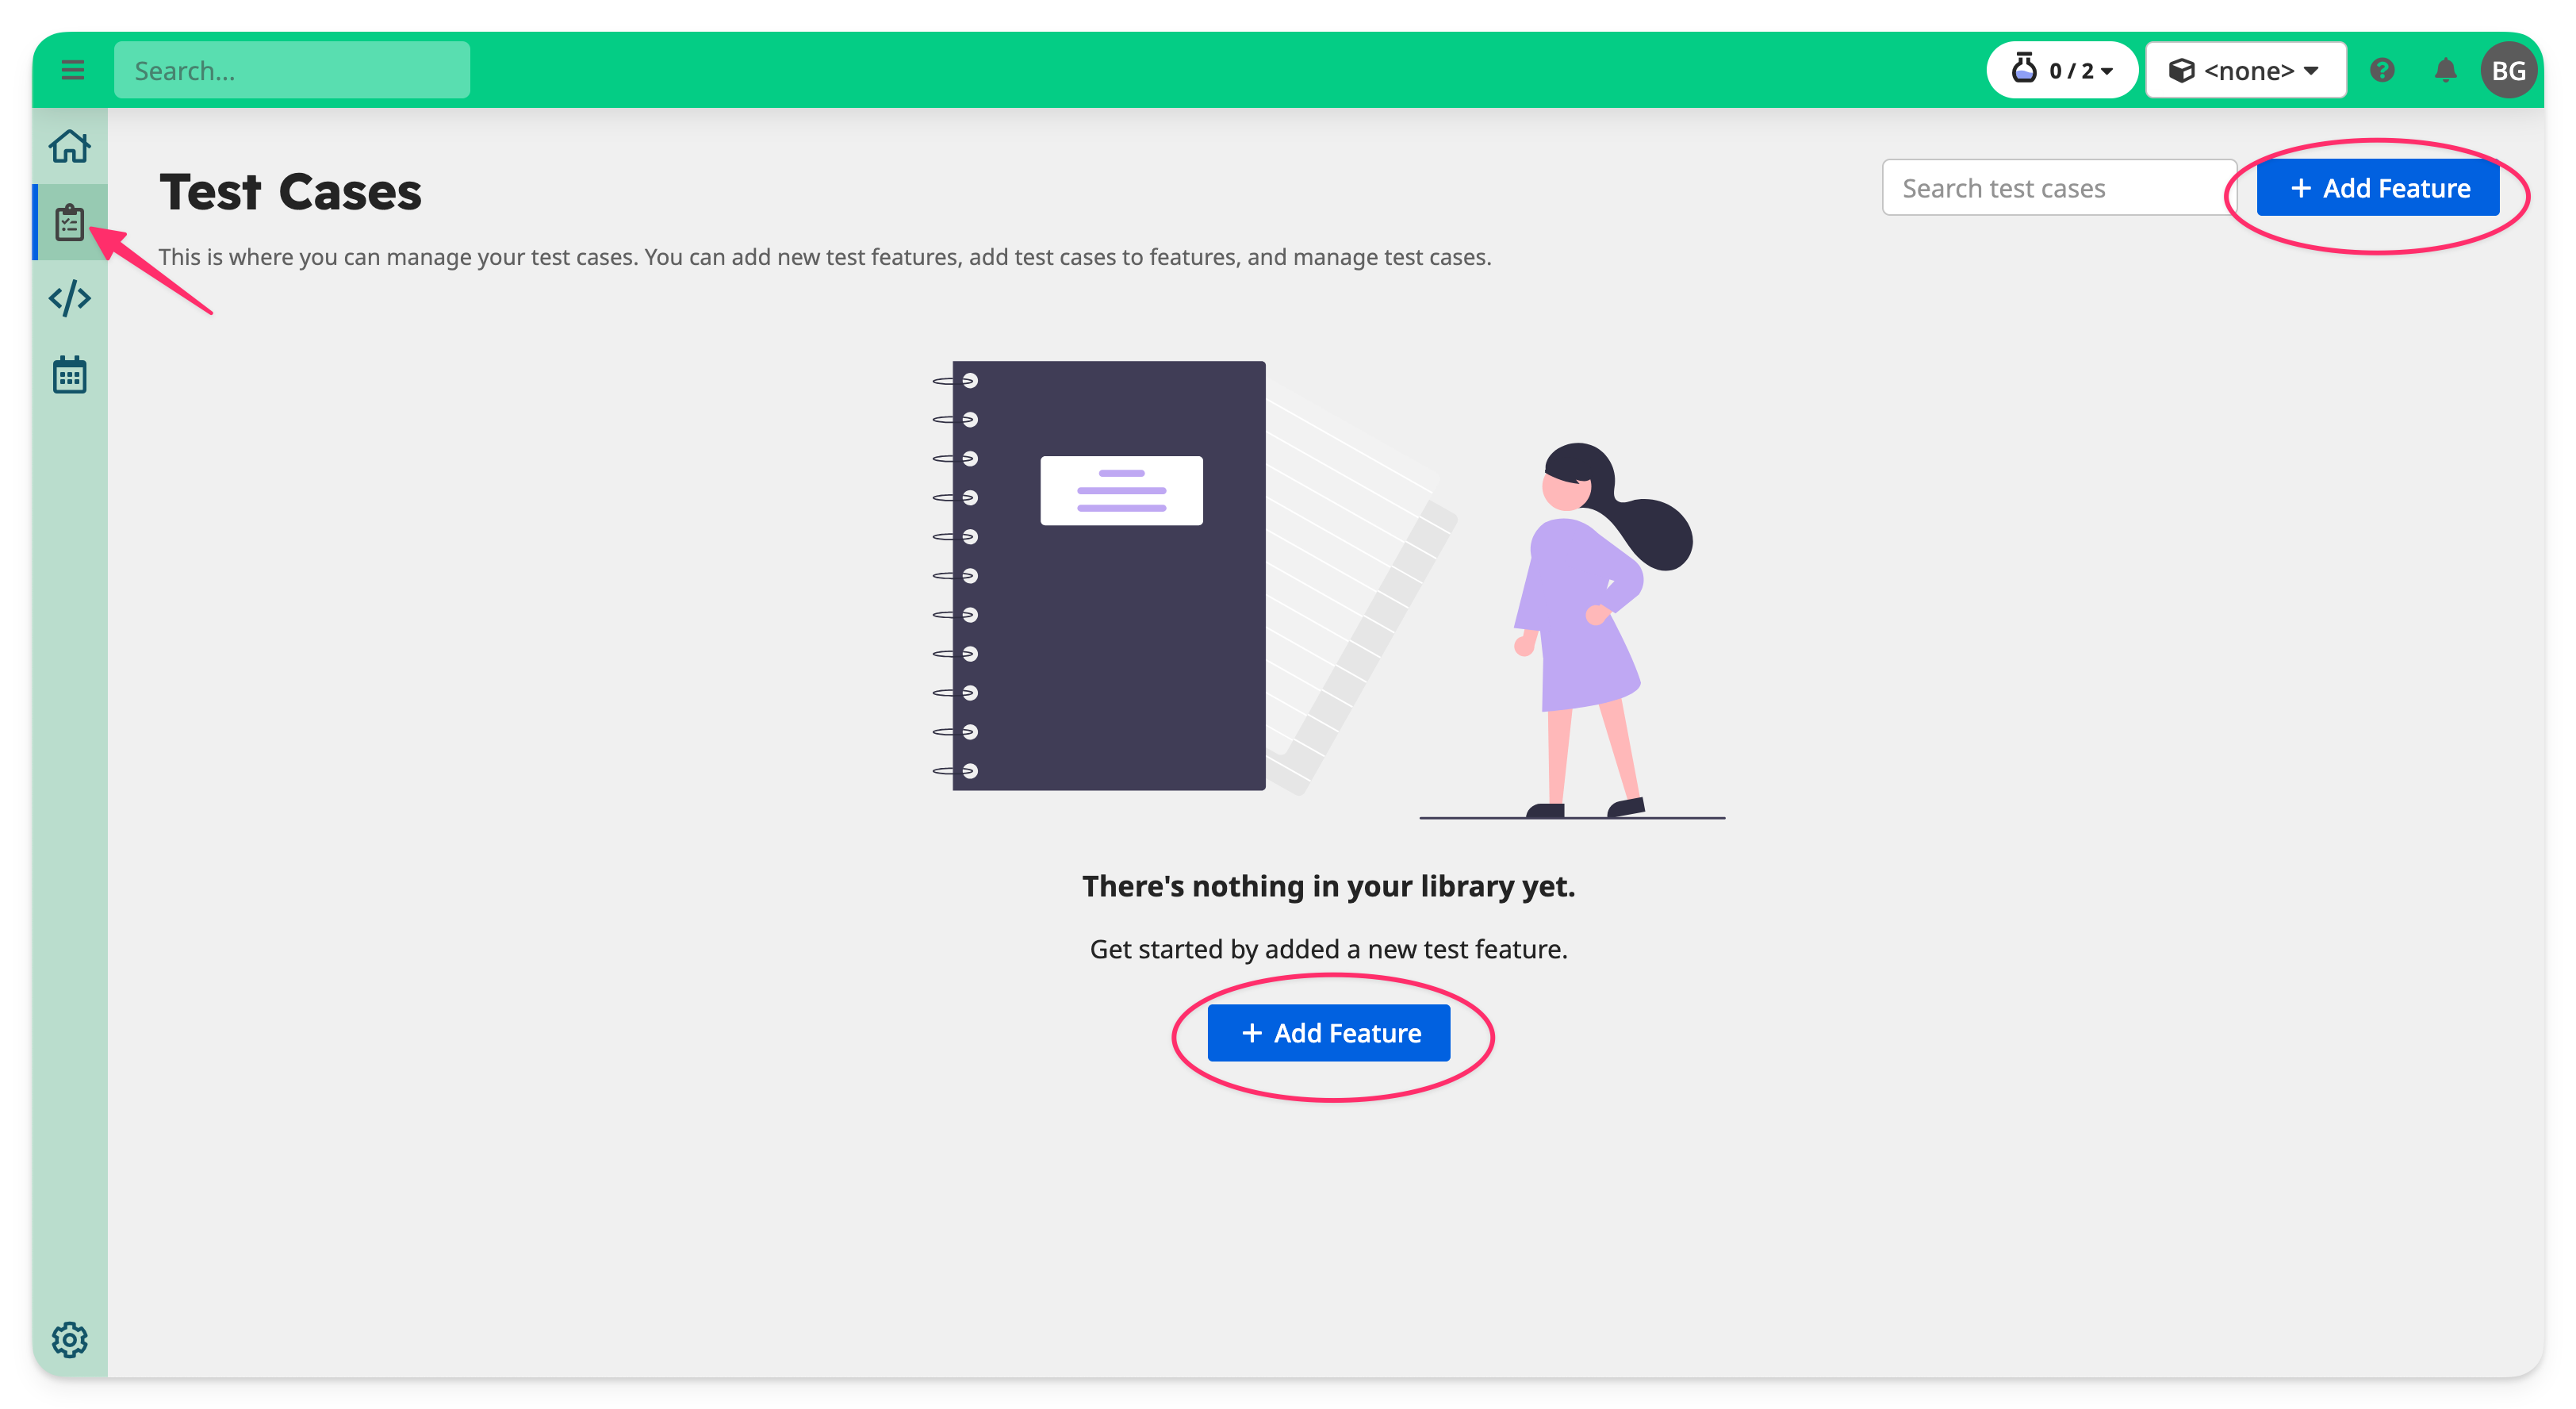
👉 Click + Add Feature to create a new test feature — this groups related test cases together.
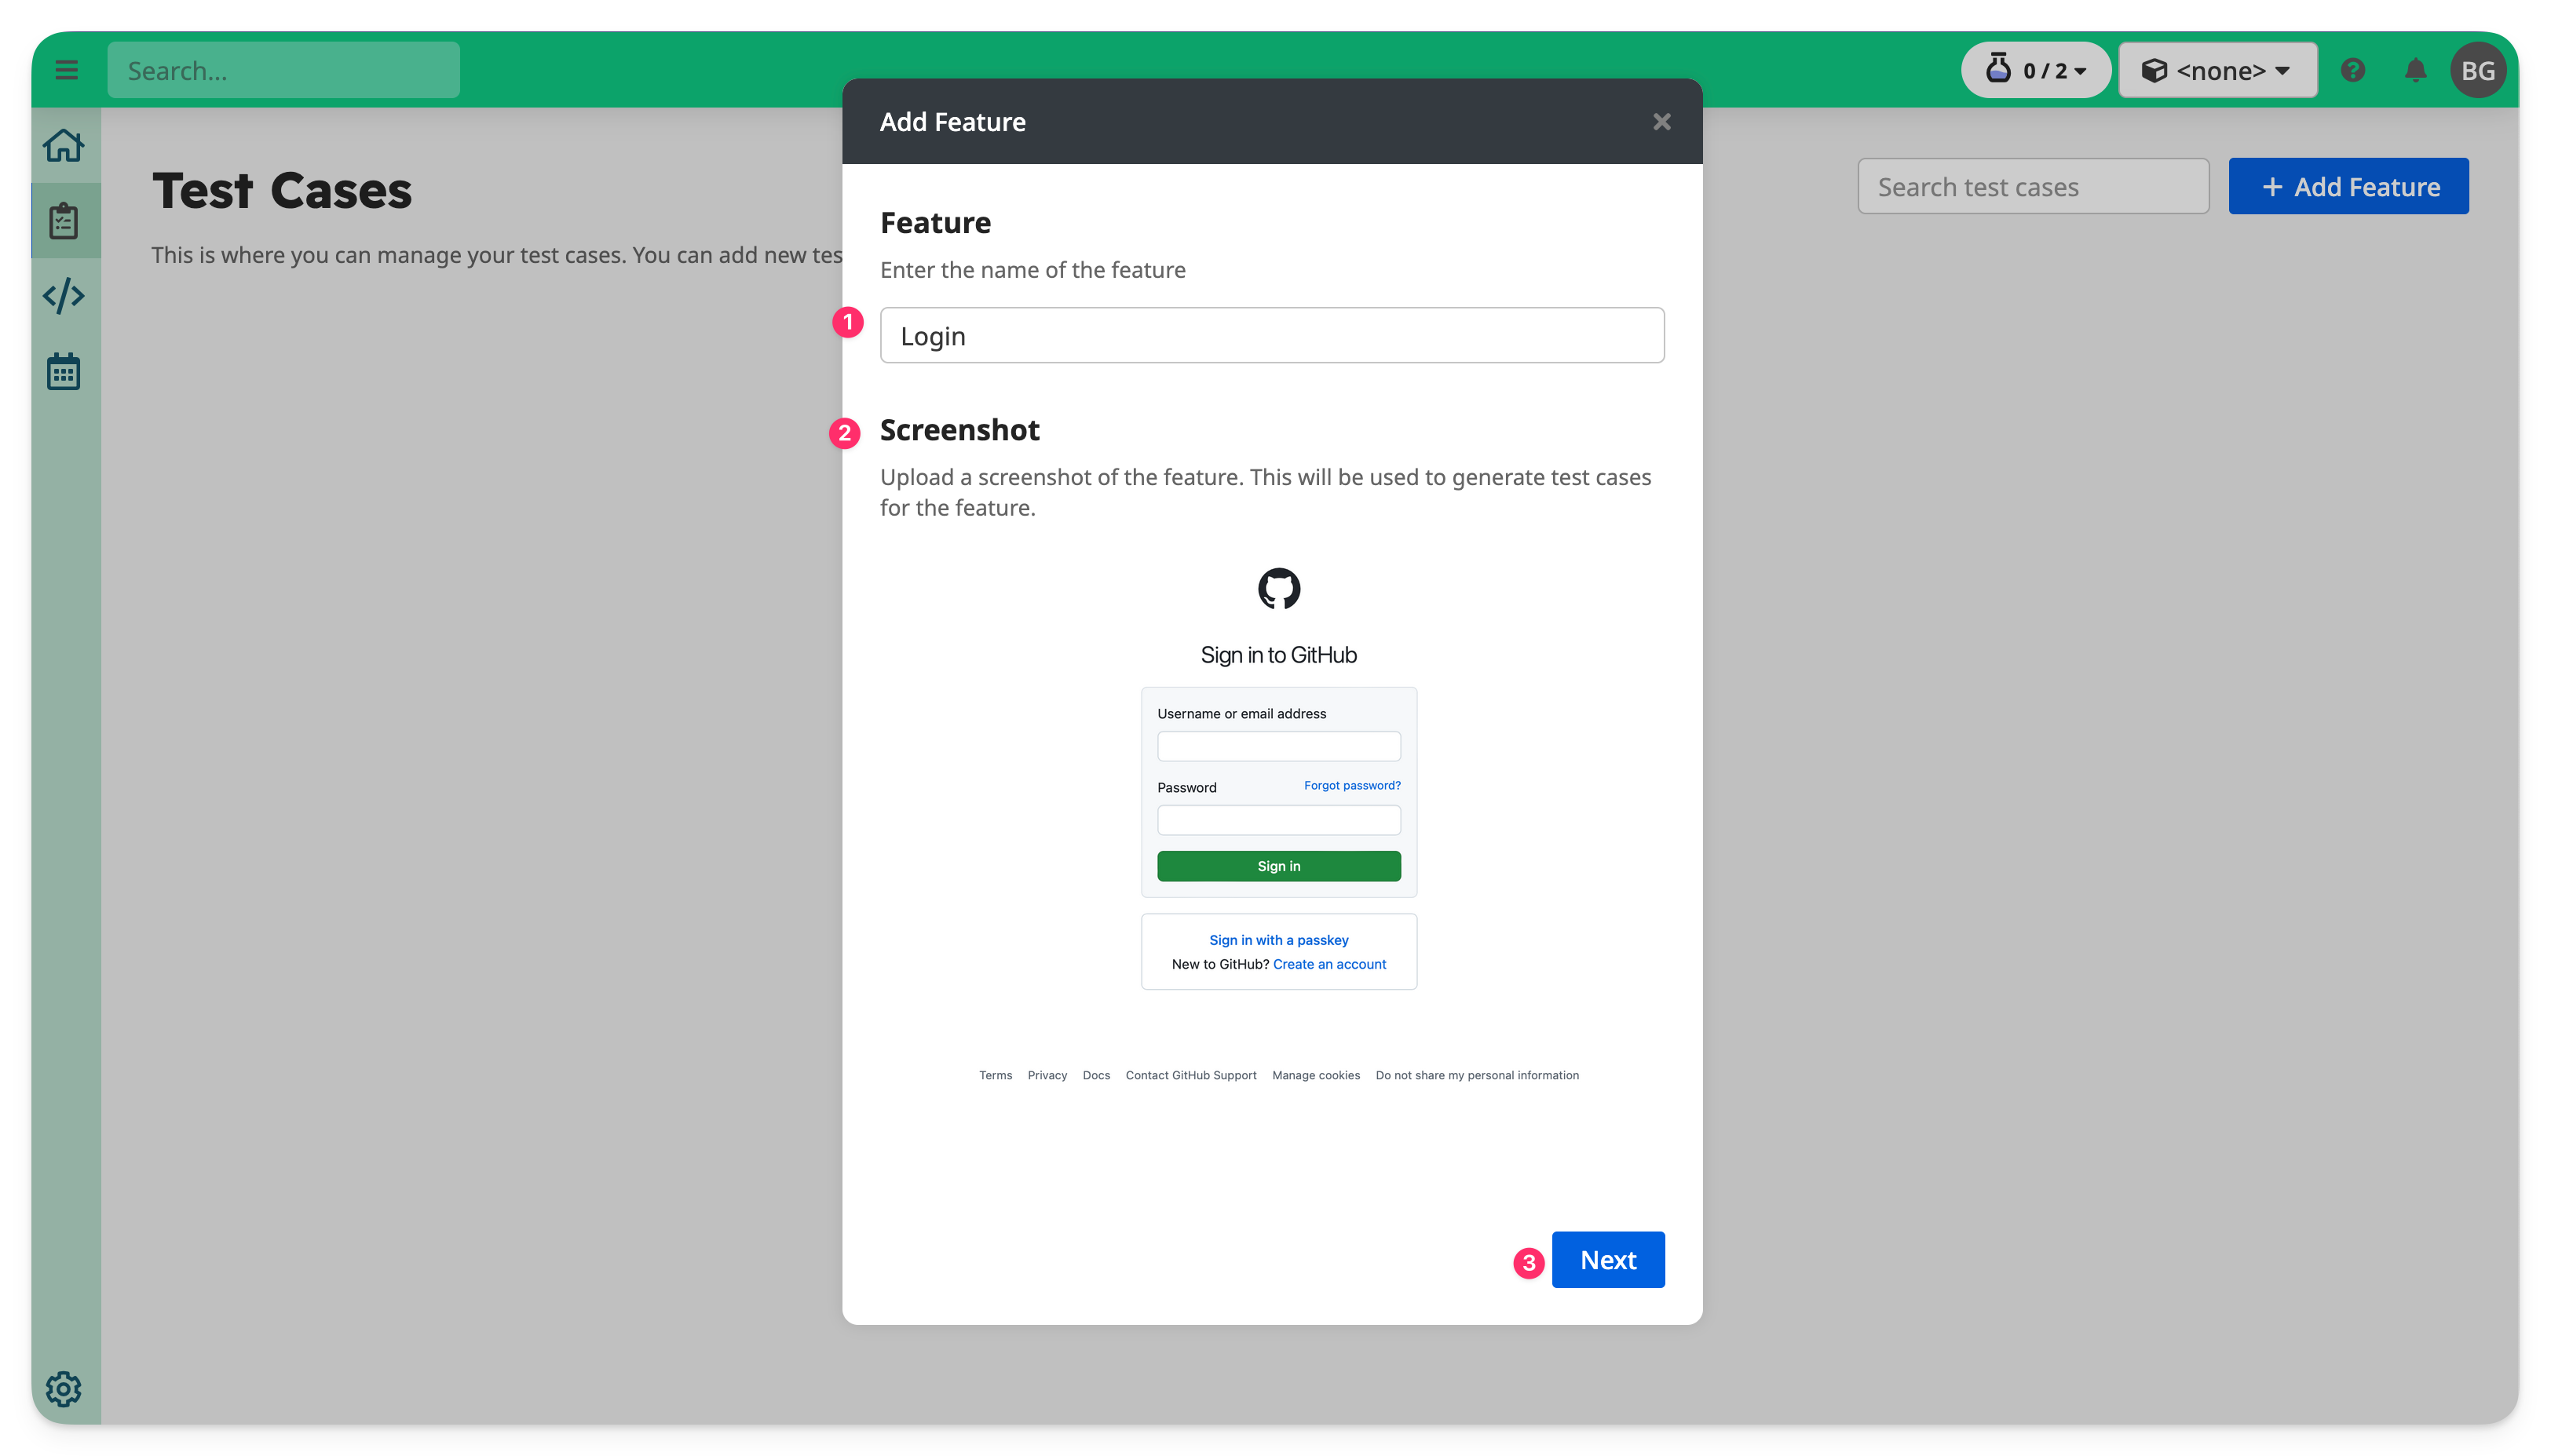
Give your feature a name, such as "Login". Optionally, you can upload a screenshot to help the AI suggest relevant test cases.
👉 Click Next to continue.
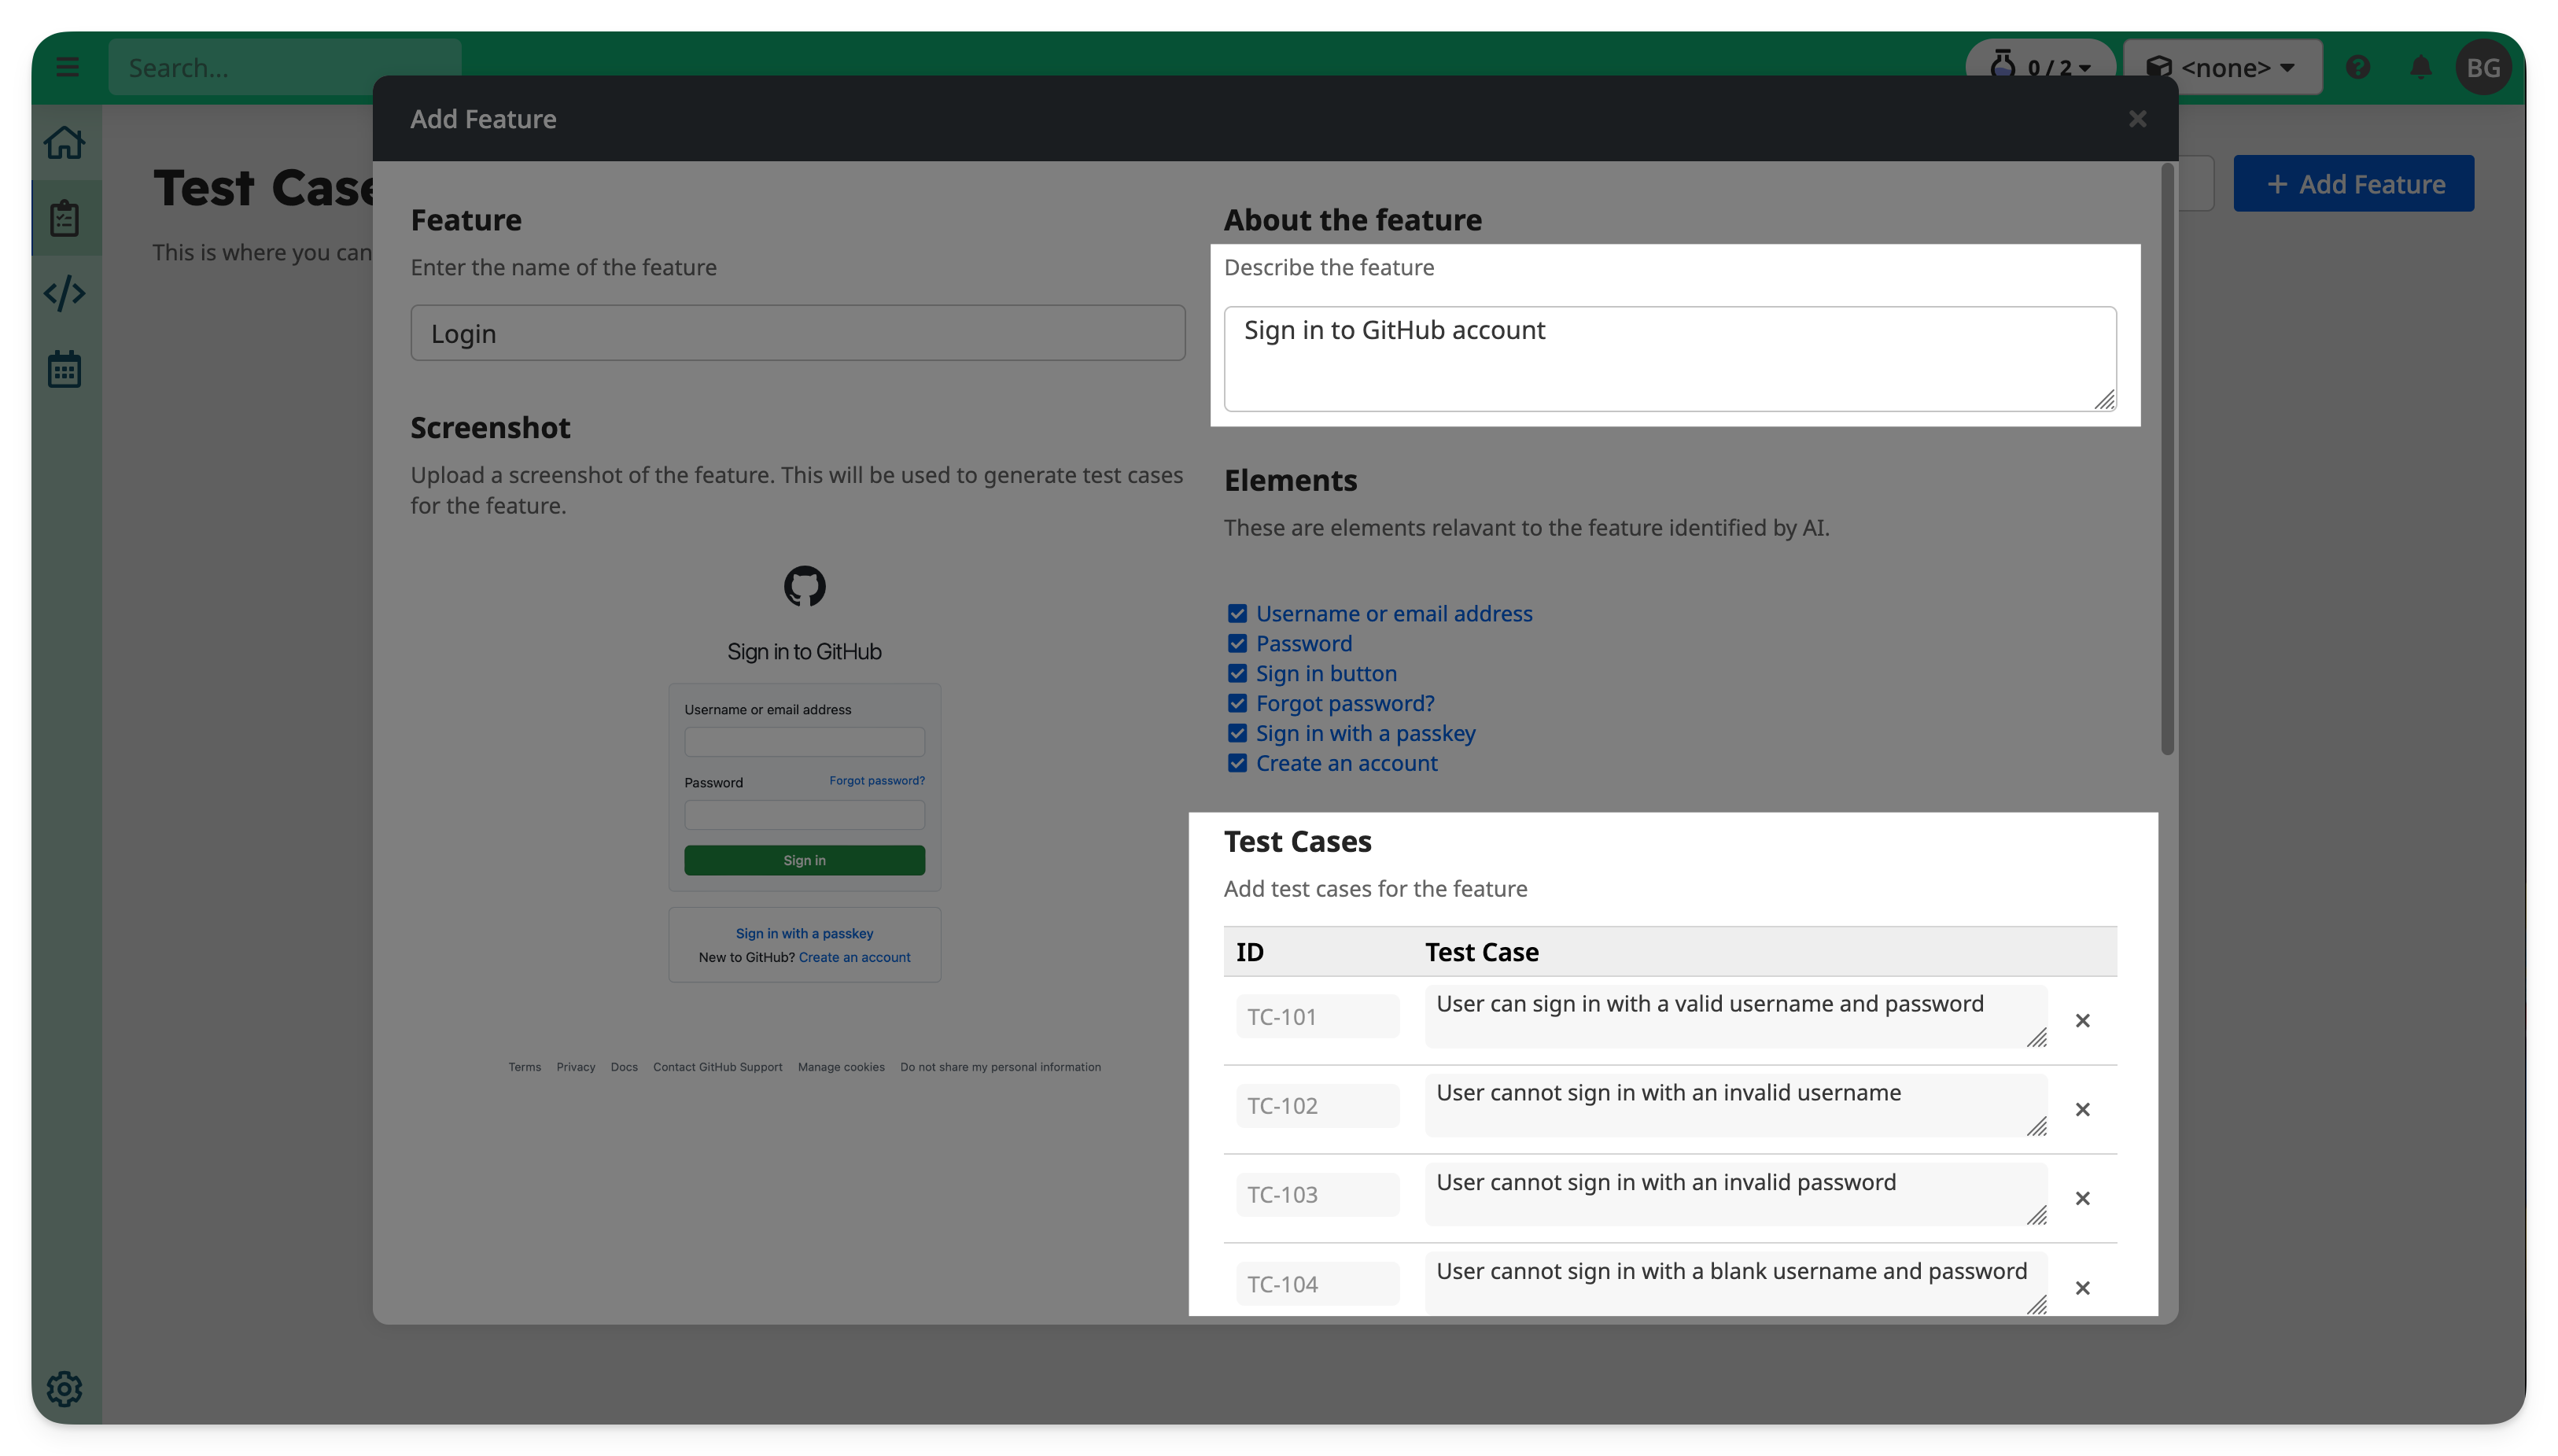
Update the description if needed, and add your first test case:
User can log in with valid username and password
If you uploaded a screenshot, suggested test cases may appear automatically.
👉 Click Create when you're ready.
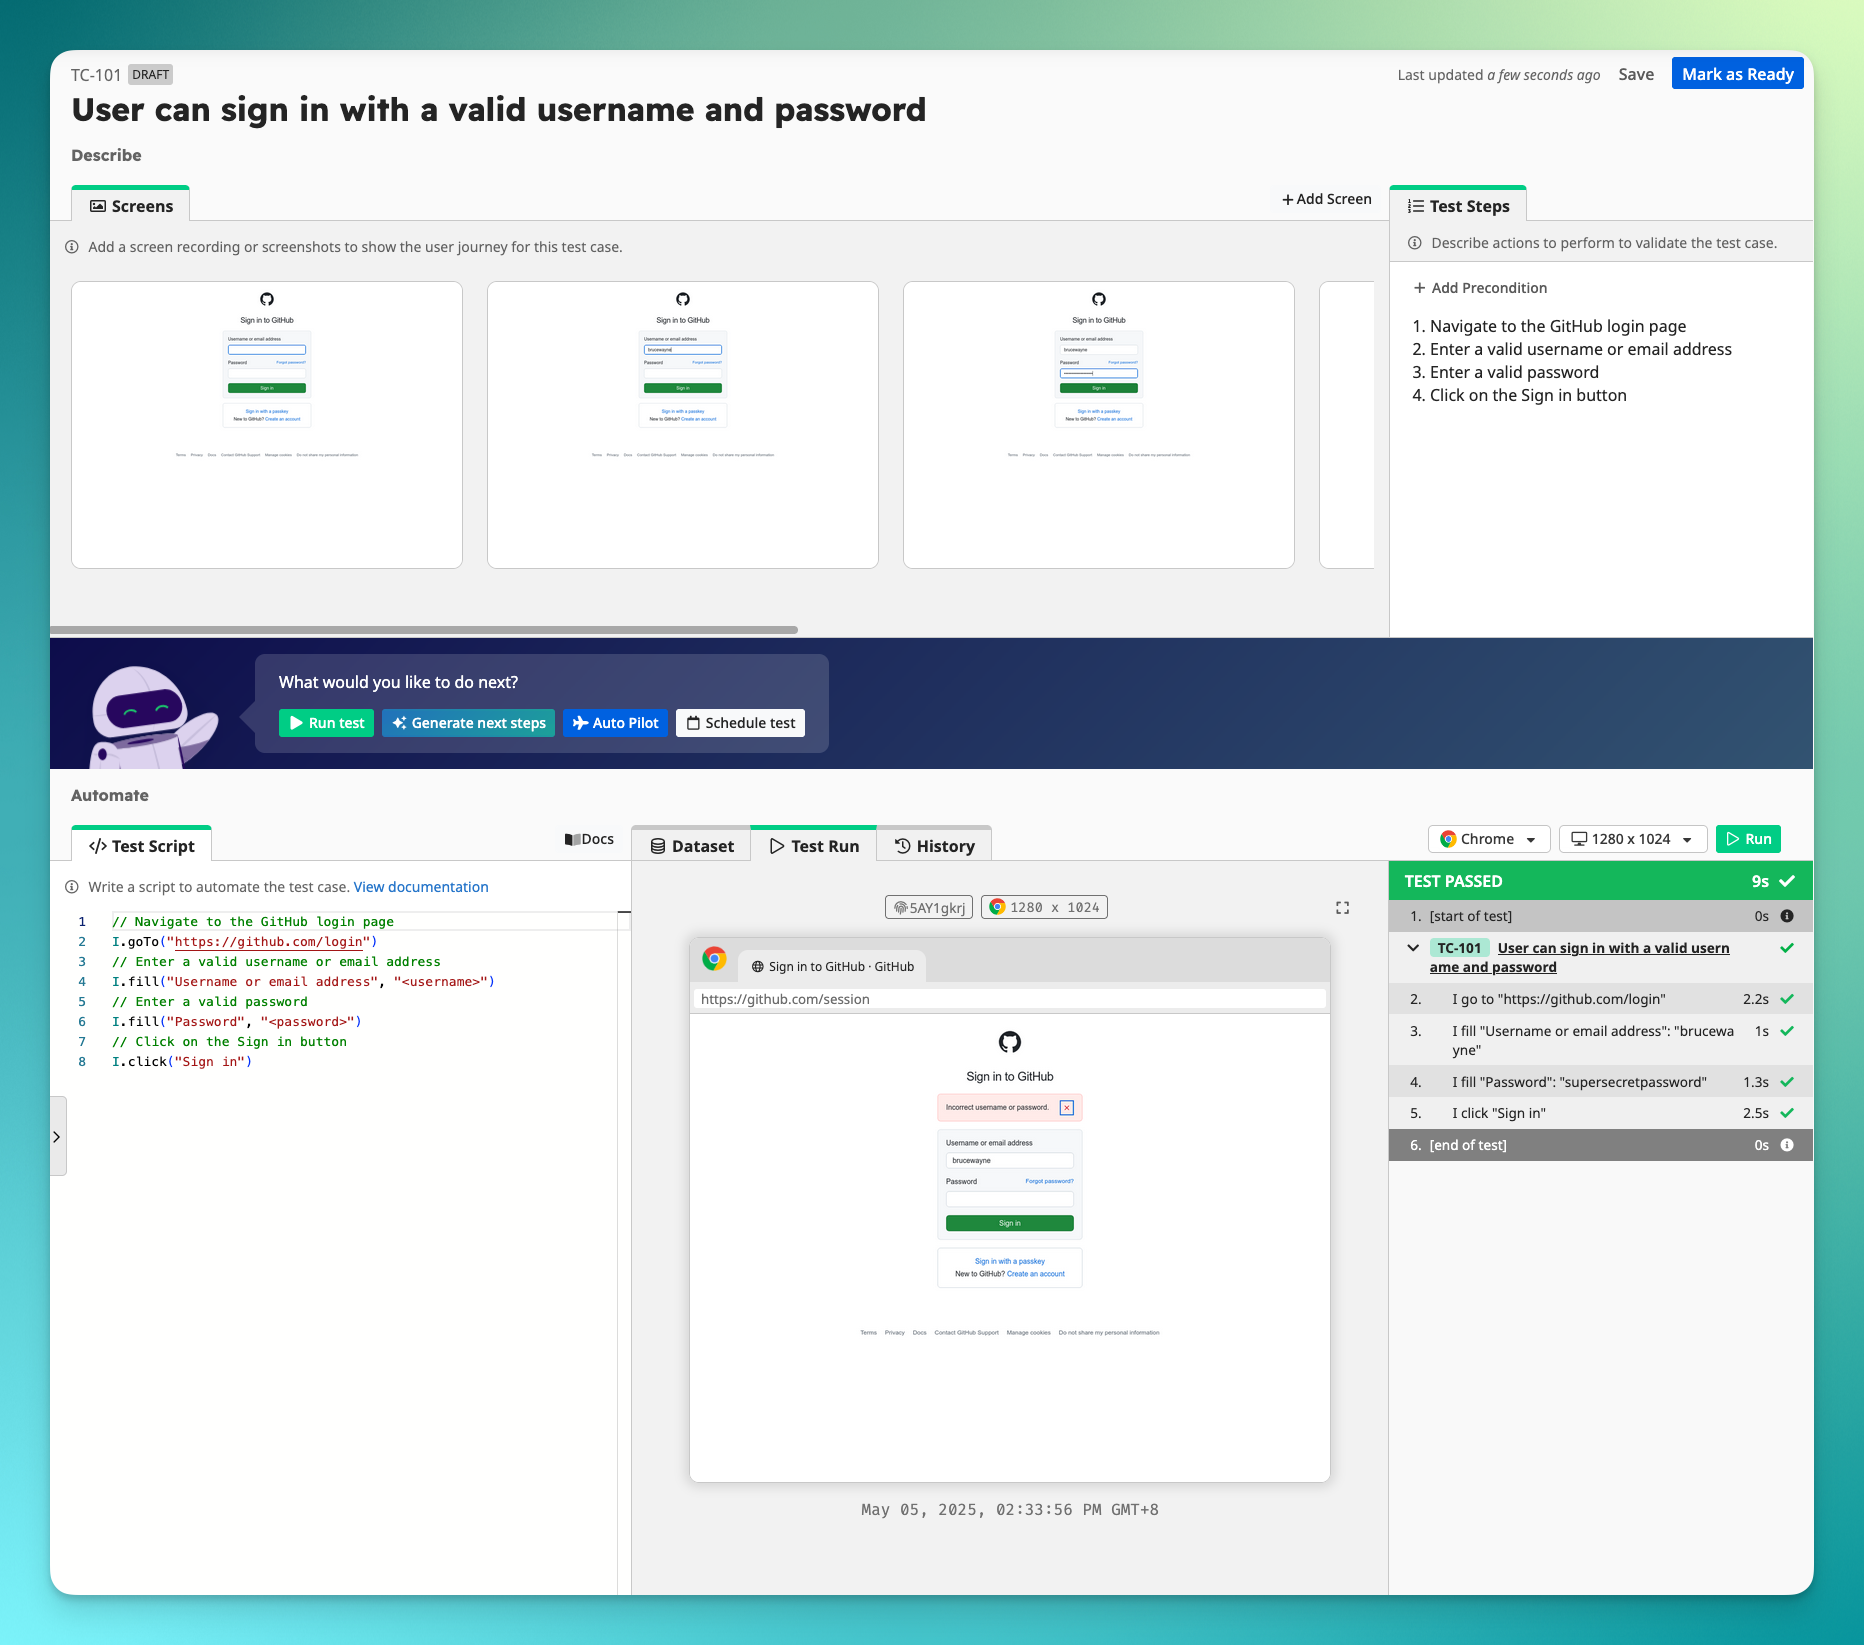
Define a Test Case
Now, let's document and automate a test case.
👉 Click on the test case “User can log in with valid username and password” to open the Test Case Editor.
The Test Case Editor has 4 main areas:
- Screens Gallery
- Test Steps
- Test Script
- Dataset / Run / History
Upload screenshots or recording to Screens Gallery
On the top-left is the Screens Gallery section.
👉 Upload screenshots or screen recordings to show relevant screens for the test case.
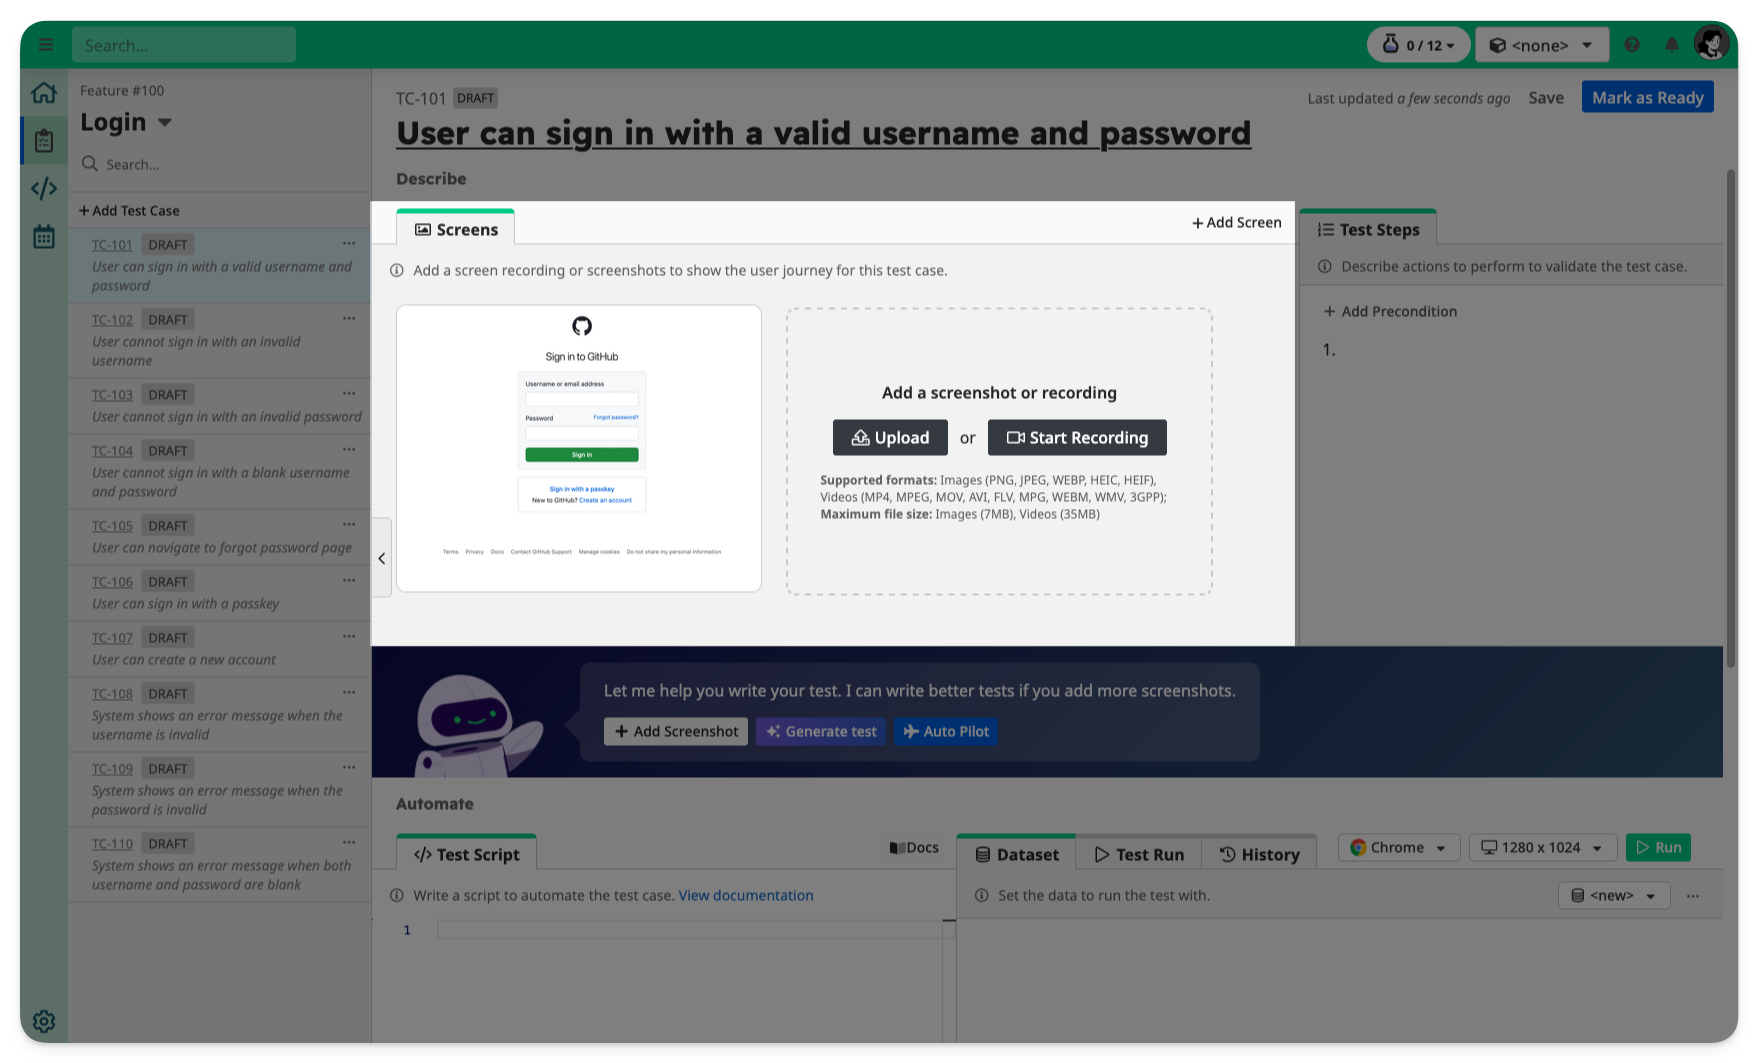
If a screenshot was added to the Test Feature, it will appear here automatically as the first screenshot.
TIP
Visual assets added to the Screens Gallery are used by TAMI to understand your UI and generate test steps and scripts.
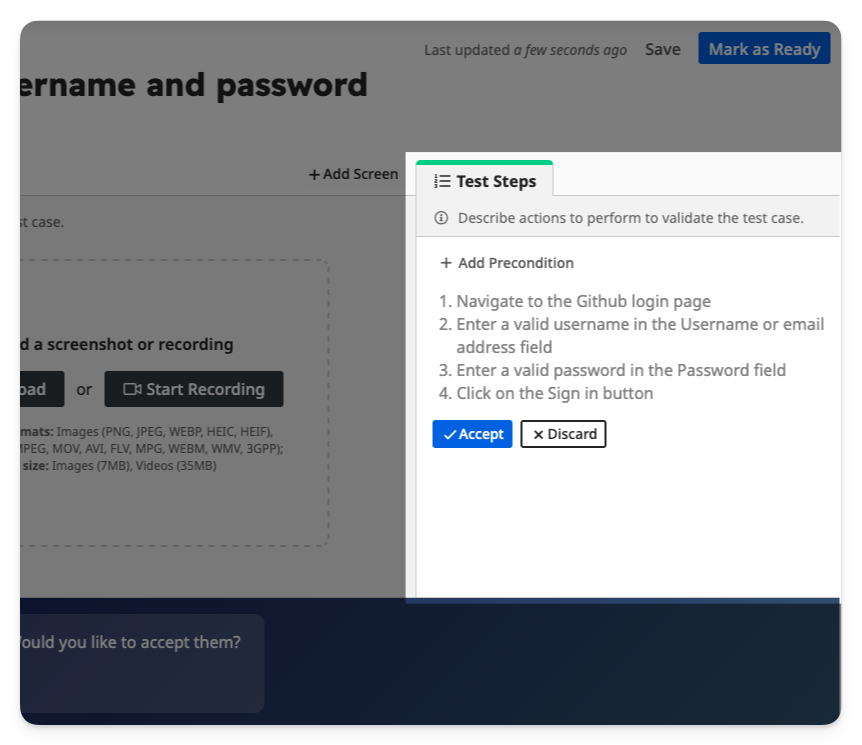
Define Test Steps
On the top-right is the Test Steps section.
Define actions to perform and validate the test case. You can write these steps manually or let TAMI generate them based on the screenshots or recordings.
👉 Click Generate test to use AI suggestions.

👉 Review the generated test steps and Accept or Discard the change.
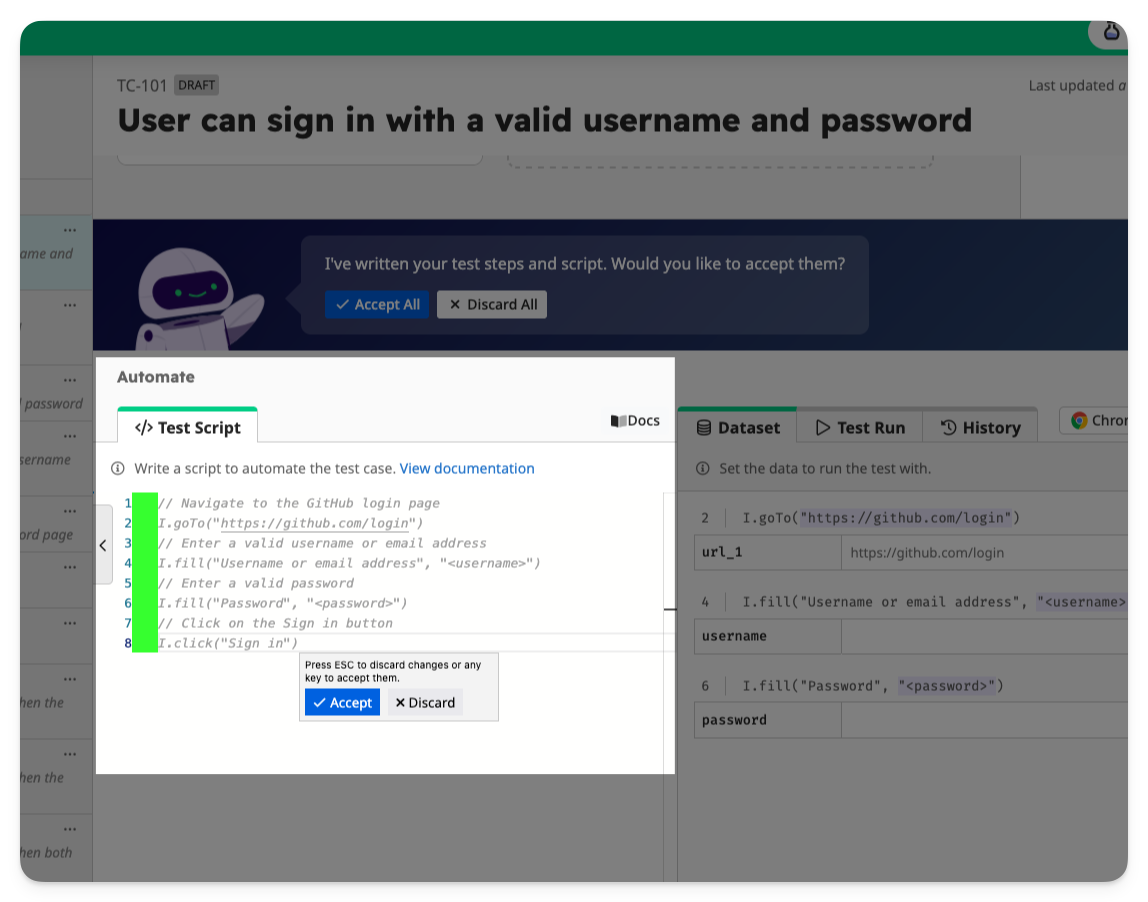
Automate a Test
Now let’s turn the test steps into a script for automated testing.
INFO
TAMI Studio uses UI-licious, a simple and expressive scripting language for browser automation. Learn more in the scripting docs.
Write Test Script
On the bottom-left is the Test Script section.
You can write the test script manually, or let TAMI generate them based on visual assets in the Screens Gallery and the procedure defined in Test Steps.
👉 Click on "Generate test" to use AI suggestions.
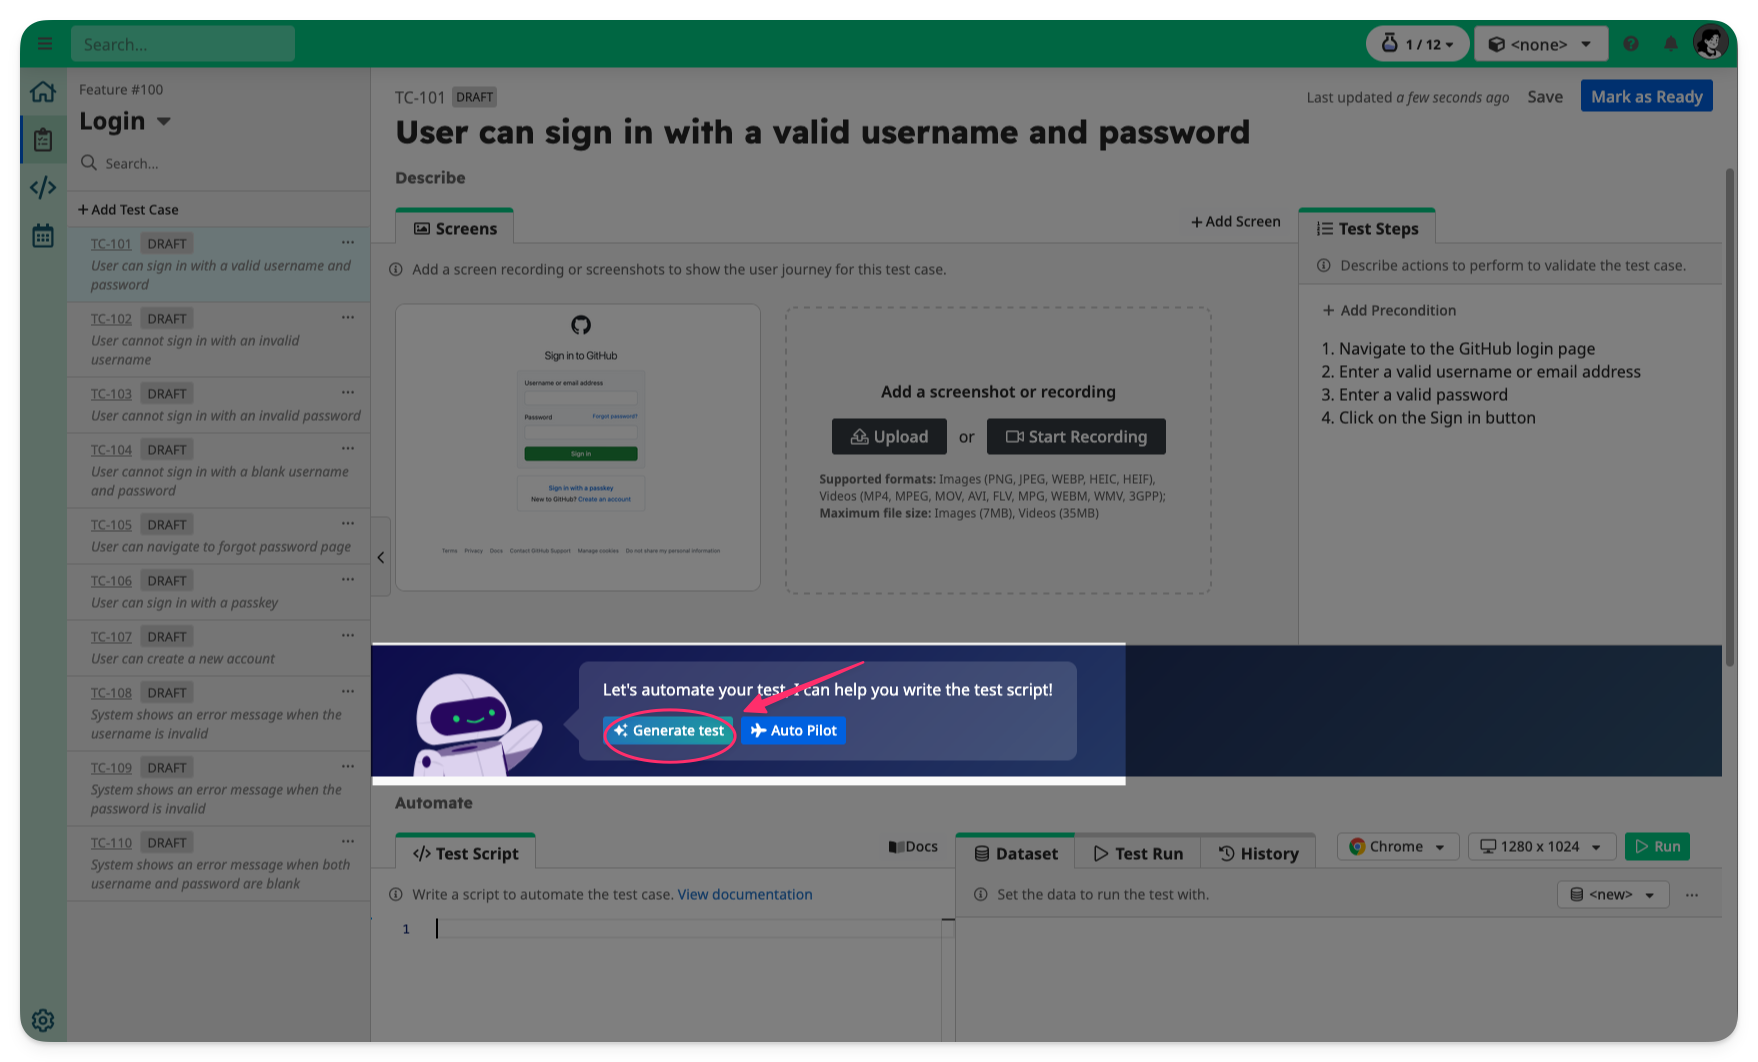
👉 Review the generated test script and Accept or Discard the change.
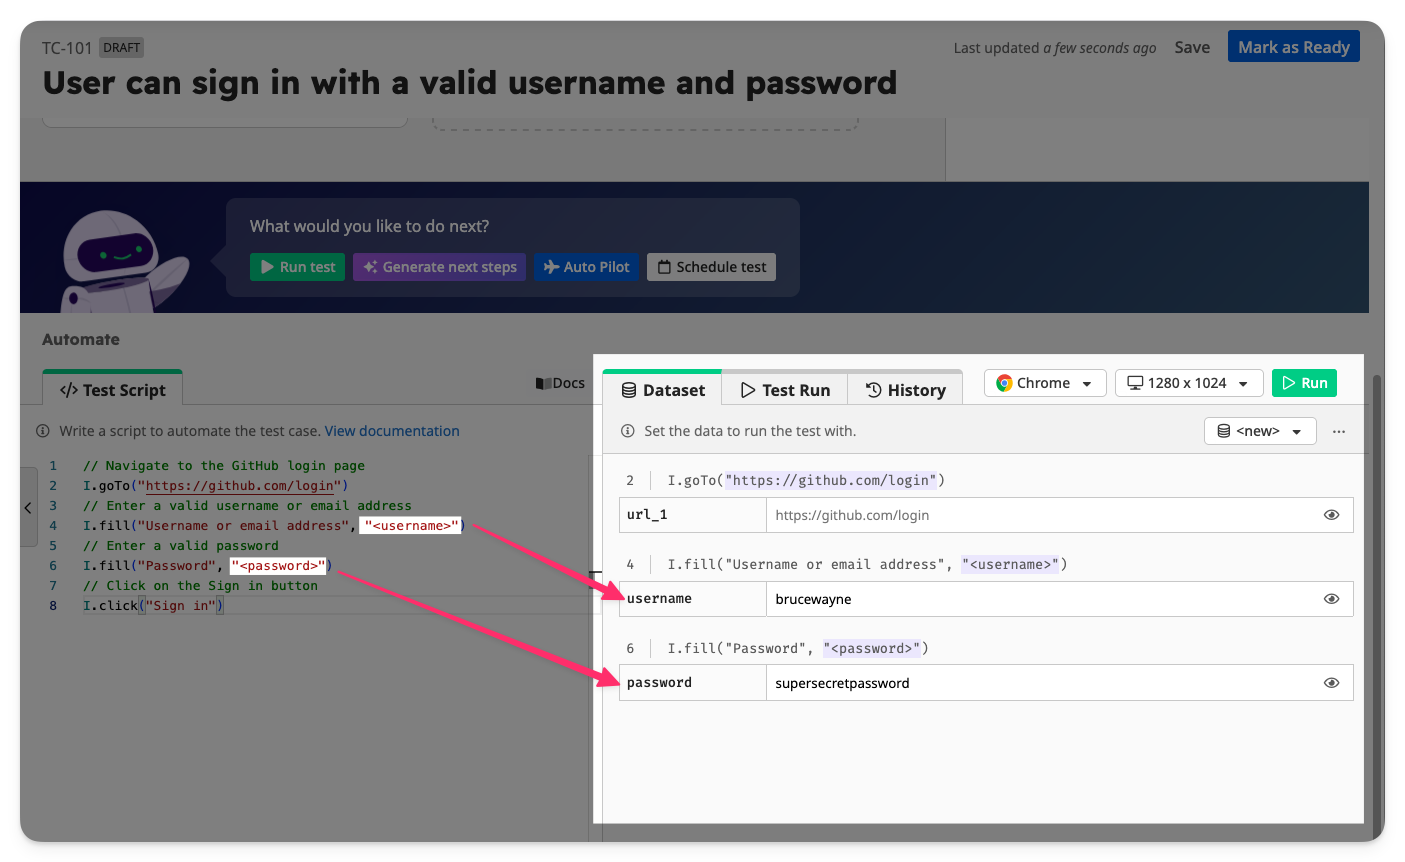
Define Test Data
On the bottom-right is the Dataset section.
You can create datasets to store values used by the test script.
TAMI Studio automatically detects placeholder strings such as <property> and DATA props such as DATA.property in the test script and creates entries in the dataset.
👉 Set the test data to use for the username and password.
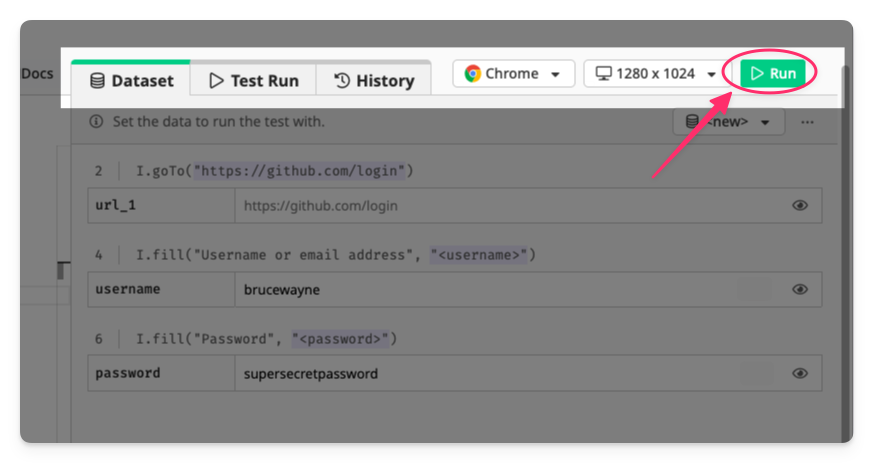
Run the automated test
Finally, let's run the automated test.
👉 Click the Run button in the toolbar.
This will run the test script with the selected browser and resolution on the Cloud Testing Grid.
TAMI Studio will automatically switch to the Test Run tab to show you the outcome of the test as it runs.
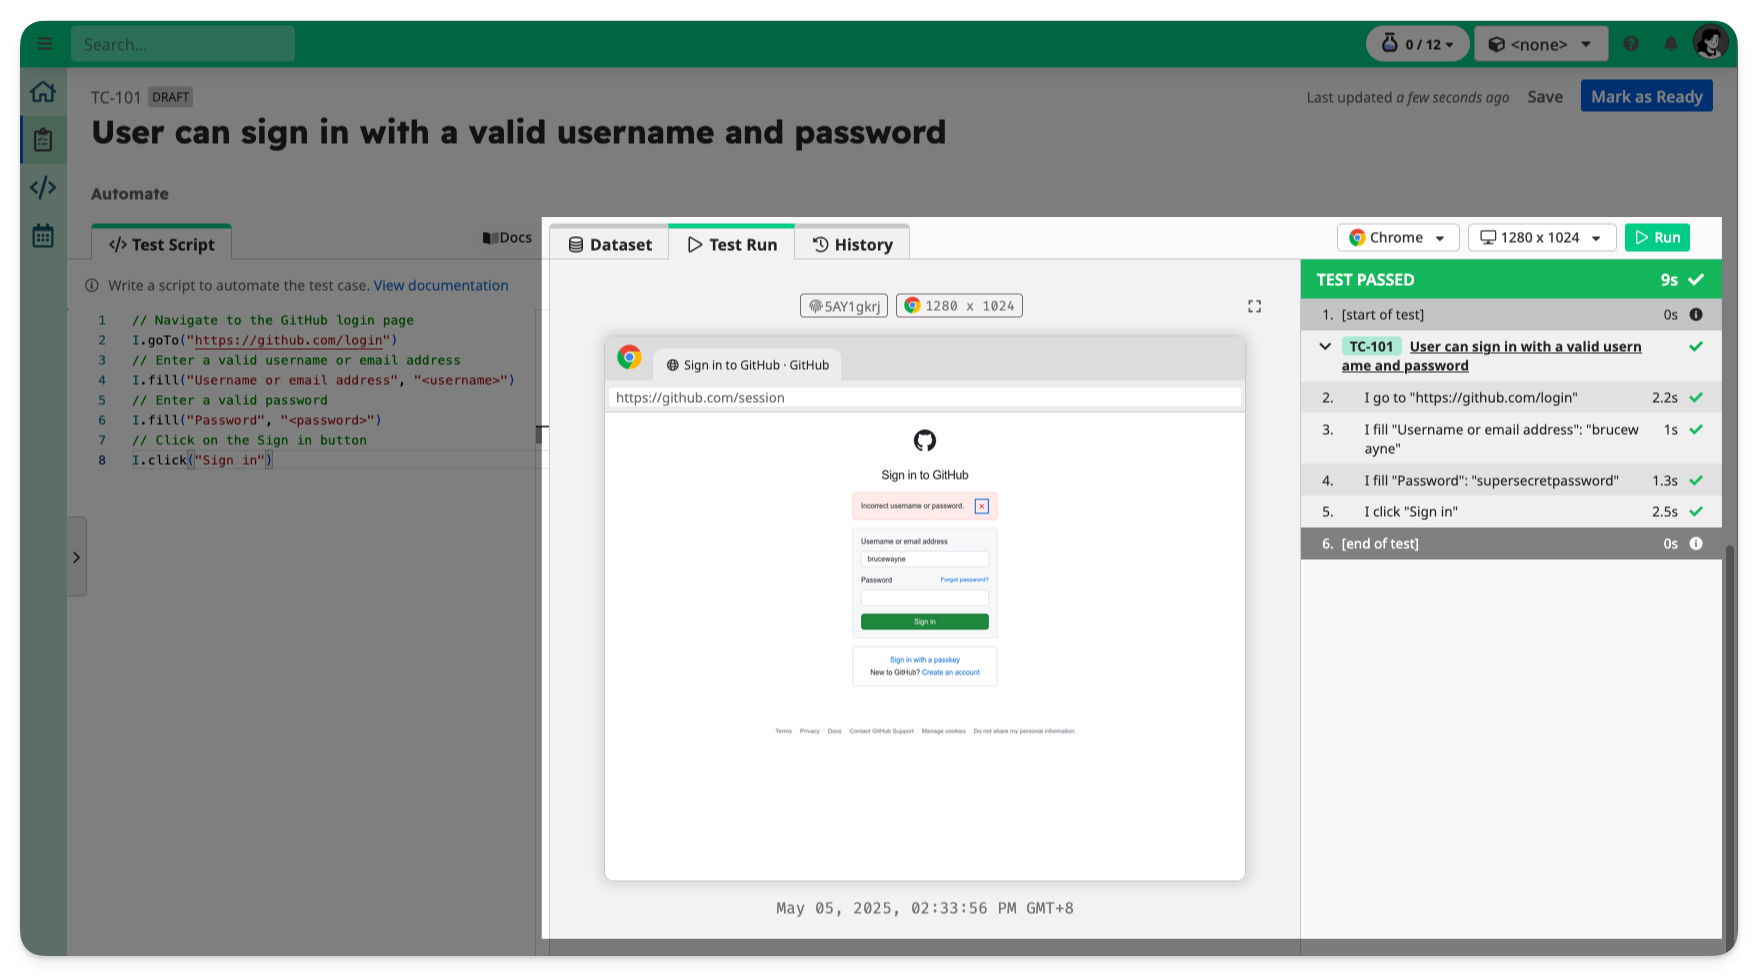
Screenshots are automatically captured for each test step. You may select a test step in the report to view more information and the screenshot.
🎉 Congratulations, you have created and automated your first test!
👉 Click Ready to change the test case from draft to ready to finish.