Appearance
How to Create a Test Case
This guide walks you through creating a test case in TAMI Studio.
📍 Prerequisites
Before you begin, make sure you've created at least one Test Feature.
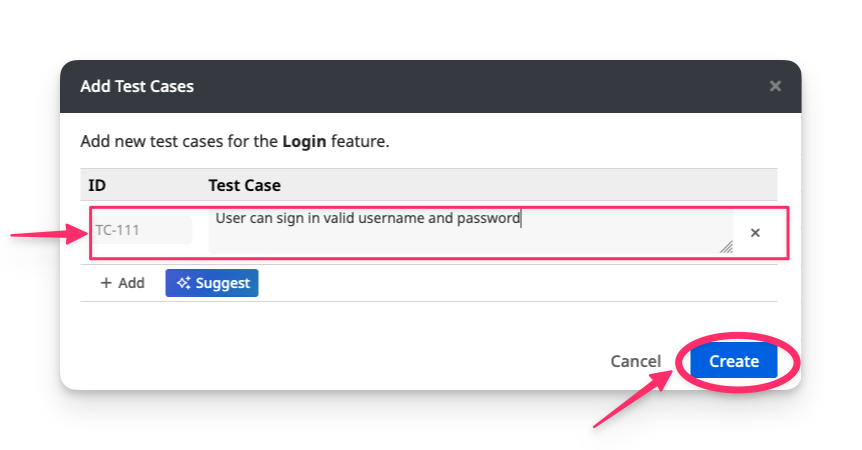
1. Add a Test Case to a Feature
From the left-hand sidebar, click on Test Cases, to view the list of Features and Test Cases.
Find the Feature you want to add a Test Case to.
Click + Add Test Case to add a new test case.
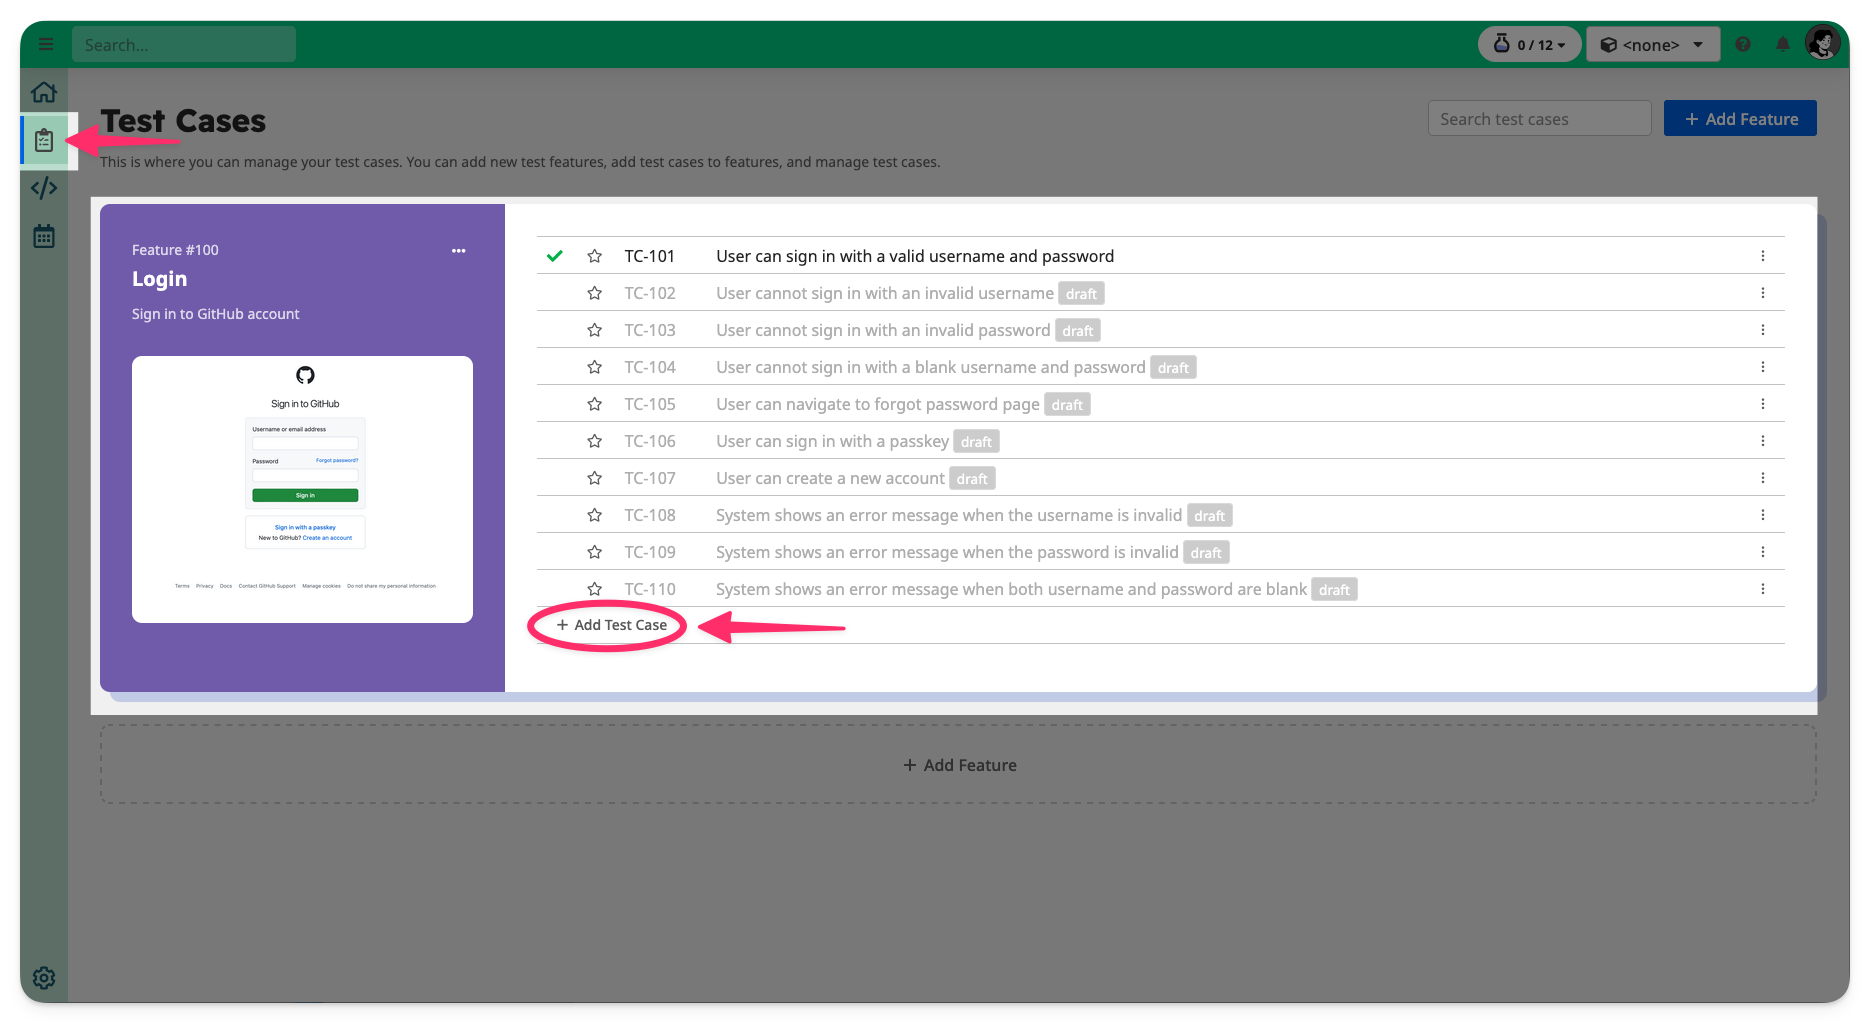
Give your test case a short, descriptive title, for example:
User can log in with valid username and password
Click Create.
2. Open the Test Case Editor
Click on the test case you just created to open the Test Case Editor.
The Test Case Editor has four main sections:
- Screens Gallery
- Test Steps
- Test Script
- Dataset / Run / History
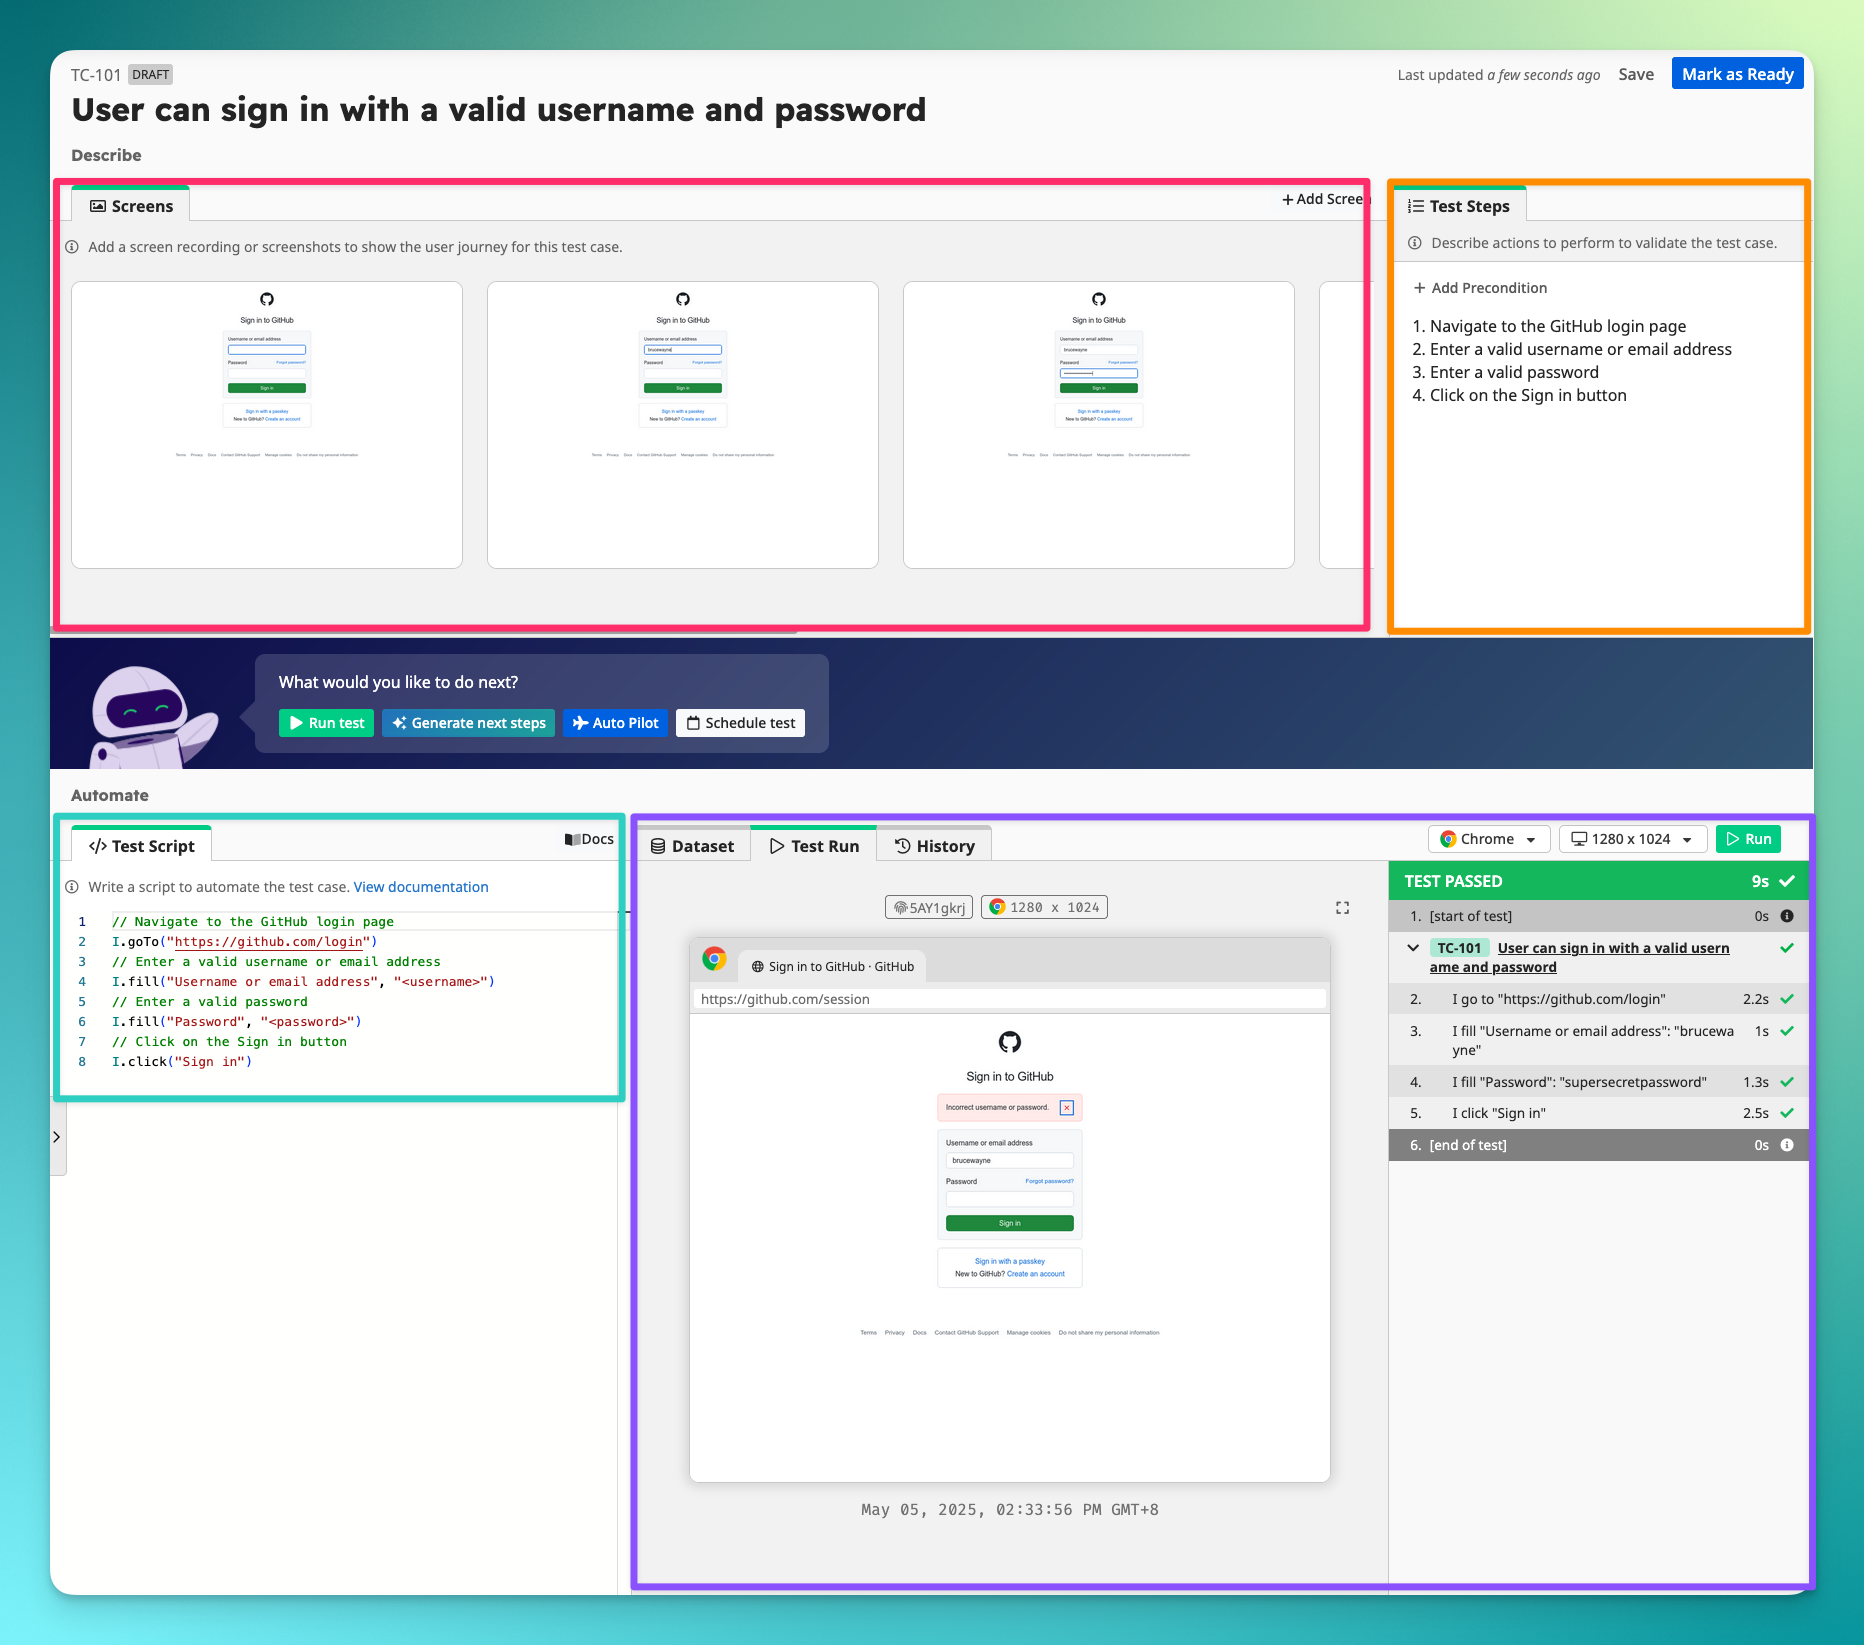
3. Add Screenshots or Recordings
In the Screens Gallery, upload screenshots or recordings that illustrate the scenario.
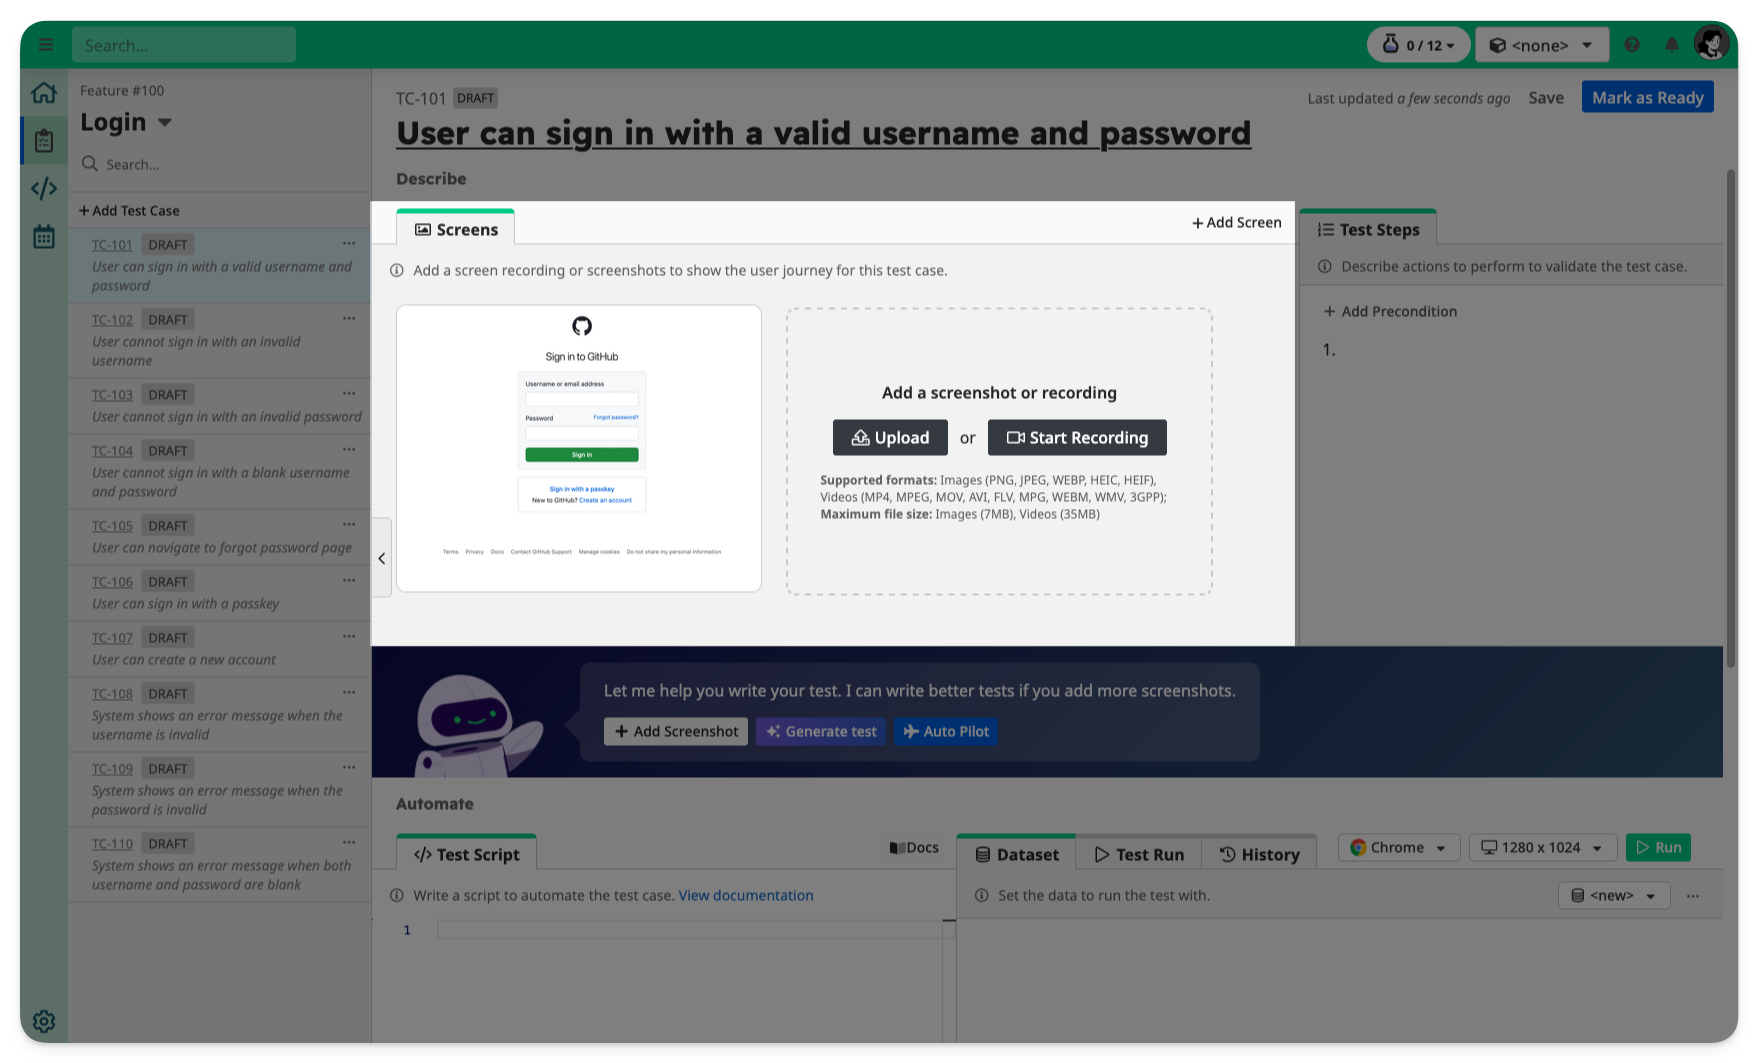
These help TAMI generate test steps and scripts in the subsequent steps.
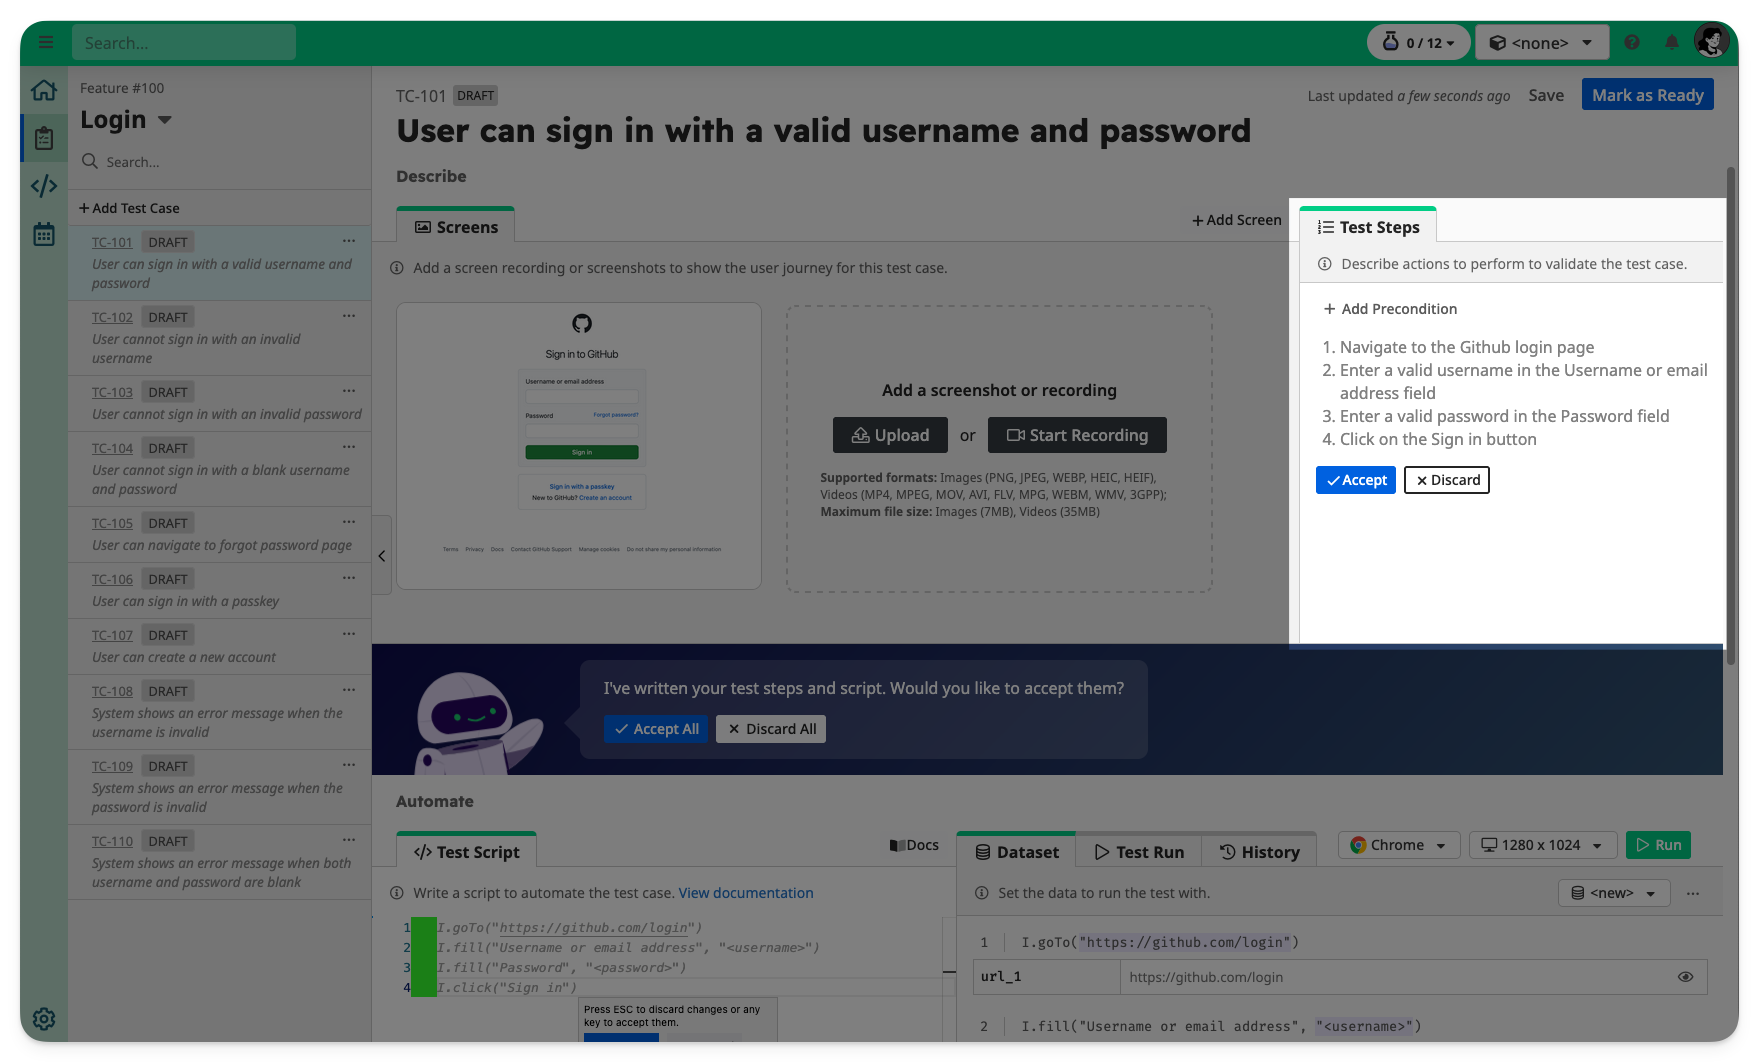
4. Define Test Steps
Use the Test Steps section to outline user actions and expected behavior.
Example:
1. Navigate to the GitHub login page
2. Enter a valid username or email address
3. Enter a valid password
4. Click on the Sign in button
You can click Generate Test to let TAMI suggest steps based on the screenshots and recordings in the Screens Gallery.

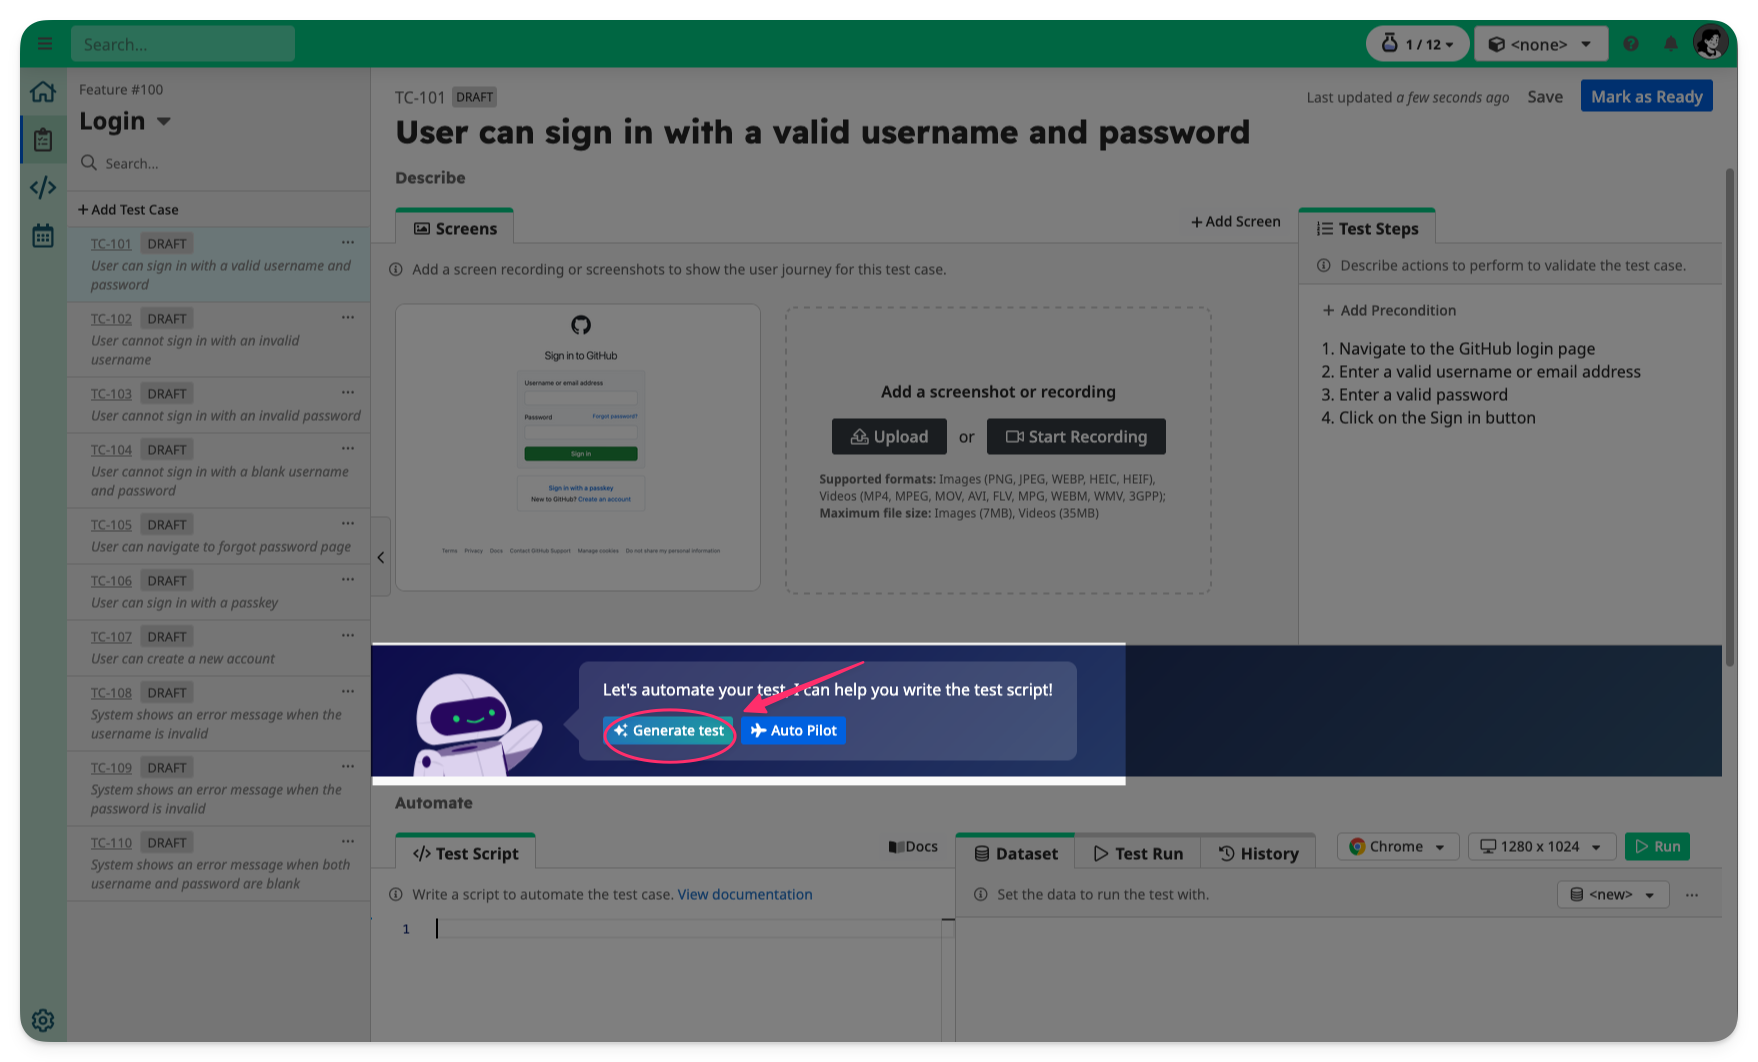
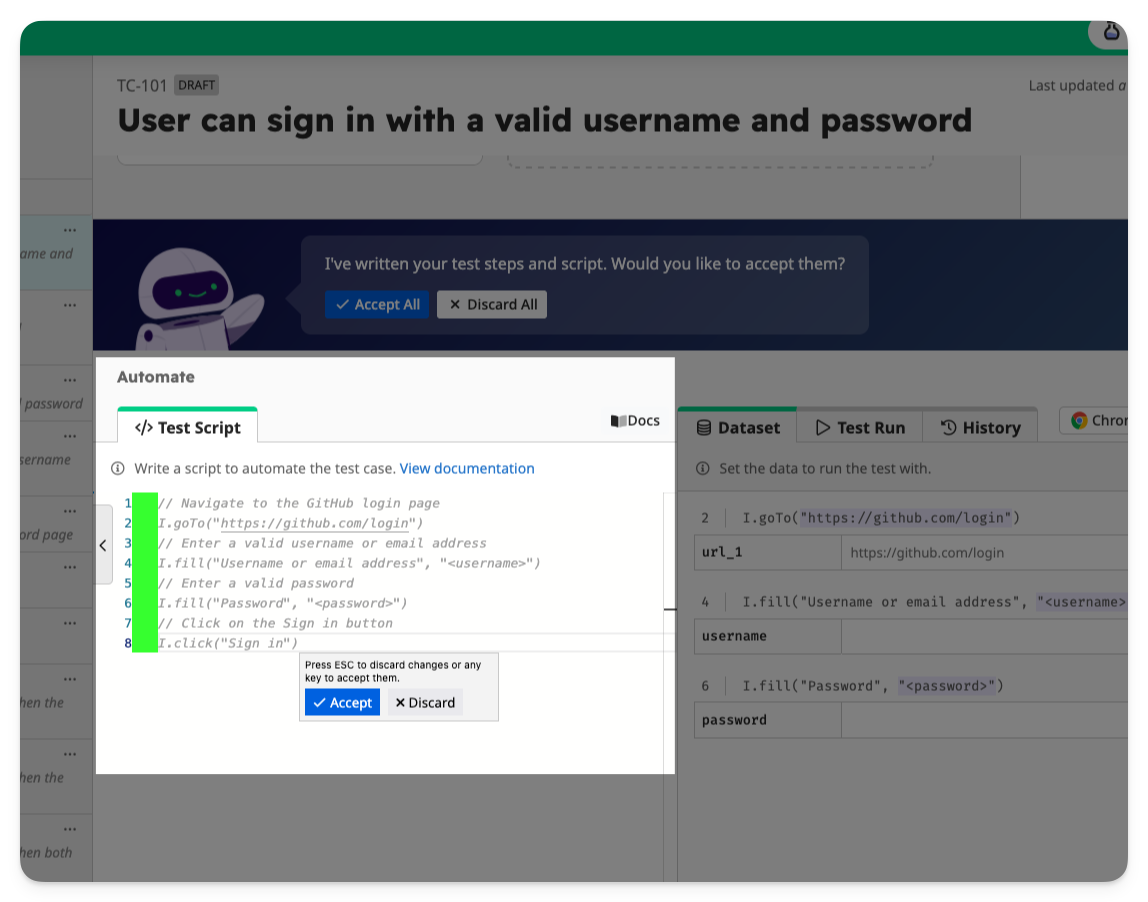
5. Write the Test Script
INFO
TAMI Studio uses UI-licious, a simple and expressive scripting language for browser automation. Learn more in the scripting docs.
Automate testing by creating a test script in the Test Script section.
Example:
javascript
// Navigate to the GitHub login page
I.goTo("https://github.com/login")
// Enter a valid username or email address
I.fill("Username or email address", "<username>")
// Enter a valid password
I.fill("Password", "<password>")
// Click on the Sign in button
I.click("Sign in")
You can write the test script on your own, or let TAMI help you write the script based on visual assets in the Screens Gallery and Test Steps.
Click Generate Test for AI assistance.
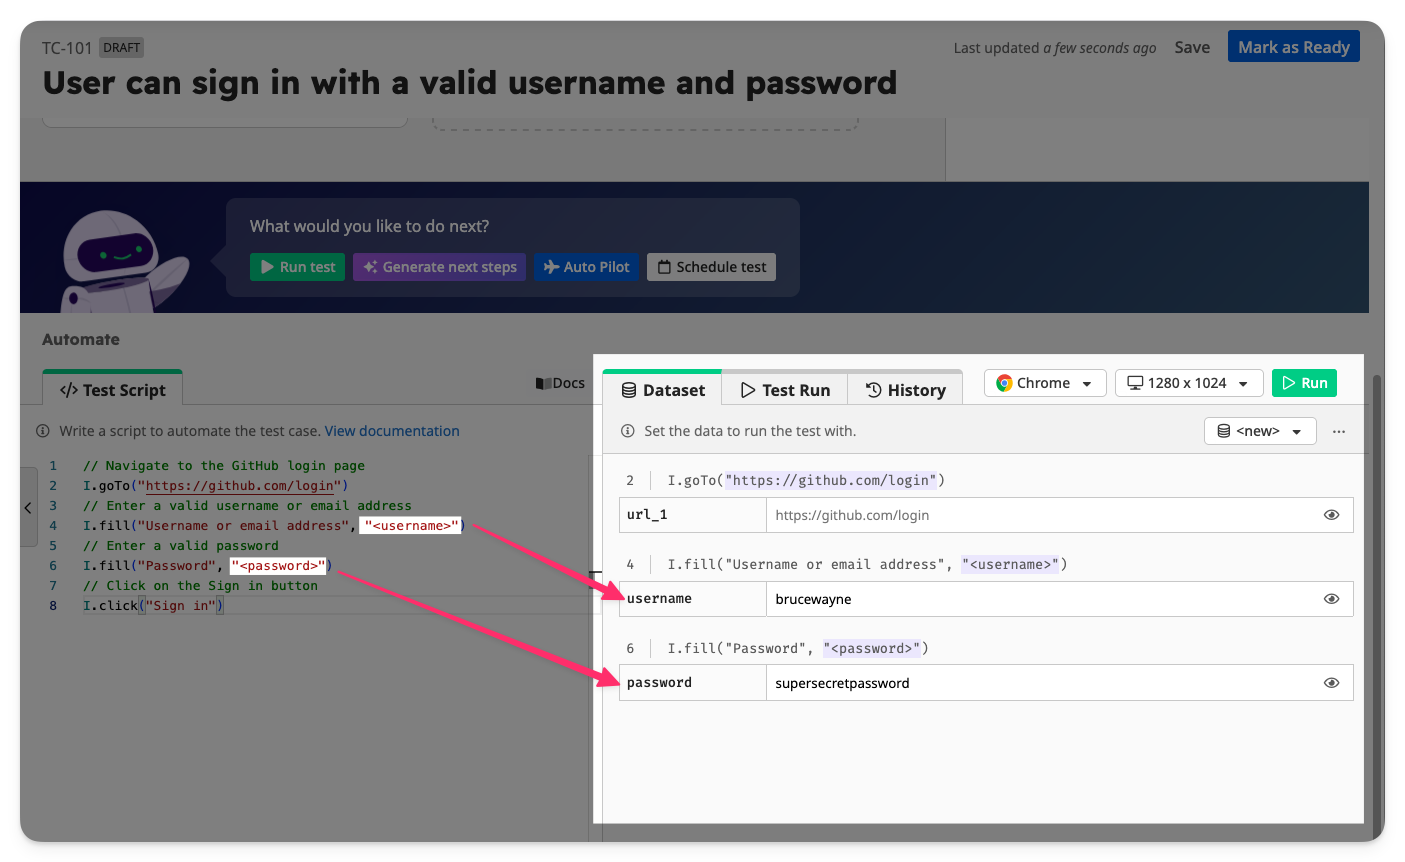
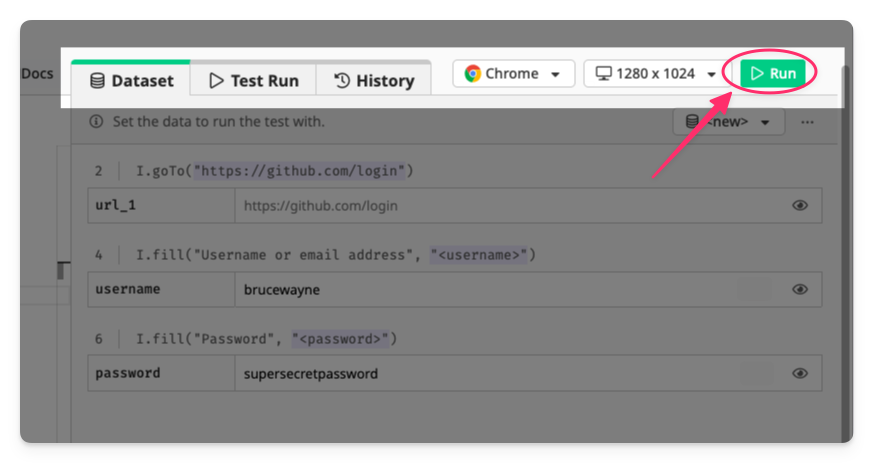
6. Define Test Data
Provide test data used by your test script in the Datasets section.
Placeholder strings (e.g. <property) and DATA properties (e.g. DATA.property) in the test script are automatically detected and added as entries in the dataset.
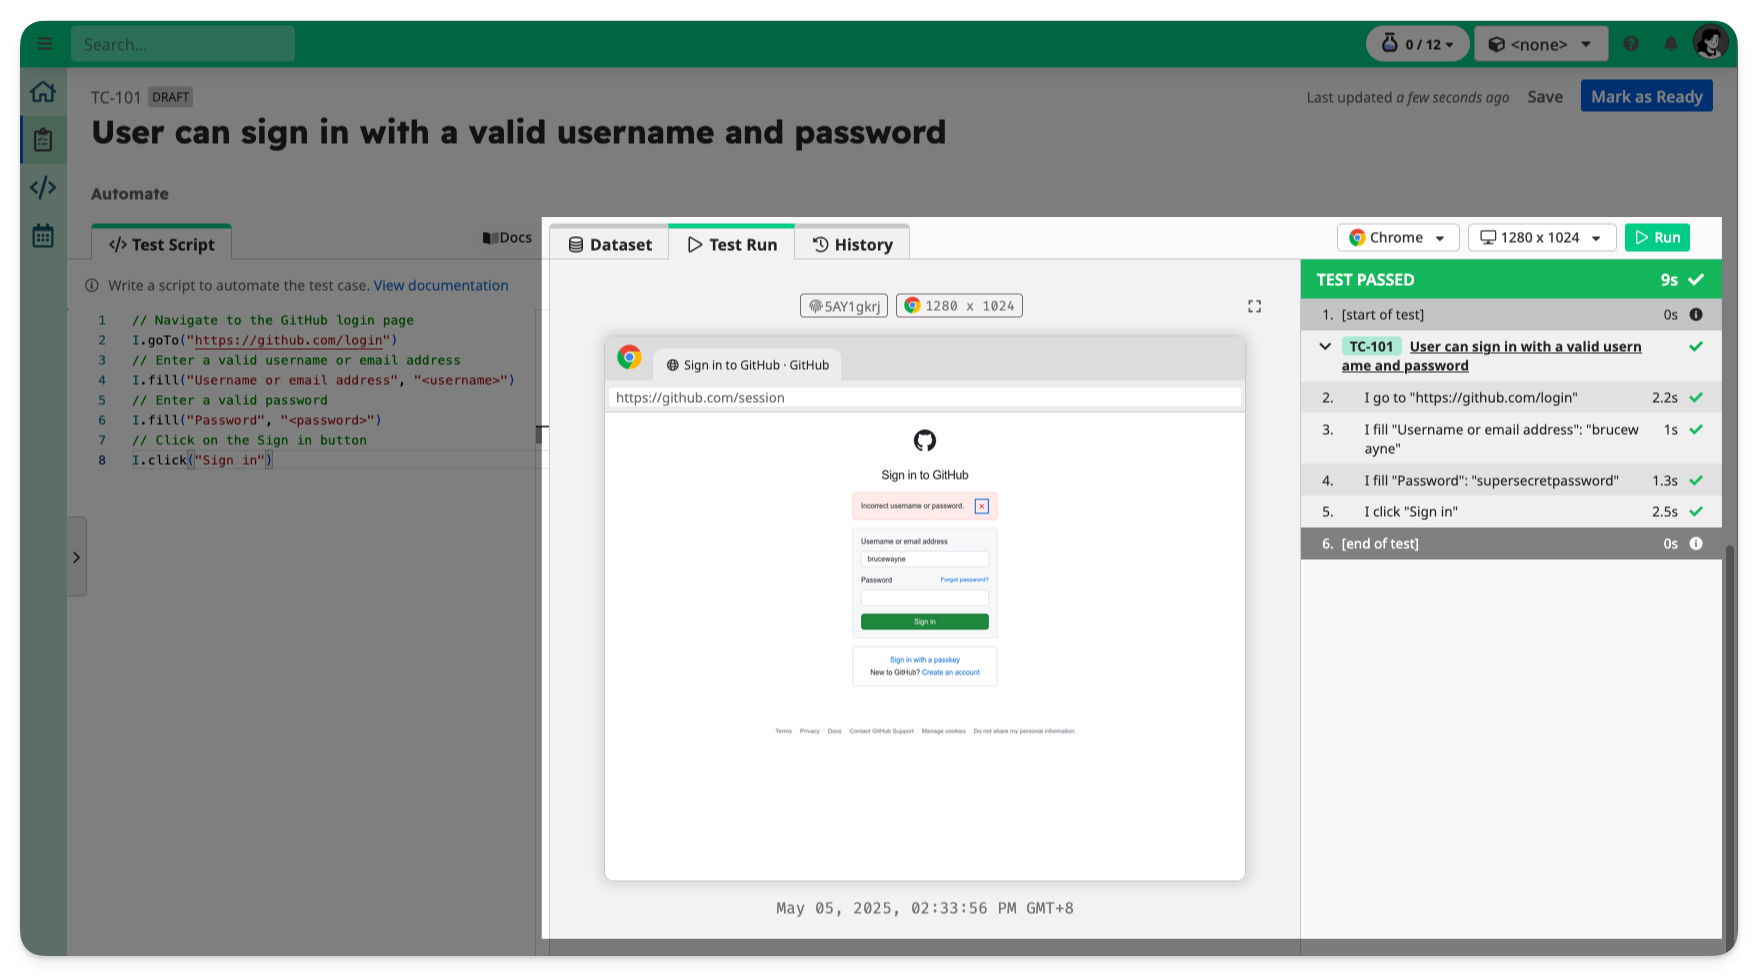
7. Run the Test
Click the Run button in the toolbar.
This executes your test on TAMI’s Cloud Testing Grid.
You’ll see a detailed result view, with step-by-step screenshots and logs.
8. Mark as Ready
If your test case looks good and passes, click Ready to finalize it.
🎉 You’ve created and automated a test case!