Appearance
How to set up Telegram notifications for Jobs
You can configure UI-licious to send test run notifications directly to a Telegram group using a bot.
Follow these steps to set it up:
Step 1. Create your Telegram Bot
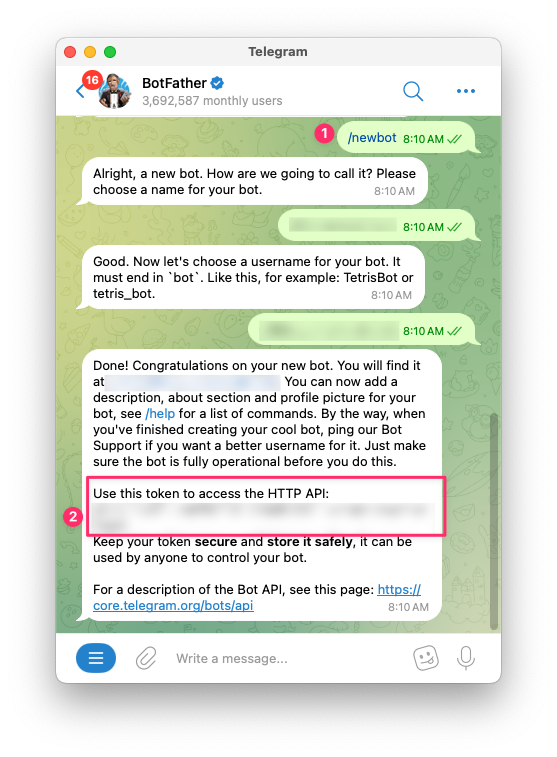
👉 Open Telegram and search for @BotFather.
👉 Start a chat and use the command /newbot to create a new bot.
👉 Follow the instructions to name your bot and give it a unique username.
👉 Once created, BotFather will provide a token - note down this bot_token, you’ll need it for the next steps.
Step 2: Create a Group and Add the Bot
👉 In Telegram, create a new group.
👉 Add the bot you just created to the group.
👉 Send any message in the group. This is necessary so Telegram registers recent activity for your bot, so that we may retrieve the Chat ID of the group.
Step 3: Get the Group Chat ID
👉 Use the following curl command, replace <bot_token> with your actual token:
bash
curl "https://api.telegram.org/bot<bot_token>/getUpdates"👉 Look for a chat object in the response. The id field inside is your group’s Chat ID.
Step 4: Send a test message as the bot
👉 Use this command to verify that bot can send text messages to the group.
Replace <bot_token> and <chat_id> with the actual values.
bash
curl -X POST "https://api.telegram.org/bot<bot_token>/sendMessage" \
  -H "Content-Type: application/json" \
-d '{"chat_id": "<chat_id>", "text": "Hello!"}'- You should see the message appear in your Telegram group. If not, double-check that the bot was added correctly and that the chat_id is accurate.
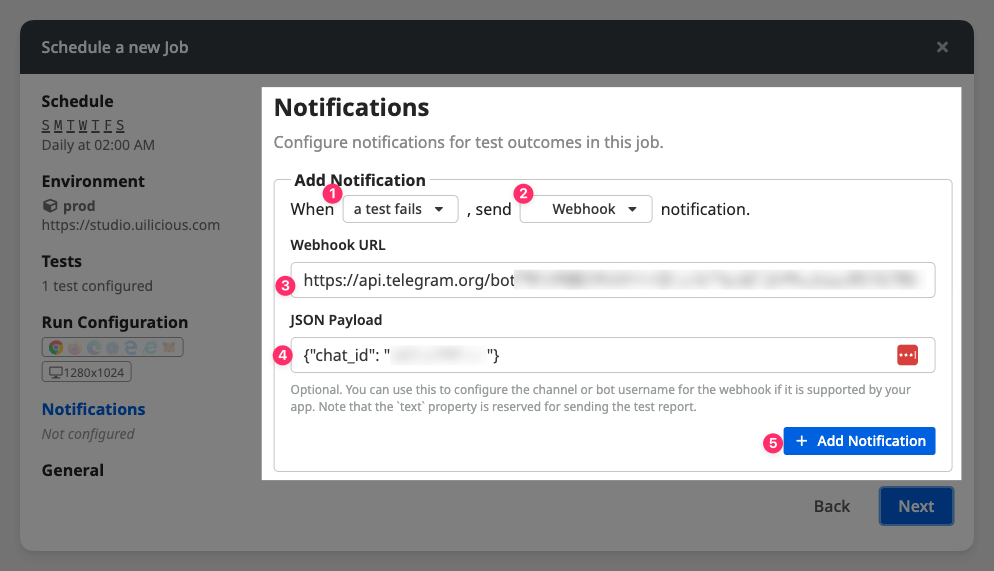
Step 5: Configure Webhook Notification in TAMI Studio
👉 In TAMI Studio, go to the Jobs tab, and edit or create a new job.
👉 Under notifications, create a new notification and select Webhook as the notification type.
👉 Enter https://api.telegram.org/bot<bot_token>/sendMessage as the Webhook URL.
👉 Enter '{"chat_id": "<chat_id>"}' as the JSON payload. Note that the text property is reserved for the contents of the test run report.
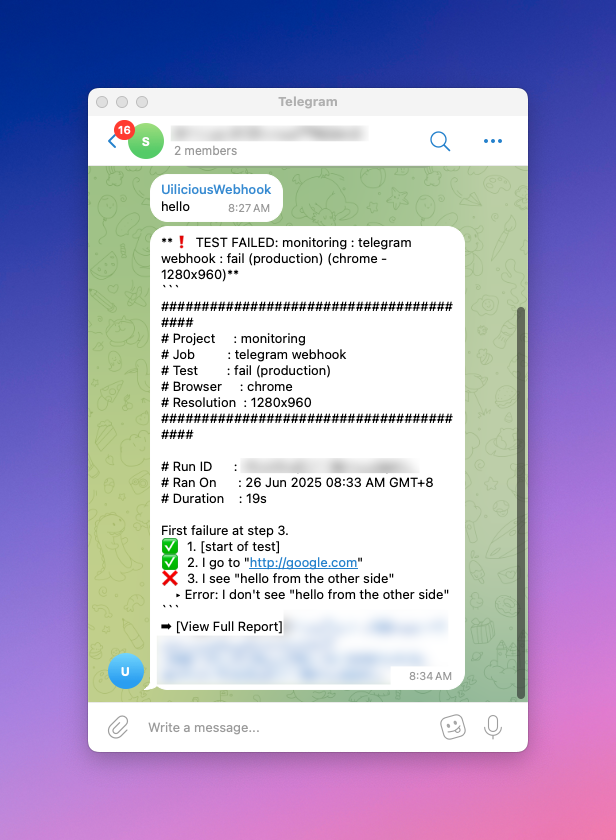
Now your Telegram group will receive a message every time your test finishes or fails!