Saving projects to Github
If your team using the editor on UI-licious Studio to edit the test files, and you wish to save the files to a Github repository, this section covers how to do so manually step-by-step using the uilicious-cli, and automatically using Github Actions.
Manual commits
If you wish to commit your test project to a Github repository, you can use the command line tool to download project to your computer and then commit the test file to your Github repository.
First, install the uilicious-cli:
# install uilicious-cli globally
npm install -g uilicious-cli
Then, download the test project to your machine (you will need your access key):
# download test project to your computer
uilicious-cli download <project_name> <local_directory> --key <accesskey>

# Example:
# uilicious-cli download "AcmeCorp Store" "./tests"
# This will donwload the "AcmeCorp Store" project to the "tests" folder at the current working directory
Finally, commit the changes to your git repository (assuming it has been initialised):
# Stage all changes
git add -all

# Commit staged changes
git commit -m '<commit_message>'
Auto-commits using Github Actions
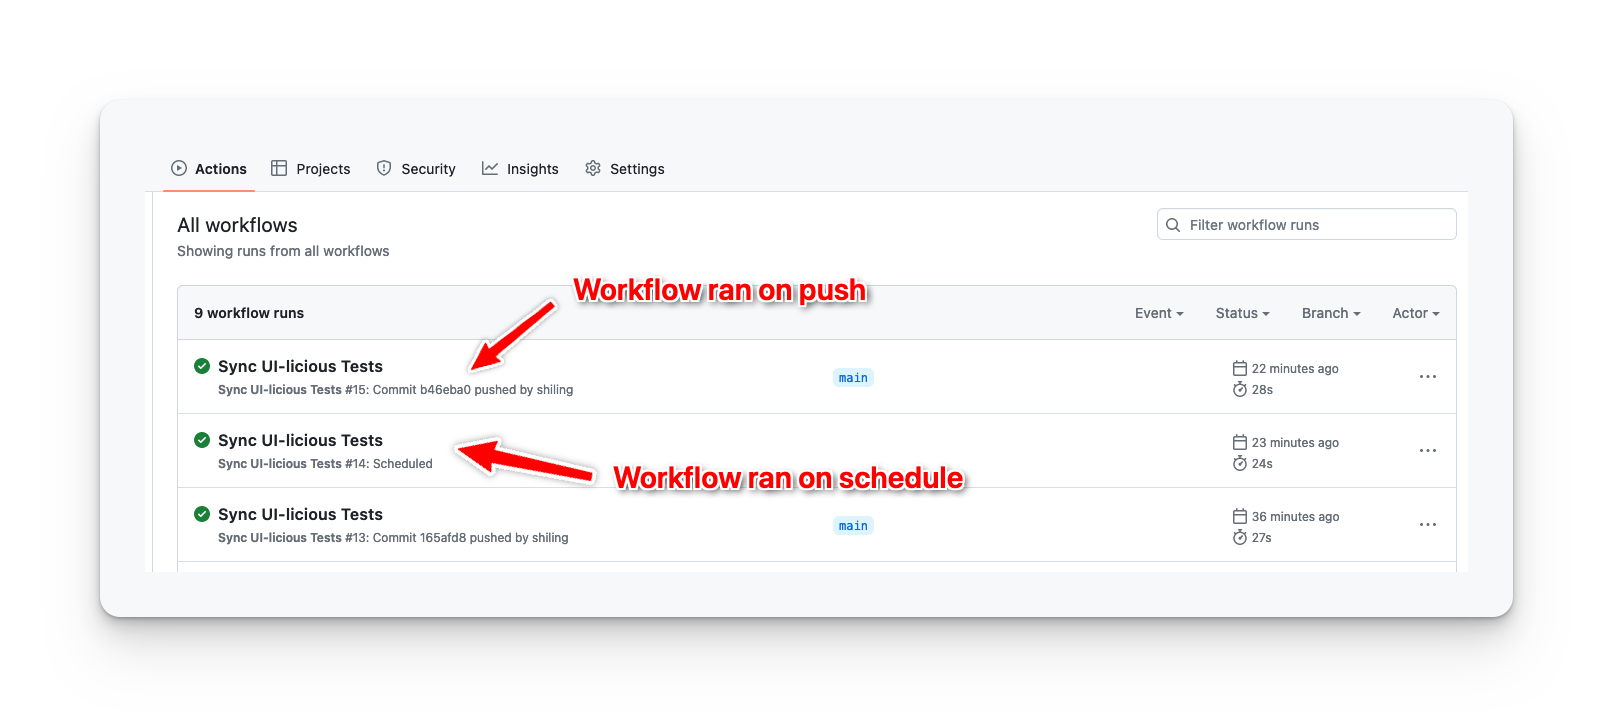
If you wish to save yourself the trouble of manually committing test files to your Github repository, you can use Github Actions to do so automatically on push or at a scheduled interval.
To see a completed example, you can check out this Github project for reference.
First, create the .github/workflows folder in your repository.
Then, create sync-uilicious-project.yml file in the .github/workflows folder.
Copy and paste the following to the sync-uilicious-project.yml file:
run-name: Sync UI-licious Tests
on:
  # sync uilicious projects on push
  push:
    branches:
      - 'main'
  # sync uilicious projects at regular intervals
  schedule:
    - cron: '0 */1 * * *' # every hour
jobs:
  sync:
    runs-on: ubuntu-latest
    steps:
      - name: Checkout HEAD
        uses: actions/checkout@v3
        with:
          ref: ${{ github.head_ref }}
      - name: Install uilicious-cli
        run: npm install -g uilicious-cli
      - name: Download UI-licious Project
        run: uilicious-cli download ${{ vars.UILICIOUS_PROJECT_ID }} ${{ vars.UILICIOUS_TEST_DIR }} --key ${{ secrets.UILICIOUS_ACCESS_KEY }}
      - name: Commit changed files to the repository
        uses: stefanzweifel/git-auto-commit-action@v4 # Refer to: https://github.com/marketplace/actions/git-auto-commit
        with:
          commit_message: "[Auto-commit] Sync UI-licious Tests"
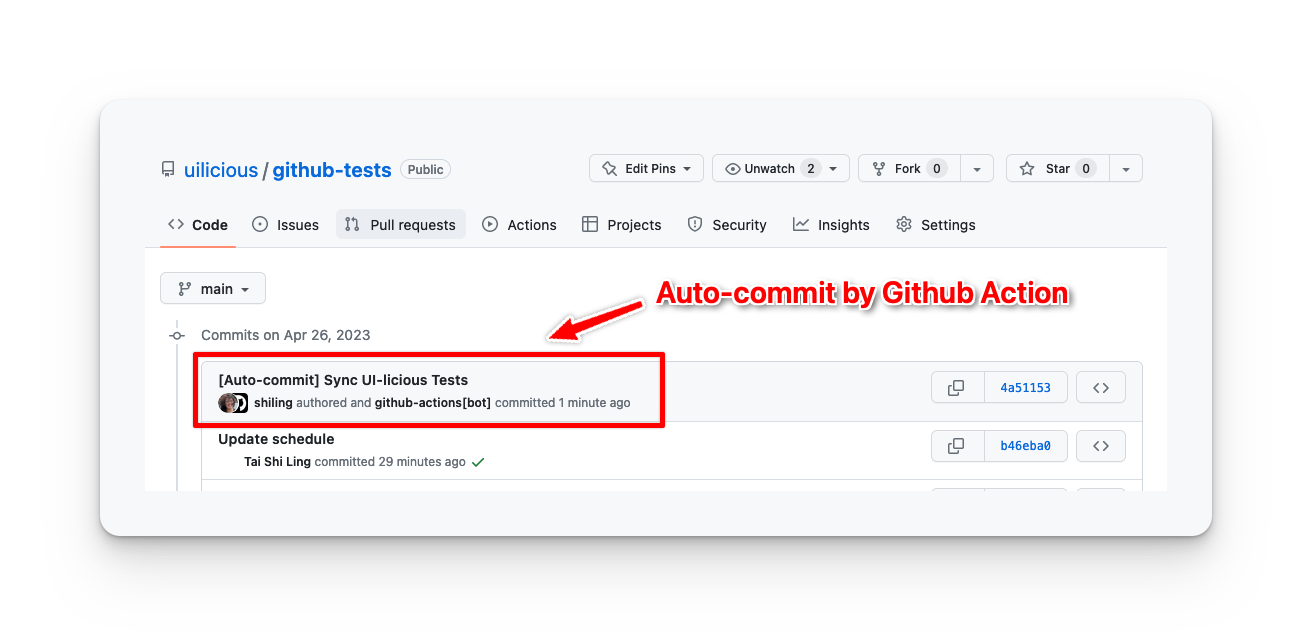
This workflow will download the UI-licious project, check for changed files, and automatically make a commit. If you wish to chnage the commit message, you can change line 21.
This workflow will trigger when changes are pushed to the main branch, and at every hour. You can change the conditions to trigger the workflow by changing lines 2 - 8. See Github's documentation on the push and schedule triggers.
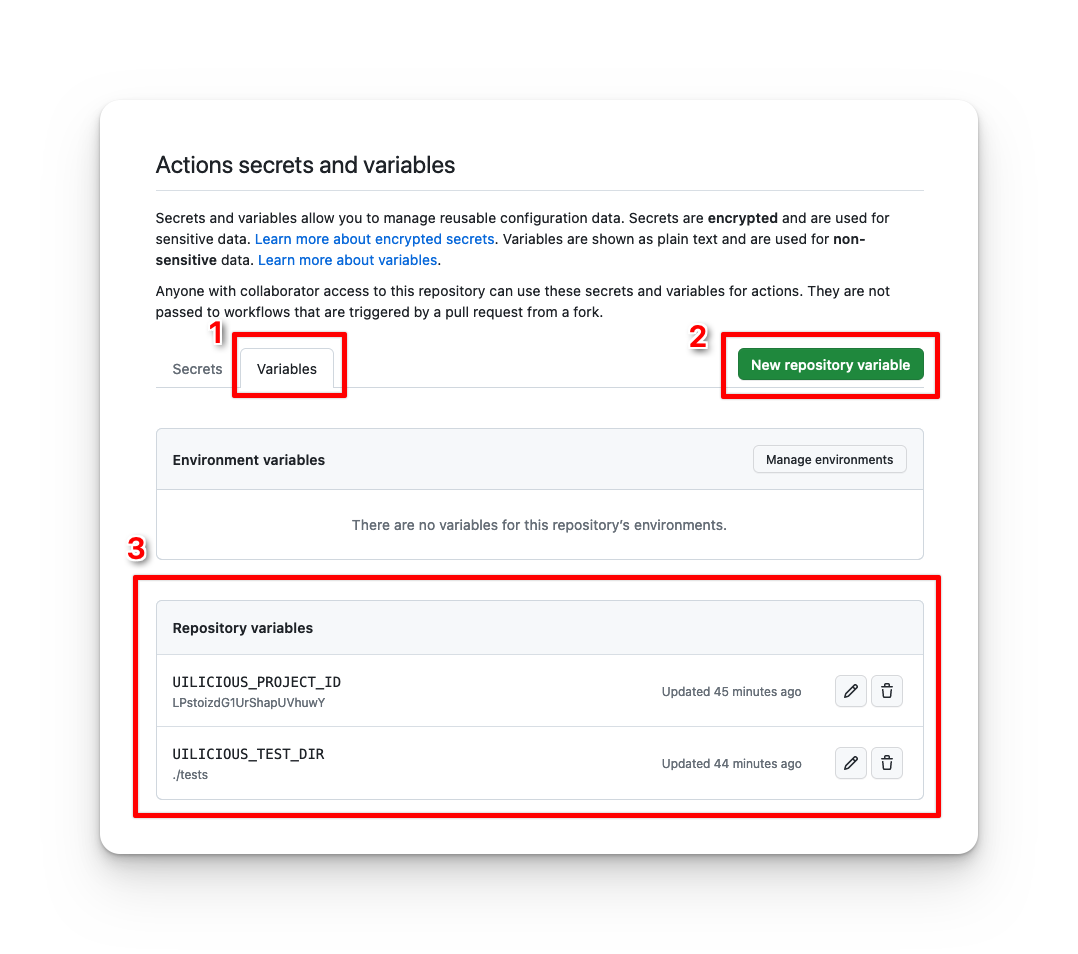
Configure the following Github Actions variables:
UILICIOUS_PROJECT_ID: This is the UI-licious project ID, which you can find in the "Project Settings" page.UILICIOUS_TEST_DIR: Which folder in the respository do you want to save the UI-licious files to? E.g. "./tests"
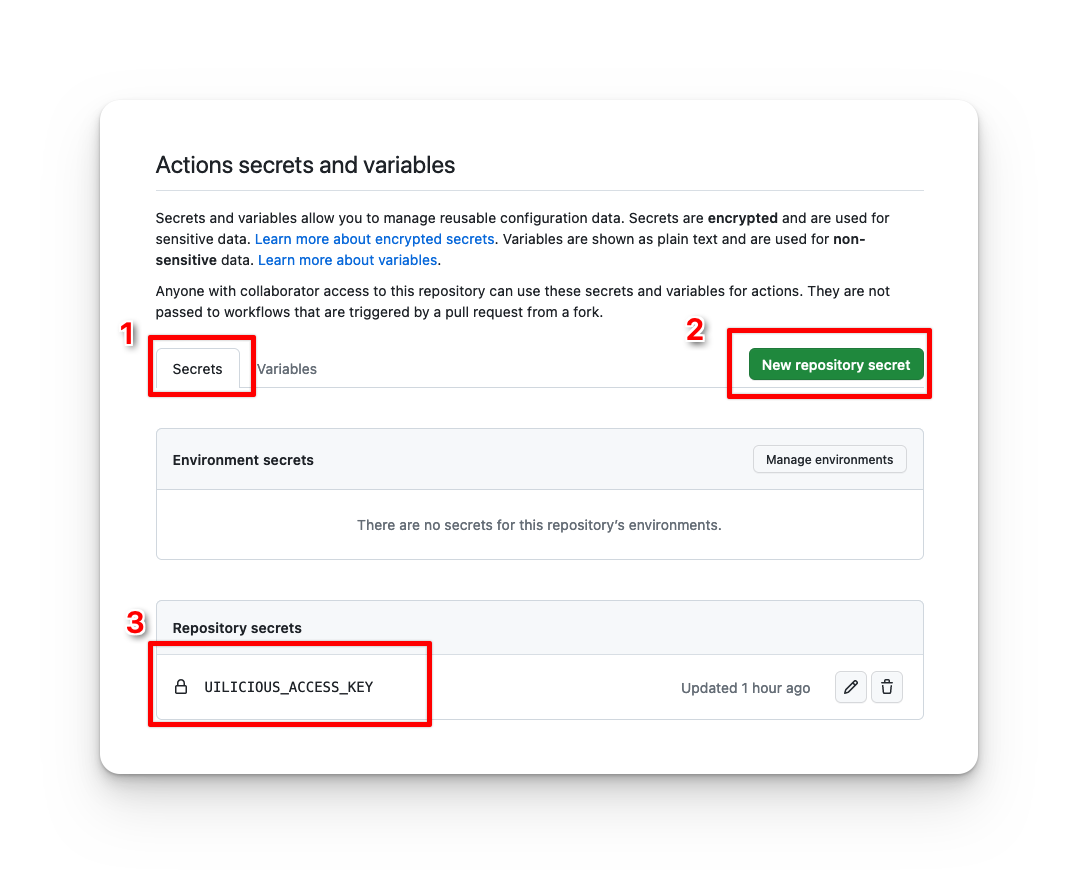
Configure the following Github Actions secrets:
UILICIOUS_ACCESS_KEY: This is your UI-licious access key.
Finally, commit .github/workflows/sync-uilicious-project.yml to the target branch on your Github repository, and you should see the workflow running for the first time on the "Actions" tab.