Run a test using the CLI

You can use the UIlicious Command Line Interface to run a test from the command line.
This is useful for integrating UIlicious with your CI/CD tools as part of your build / deployment pipelines.
Installation
You can download the the UIlicious CLI from NPM by running the following the command line:
npm install uilicious-cli -g
Alternatively, you can download the binaries directly from the Github Releases page:
Authentication
You will need the access key to login and use the UIlicious Command Line.
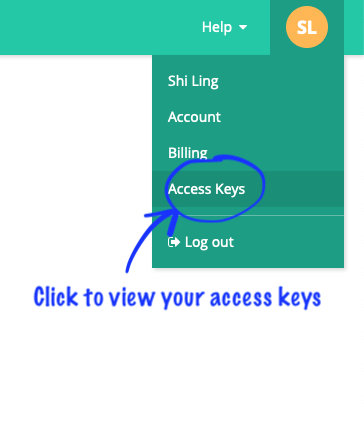
Click on your profile menu and open the link to "Access Keys" to view your access key.

Running a test
To learn more, read the docs on the UIlicious CLI Github repository.
Use the project run command to run a test:
uilicious-cli project run <project_name> <test_file_path> [--browser] [--width] [--height] --key <access_key>
The command expects a few arguments:
<project_name>: The name of the project<test_file_path>: The path to the test that you want to run--browser <browser_name>: The browser to run the test on. The available options are:chrome- Chrome browserfirefox- Firefox browsersafari- MacOS Safari browseredgechromium- Edge Chromium browseredge- Legacy Edge browser (uses Microsoft EdgeHTML instead of Google Chromium)ie11- Internet Explorer 11
--width <browser_width>: The initial width of the browser window to set to, in pixels--height <browser_height>: The initial height of the browser window to set to, in pixels--key <access_key>: Login using an access key
Here's an example:
uilicious-cli project run "MyStore" "auth/loginAsBuyer" --browser chrome --width 1280 --height 800 --key <access_key>
This will run the "auth/loginAsBuyer" test in the "MyStore" project on Chrome with the browser window set to the 1280x800 resolution.
There are more options available to configure test runs. To show the manual for the project run command, type:
uilicious-cli project run --help
