How to test slider components
In this tutorial, we're going to look at how to test slider components using UI-licious.

Real-world example: Sendgrid's pricing slider
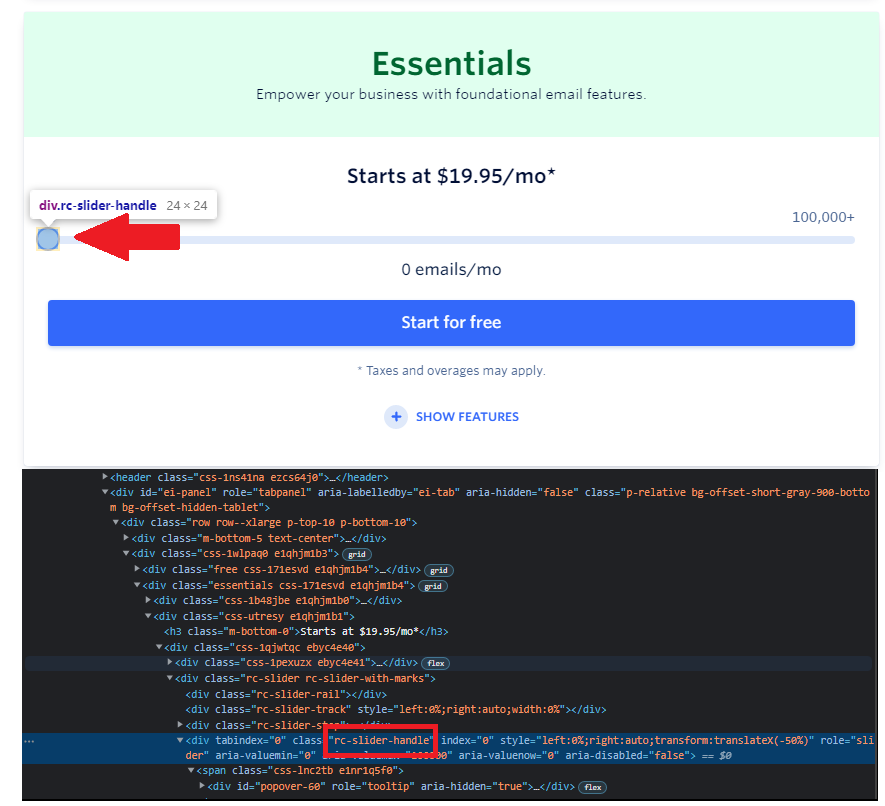
We’ll be testing the slider component on Sendgrid’s pricing page.
Let’s write a test to drag the slider to the right and increase the email volume from 0 emails/mo to 50,000 emails/mo, and check that the price estimates change from “Starts at $19.95/mo” to “$19/95/mo estimated”.
Inspecting the slider component

First, we need to identify the element that we want to drag. Open the browser inspector to inspect the elements on the page. The round knob on the slider has the class “rc-slider-handle”. Sliders are UI components commonly used for number range inputs.
Using I.drag to test with the slider
UIlicious provides different drag commands for dragging a page element:
| Property | Description |
|---|---|
I.dragTo | drag an element and drop it over another element |
I.dragBy | drag an element by a fixed number of pixels |
I.dragDown | drag an element down |
I.dragUp | drag an element up |
I.dragLeft | drag an element left |
I.dragRight | drag an element right |
To drag the slider to the right, use the I.dragRight command to drag the slider using its class “rc-slider-handle” to the right by 200 pixels like this:
I.dragRight(".rc-slider-handle", 200)
Complete test script and result
This is what the entire test script will look like:
I.goTo("https://sendgrid.com/pricing/")

UI.context("//iframe", ()=>{
	I.click("Accept All")
	I.click("Close")
})

I.see("Essential")

I.see("Starts at $19.95/mo")

I.dragRight(".rc-slider-handle", 200) //This will drag the slider to the right by 200 px
You may view, rerun and edit the test script available publicly on snippets here: View “Dragging Sendgrid Slider” test script
