Testing Metamask
MetaMask is a cryptocurrency wallet that enables users to store Ether and other ERC-20 tokens.
If you are testing a Web3 application that requires interacting with a MetaMask wallet, UIlicious allows you to run tests on browsers installed with the MetaMask extension.
Running a test on MetaMask
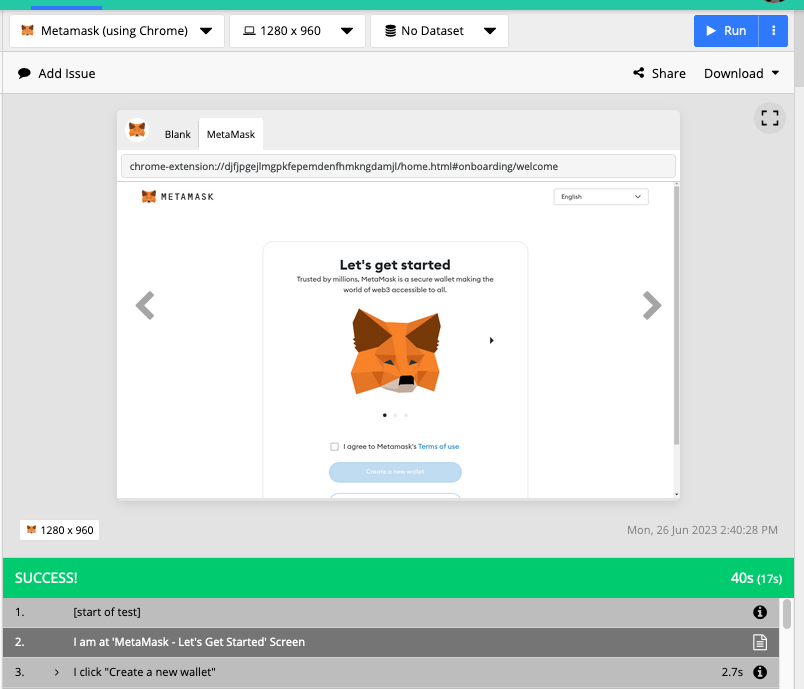
On the "Run" toolbar, select "Metamask" in the Browser dropdown, and press "Run" to run a test on a browser that comes installed with MetaMask.
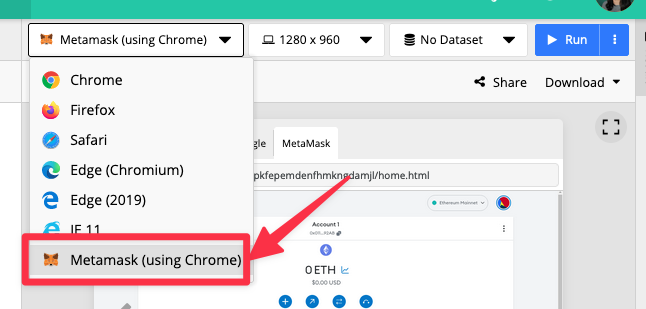
Whenever the test is started, the MetaMask will always be the active tab opened, and starts with the "Getting Started" screen.
MetaMask Plugin
UIlicious also provides a plugin to simplify setting up MetaMask for testing.
Importing the plugin
First, you need to import the plugin using the TEST.loadPlugin to import "metamask". You can assign the imported module to any variable. In this guide, we'll name the imported plugin "metamask".
let metamask = TEST.loadPlugin("metamask")
Once the plugin is loaded, you can use the setup function to create a wallet, import an existing wallet, switch network, and manually add a network.
Create wallet and use default network
By default, if you run the setup function without passing options, Metamask will be configured to create a new wallet and use the default network, which is Ethereum Mainnet.
// run the setup with no custom options
metamask.setup() // this will create a wallet and use the default network.
If you wish to reveal the passphase of the created wallet, you can view the screenshot taken at the "Confirm Secret Recovery Phrase" screen.
You may also read the passphase using the function getPassphase and print the passphase to the test report using TEST.log.info, as such:
// setup with a new wallet
metamask.setup()

// print the wallet passphrase to the test report
TEST.log.info("passphrase: ", metamask.getPassphrase())
Import wallet
If you wish to import an existing wallet instead of creating a new wallet, you can run the setup function and provide the wallet's secret recovery phrase in the wallet.passphrase option:
// import an existing wallet using the recovery passphrase
metamask.setup({
	wallet: {
		passphrase: "<WALLET SECRET RECOVERY PHRASE>"
	}
})
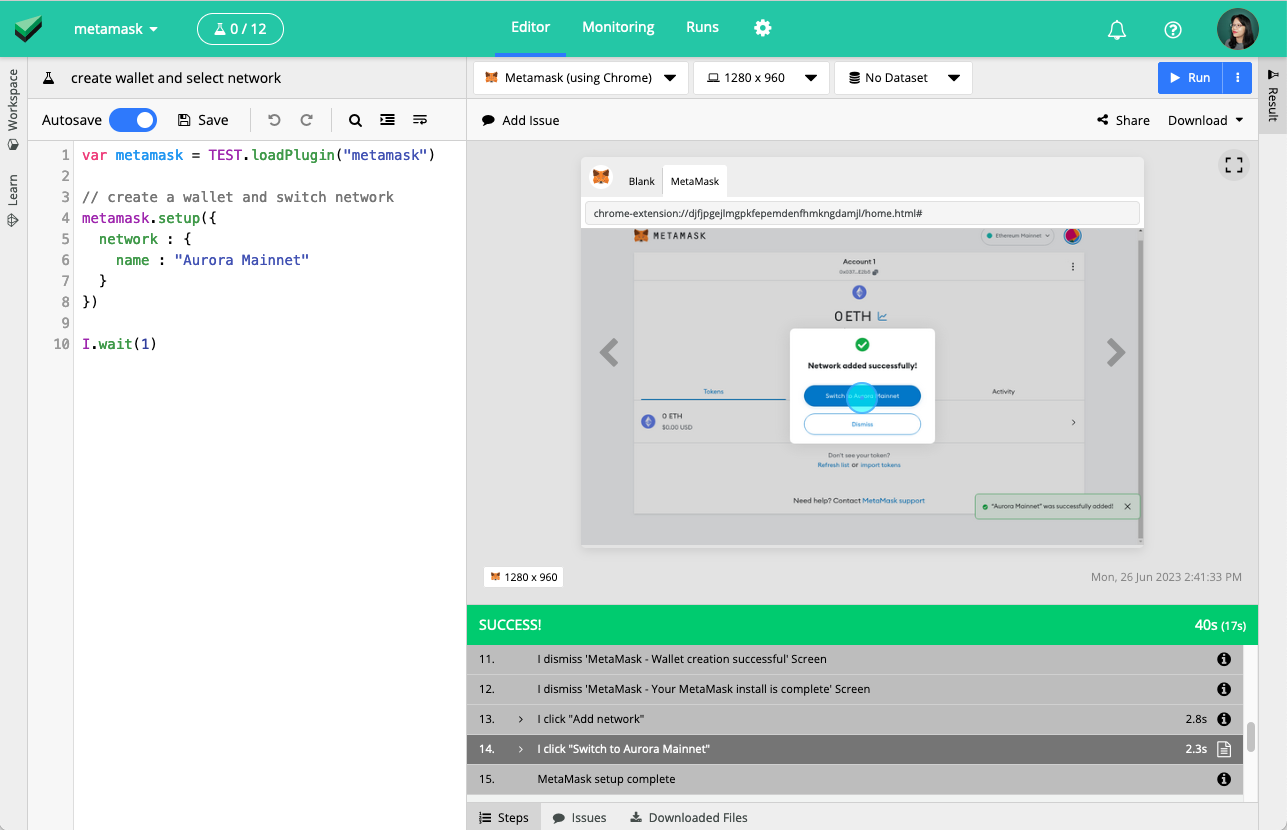
Switch network
By default, Metamask will use the Ethereum Mainnet. However, if you wish to use another network from MetaMask's predefined list of networks, you can run the setup function and provide the name of the network you want to switch to in network.name. The example below a setup that imports a wallet and switches to the "Aurora Mainnet".
metamask.setup({
	wallet: {
		passphrase: "<WALLET SECRET RECOVERY PHRASE>" // import a wallet
	},
	network : {
		name: "Aurora Mainnet" // switch to another network
	}
})
If you have already ran the setup function once to create or import the wallet, and wish to switch the network at a later part of the test, you can use the addNetwork function instead using the same options.
metamask.addNetwork({
	network : {
		name: "Aurora Mainnet" // switch to another network
	}
})
Add a network manually
If you wish to use a custom network, you can run the setup function and provide the details of the network you want to add manually:
metamask.setup({
	network : {
		name : "BuildBear",
		rpcURL: "https://rpc.buildbear.io/example",
		chainID: 1,
		currencySymbol: "NAT",
		explorerURL: "http://explorer.buildbear.io/example"
	}
})
rpcURL, and explorerURL. 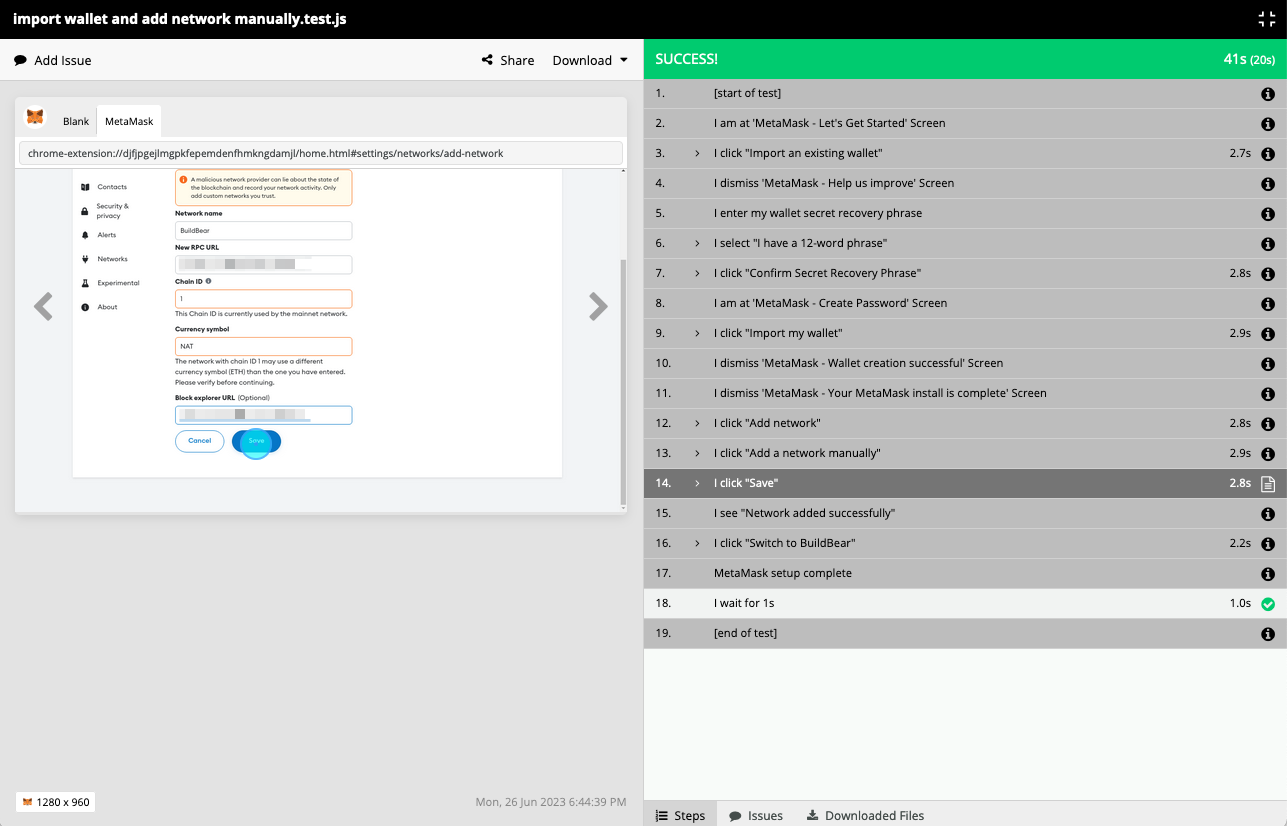
If you have already ran the setup function once to create or import the wallet, and wish to add the network at a later part of the test, you can use the addNetwork function instead using the same options.
metamask.addNetwork({
	network : {
		name : "BuildBear",
		rpcURL: "https://rpc.buildbear.io/example",
		chainID: 1,
		currencySymbol: "NAT",
		explorerURL: "http://explorer.buildbear.io/example"
	}
})
Opening the Metamask settings
Whenever the test is started, the MetaMask settings will always be the active tab opened, starting with the "Getting Started" page. If the test has navigated away to other pages, and you wish to open the MetaMask settings page, you can use the open function.
// Opens the MetaMask settings page
metamask.open()
Sometimes when opening the MetaMask settings page, MetaMask might ask you to unlock the device if too much time has passed. You can get the device password generated for the current test session using the getDevicePassword function.
// Opens the MetaMask settings page
metamask.open()
// Fill the password and unlock the settings page
I.fill("Password", metamask.getDevicePassword())
I.click("Unlock")