Running a test
In UIlicious Studio, you can write and run tests in the Editor view.
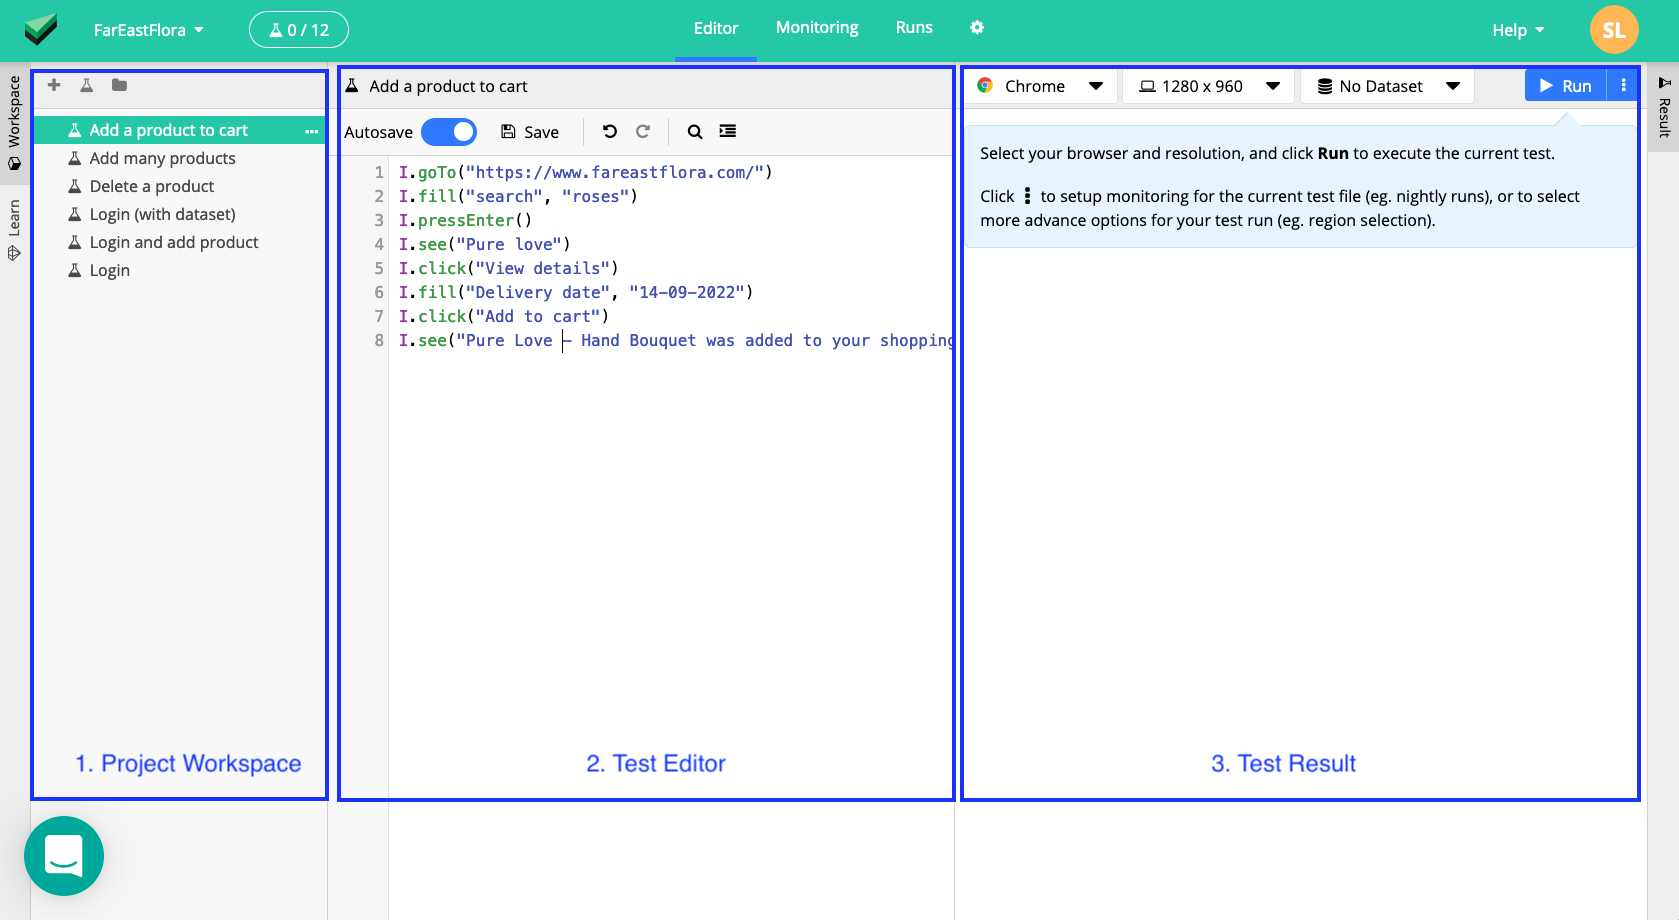
The Editor tab has three panes:
- Workspace - Manage your files in your project here
- Editor - Write your tests here
- Result - Run and view test reports here
Once you have written a test, you can configure how you want to run a test. There are several configuration options:
- Browser - the browser you want to test
- Resolution - the initial screen resolution you want to test
- Dataset - the dataset you want to use with the test
- Region - the geographic location you want to run the test in
- User Agent - override the default user agent of the test browser
Basic configuration
In the toolbar above the "Result" pane, you can find basic configuration options for setting the test browser, resolution, and dataset.
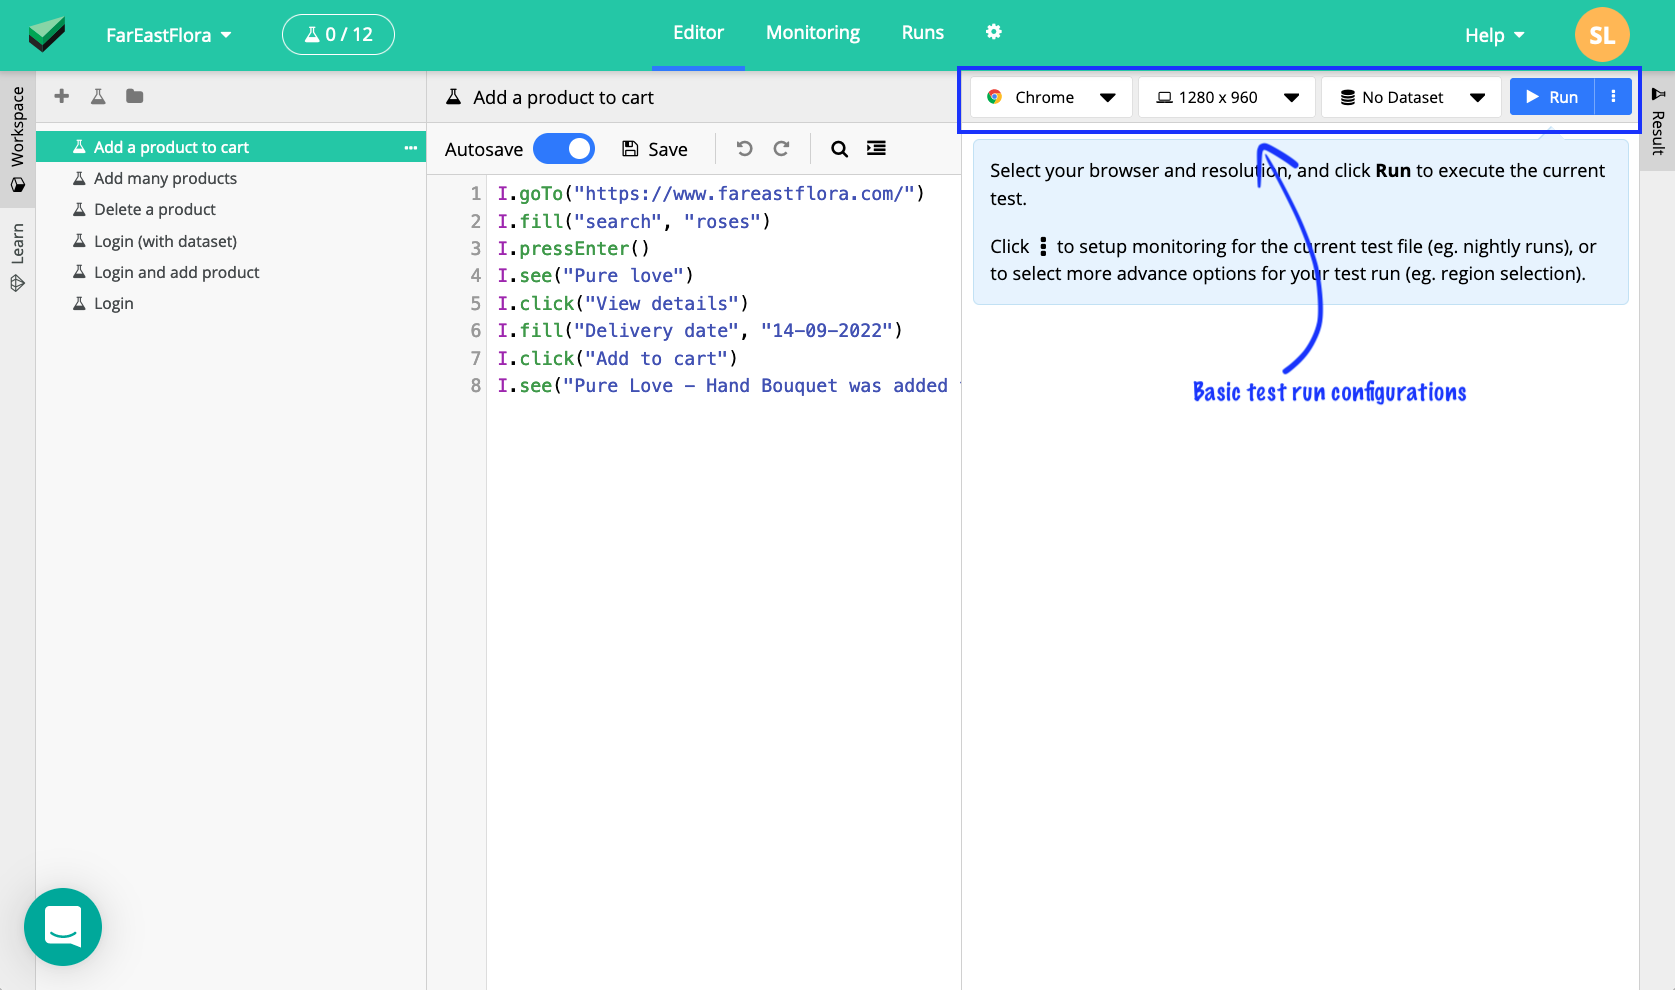
To run a test, you must pick a browser and an initial resolution.
The selected browser cannot be changed for the rest of the test.
The selected resolution will set the initial screen resolution of the test browser, and this can be changed at any point during the test using the UI.resize command. If you want to run the test with a custom resolution, you can use the UI.resize command to specify the custom resolution.
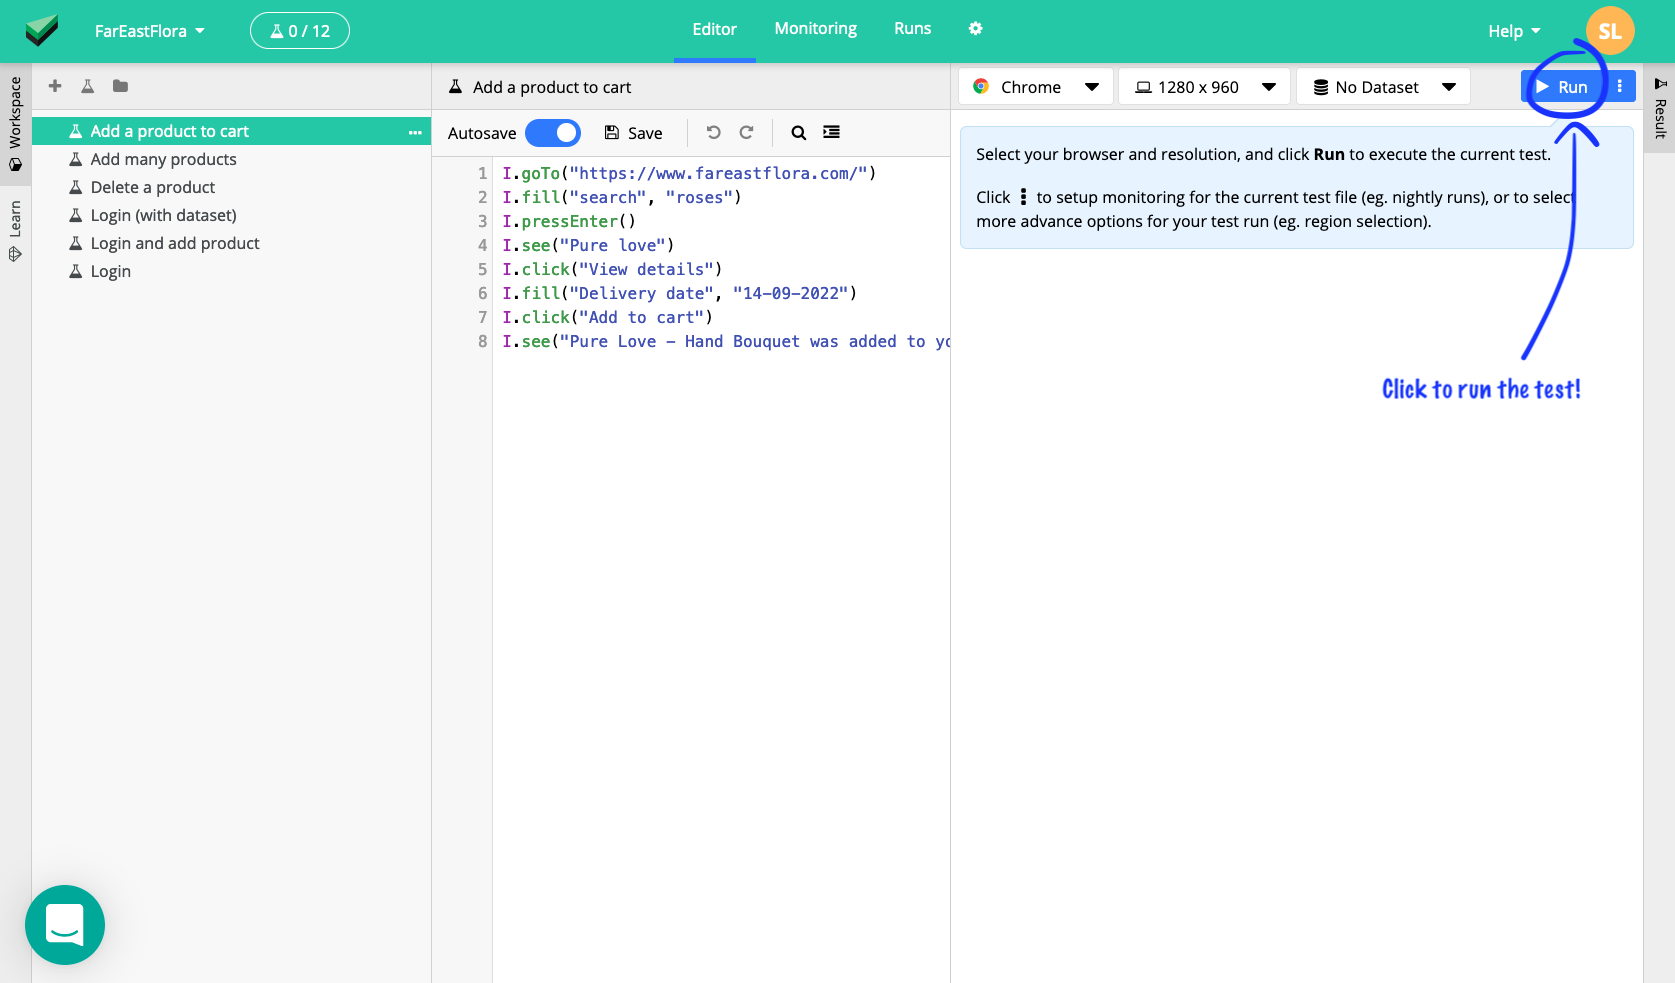
Run a test
Click on the "Run" button in the toolbar to start running the test that is opened in the Editor pane.
Once the test starts, you will start seeing the test results while the test runs in the Result pane.
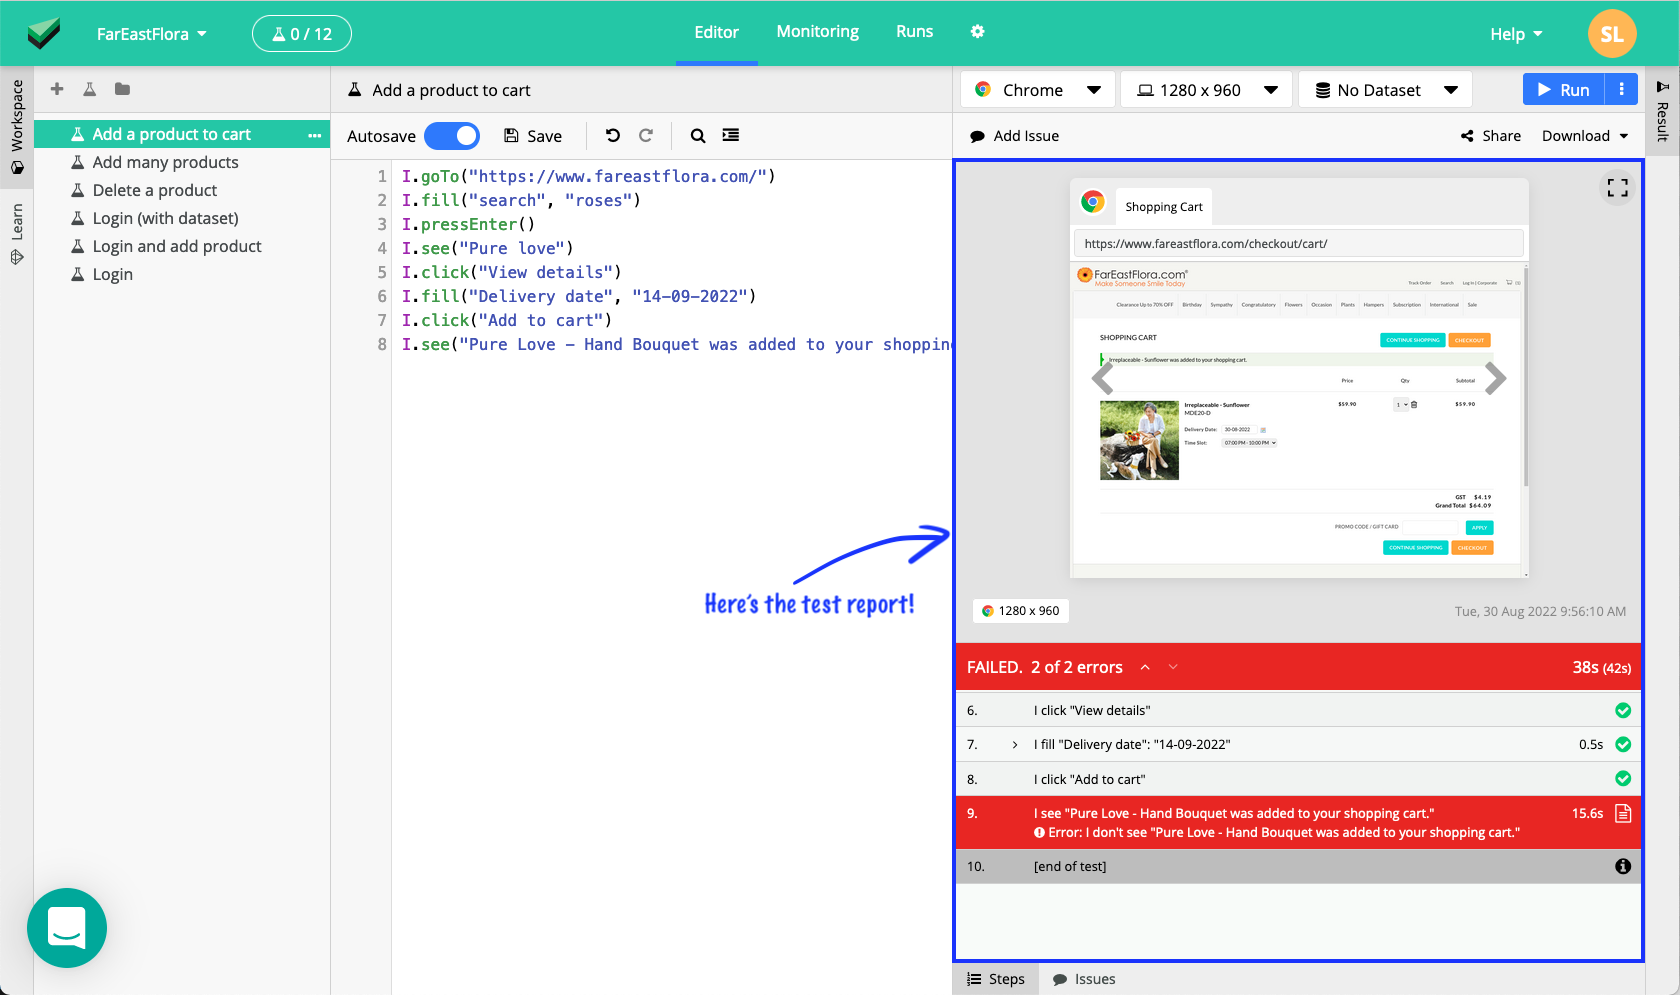
You can click on the individual steps to view the screenshot for the step, or use the Up / Down Arrow Keys to move between steps.