Schedule tests using jobs
In this article, we'll cover how to create jobs to schedule test runs and setup notifications.
What is a Job?
A job is a task that executes tests on a scheduled basis. Jobs will trigger automatically at the scheduled time, and run tests in the background, utilising the available test runners in your workspace. You can create a job that runs any number of tests. You can setup notifications when tests fail or when they complete.
Setting up a Job
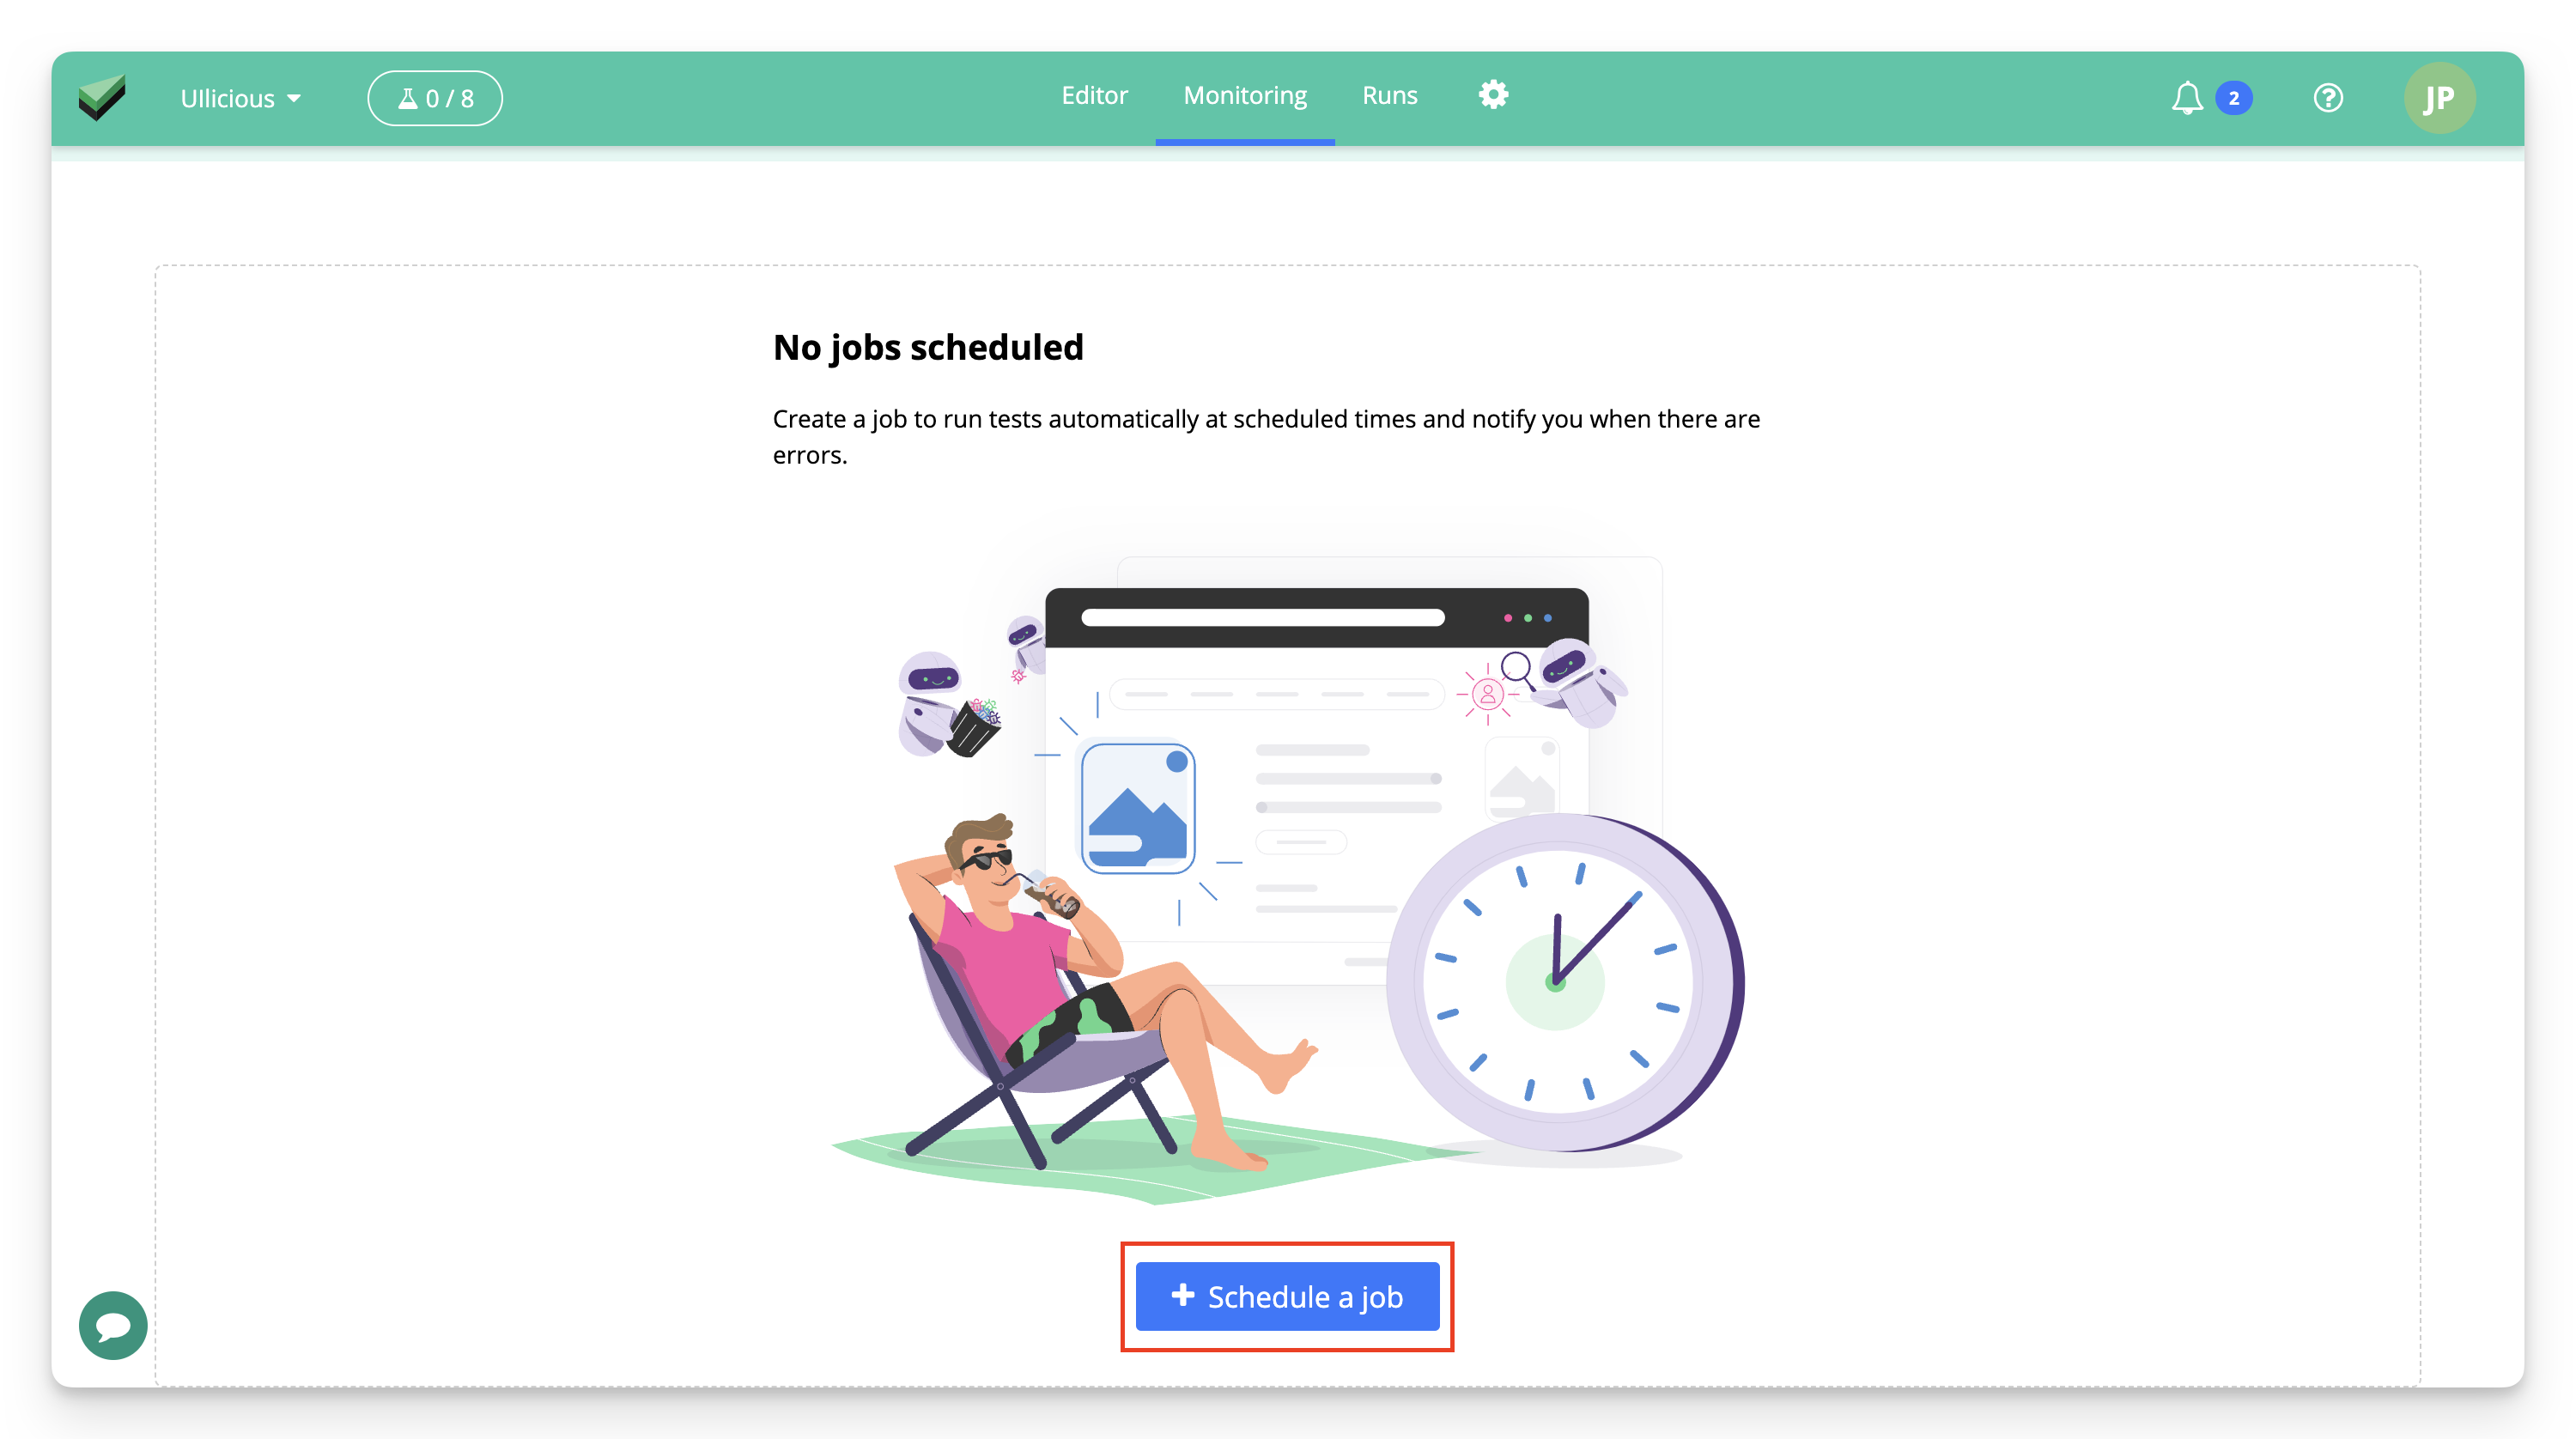
To start, first, select the "Monitoring" Tab and click "Schedule a job" button.
Then, enter a name for the job.
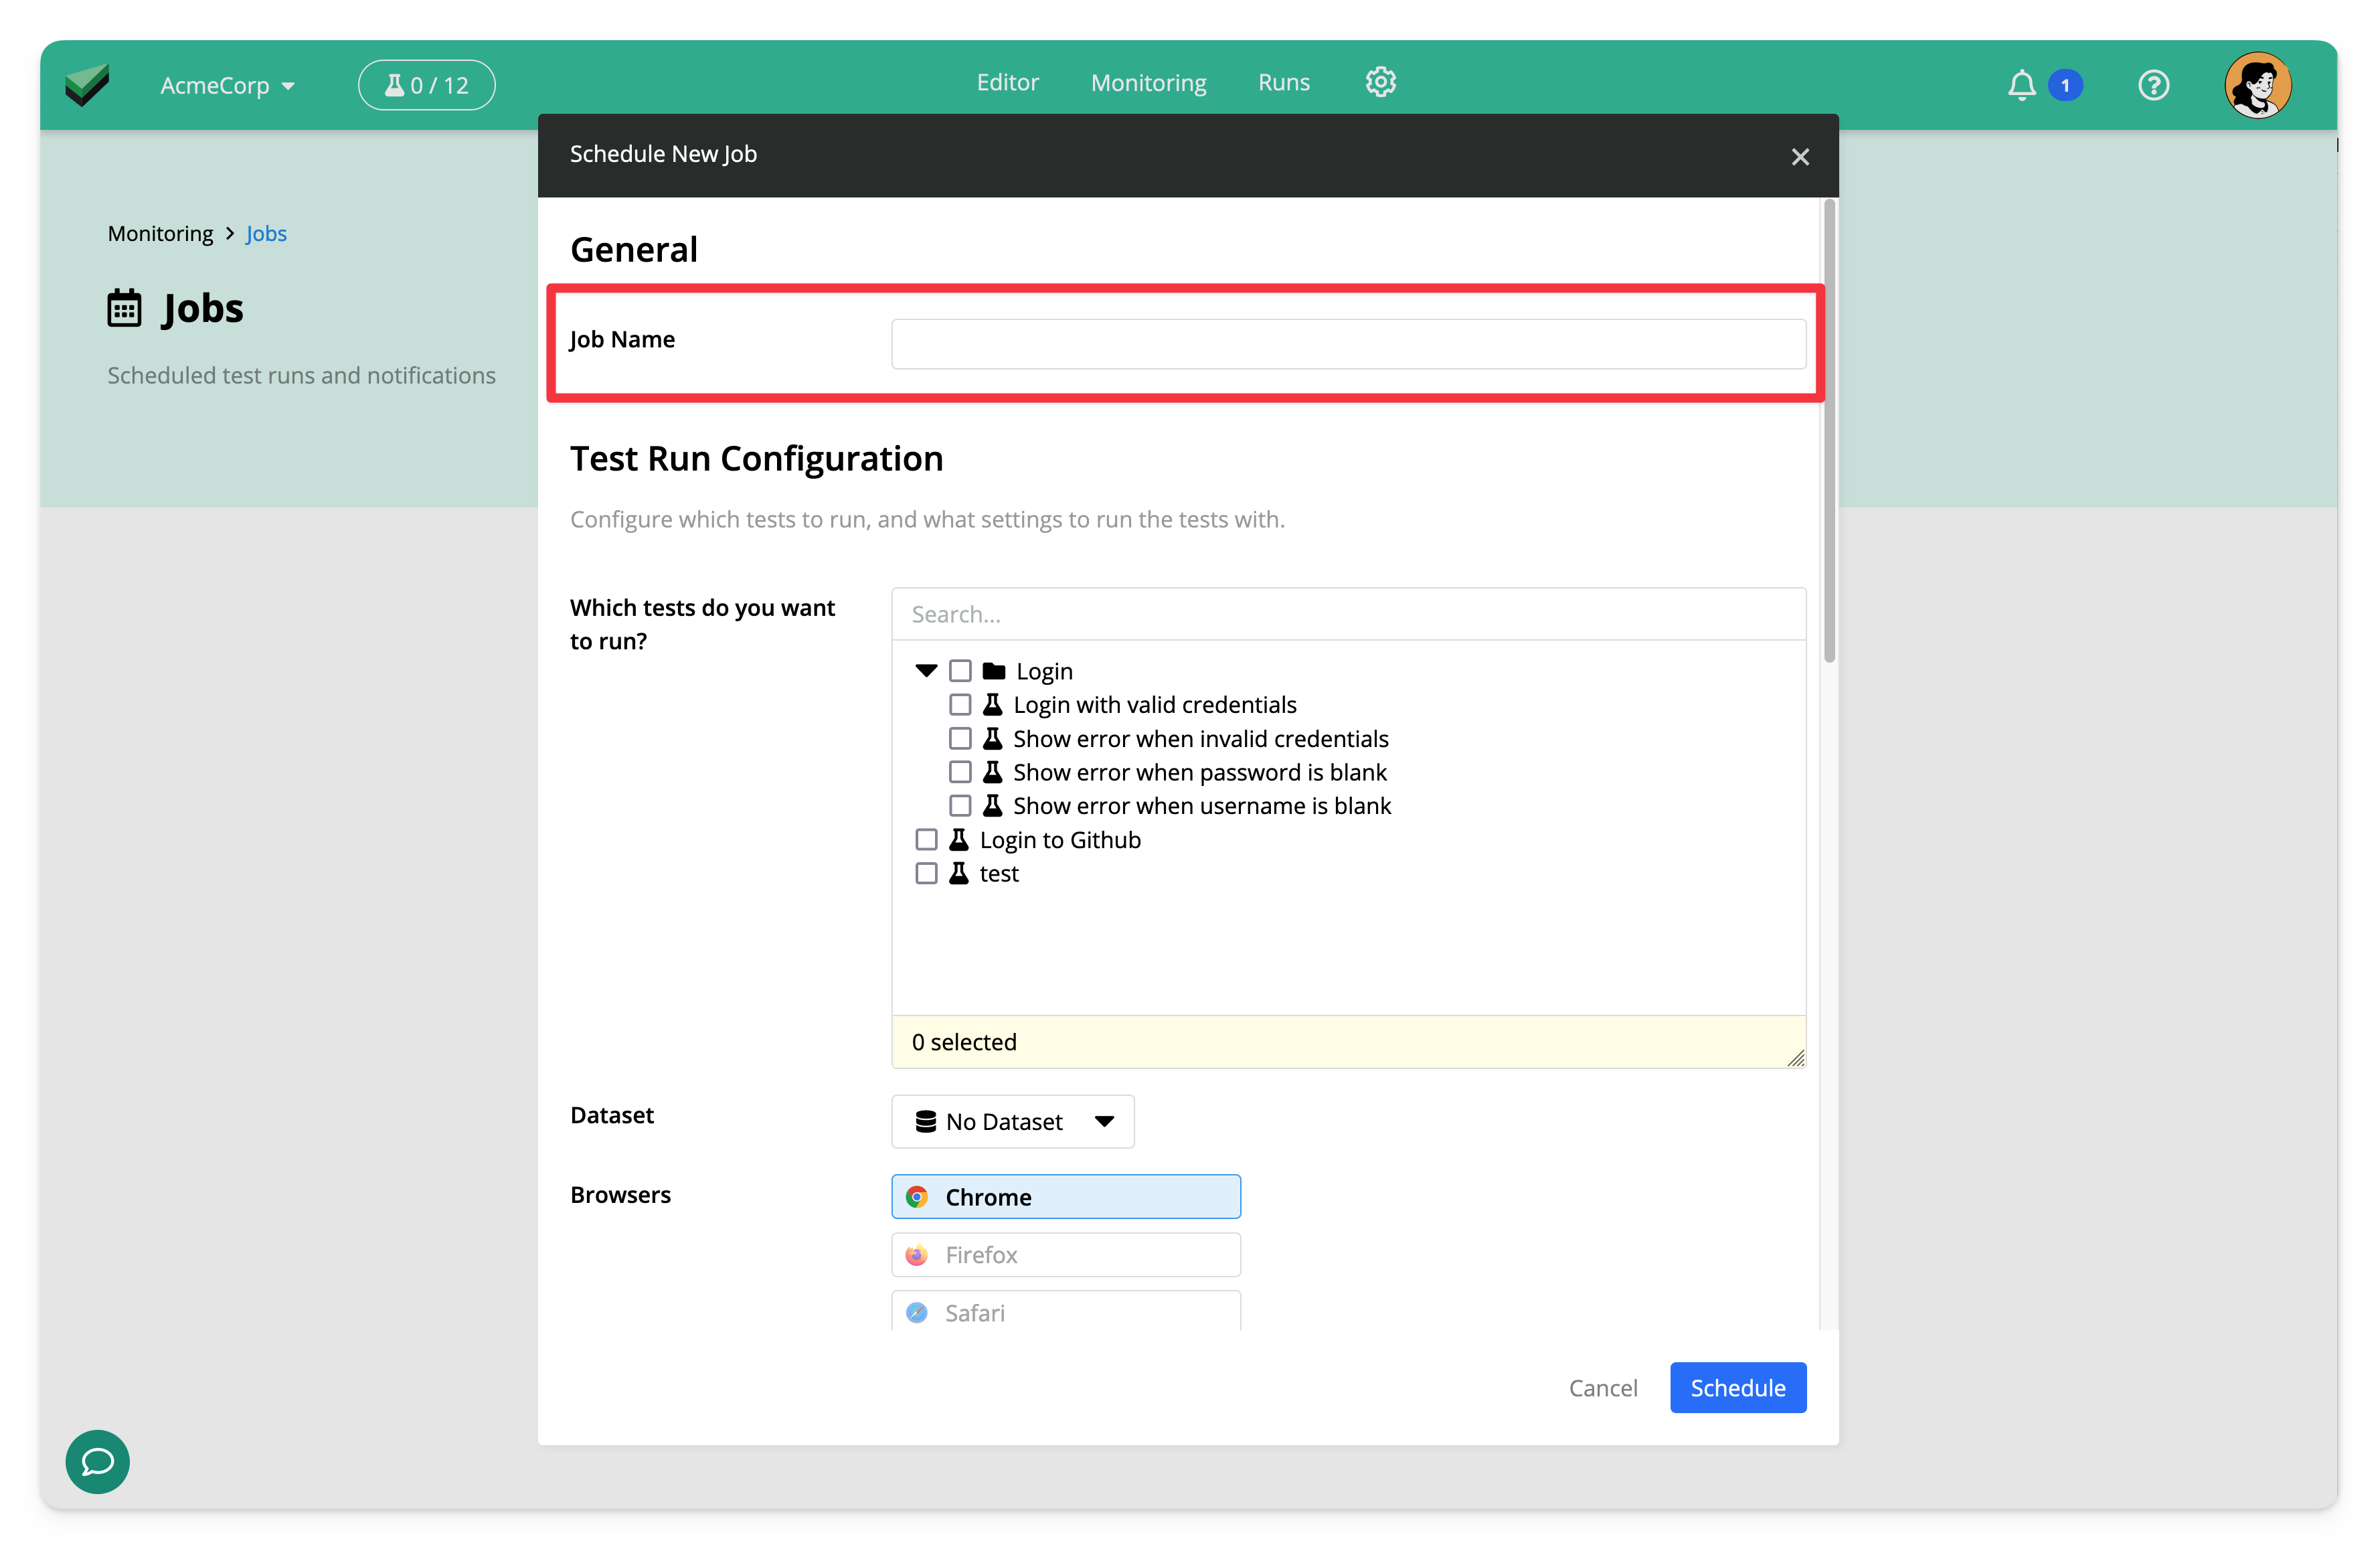
Now, select the tests that you want to run as part of this job.
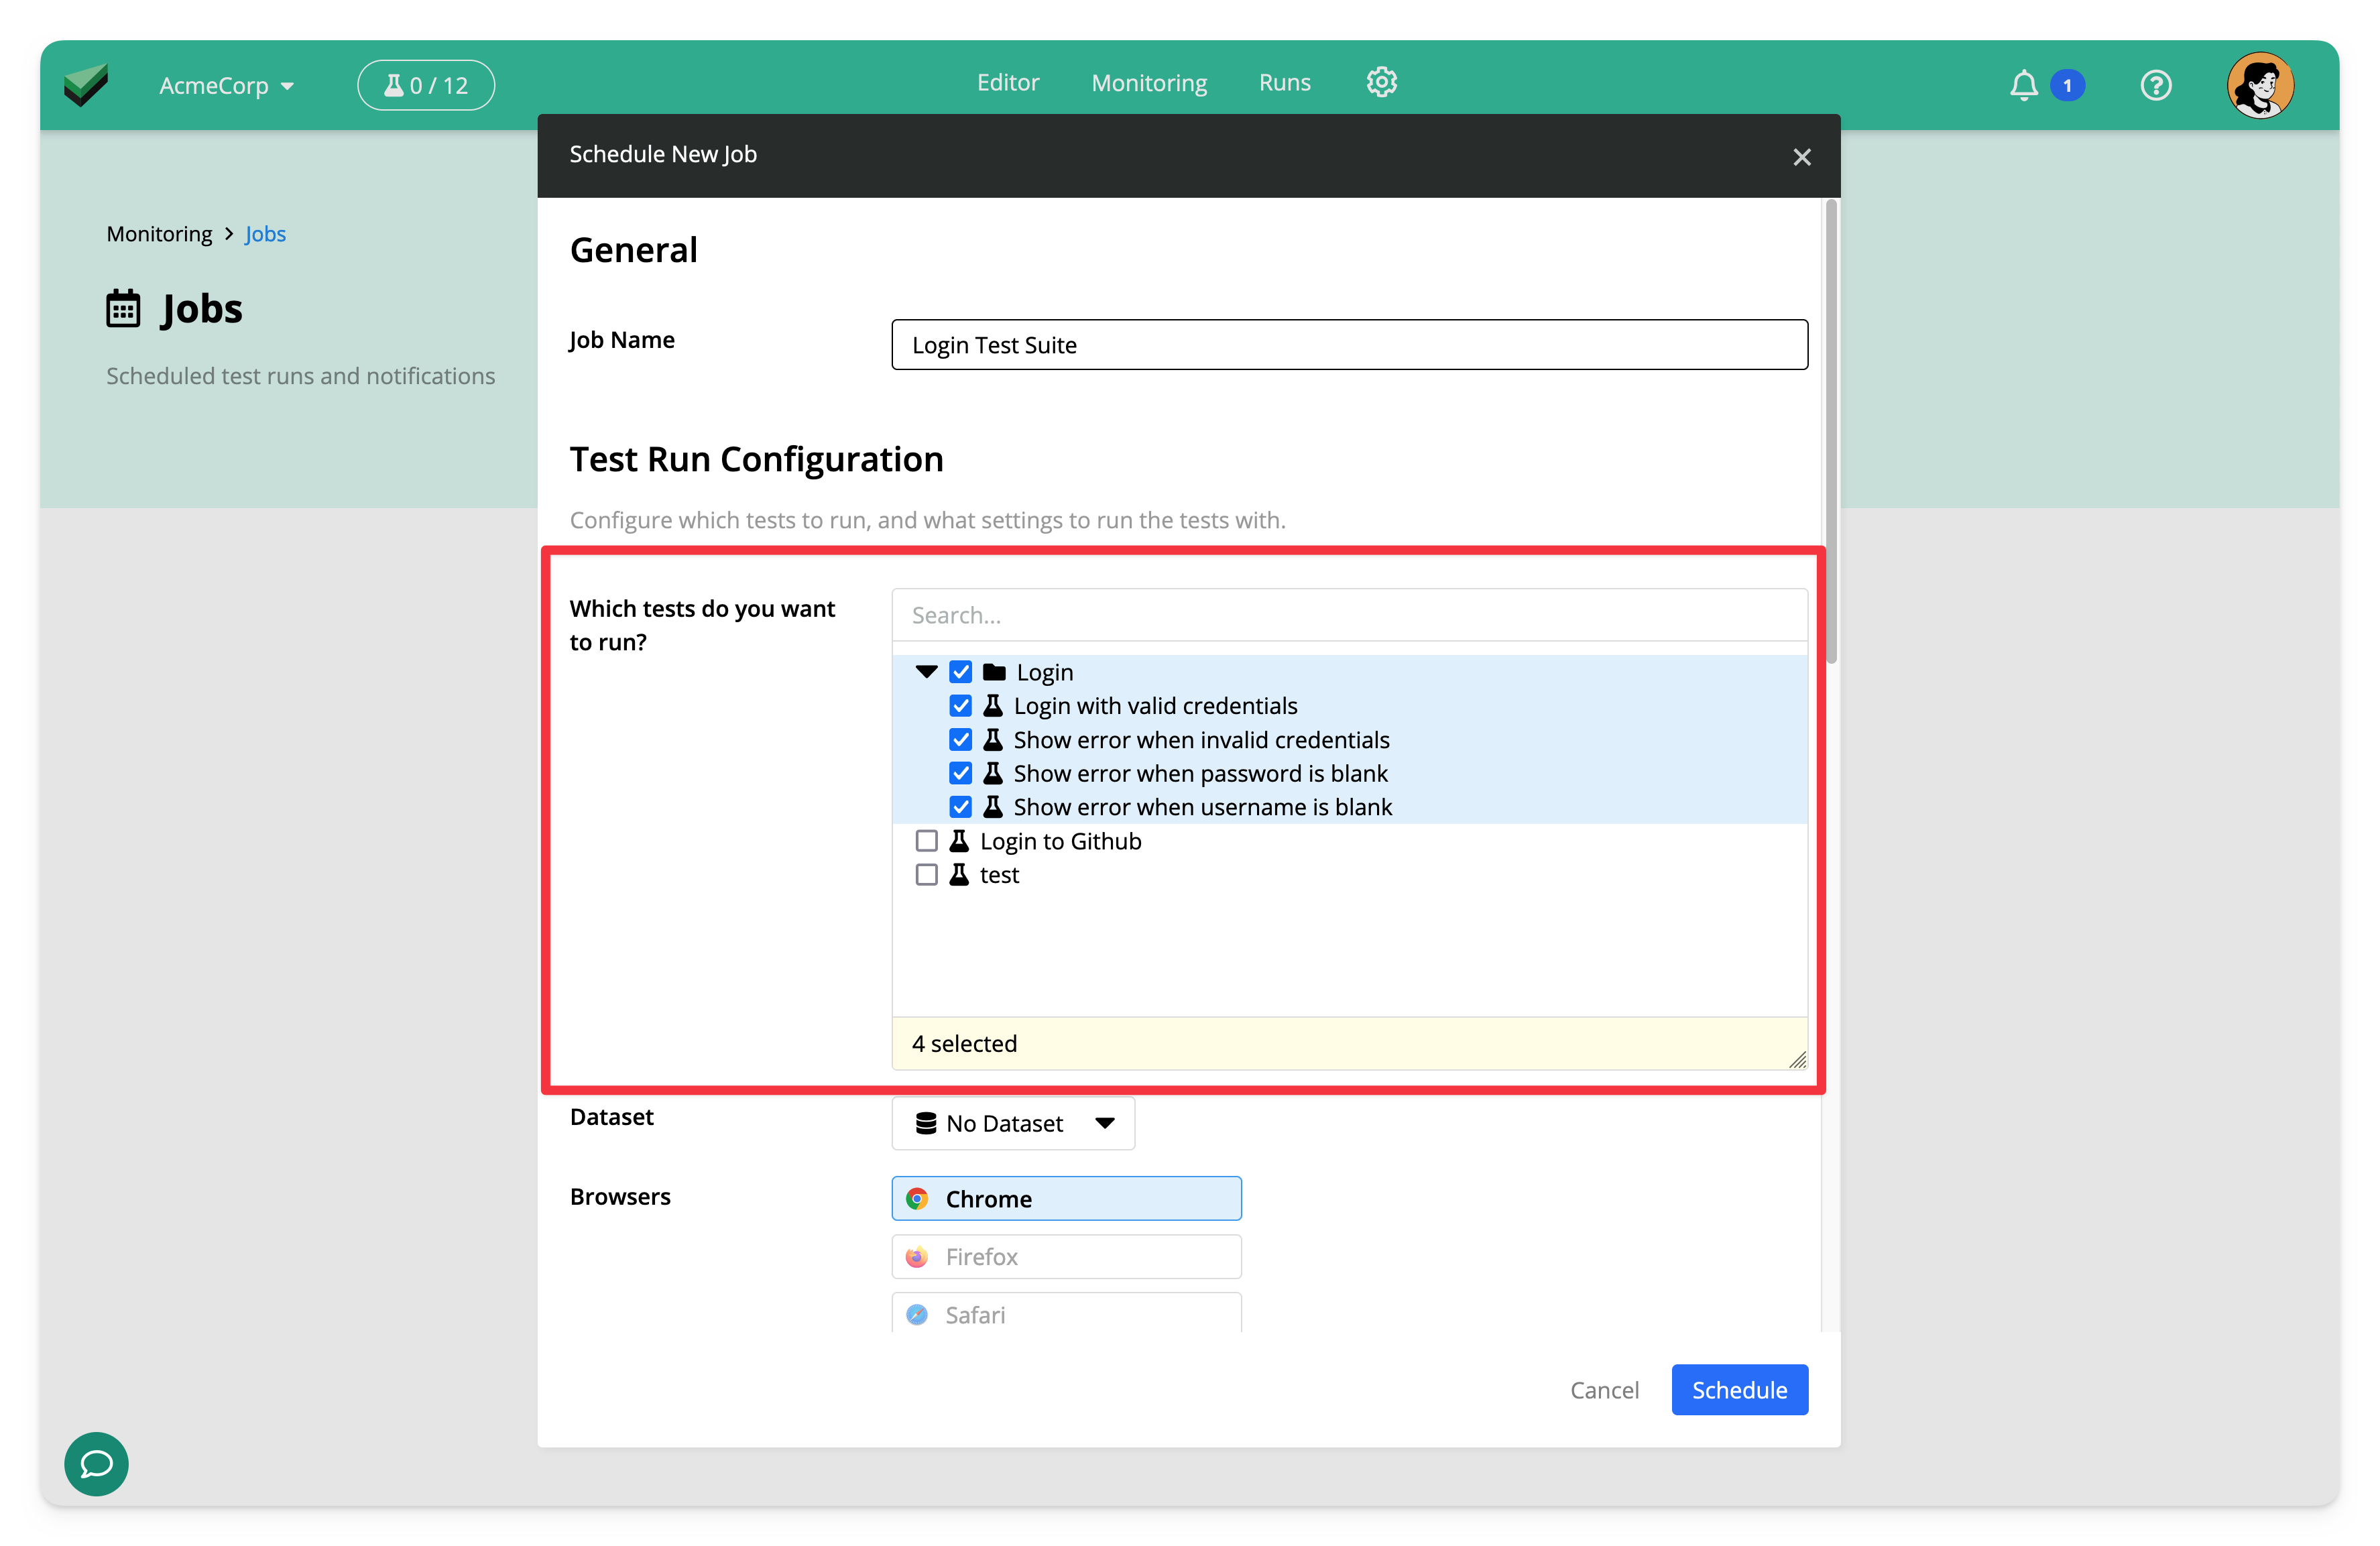
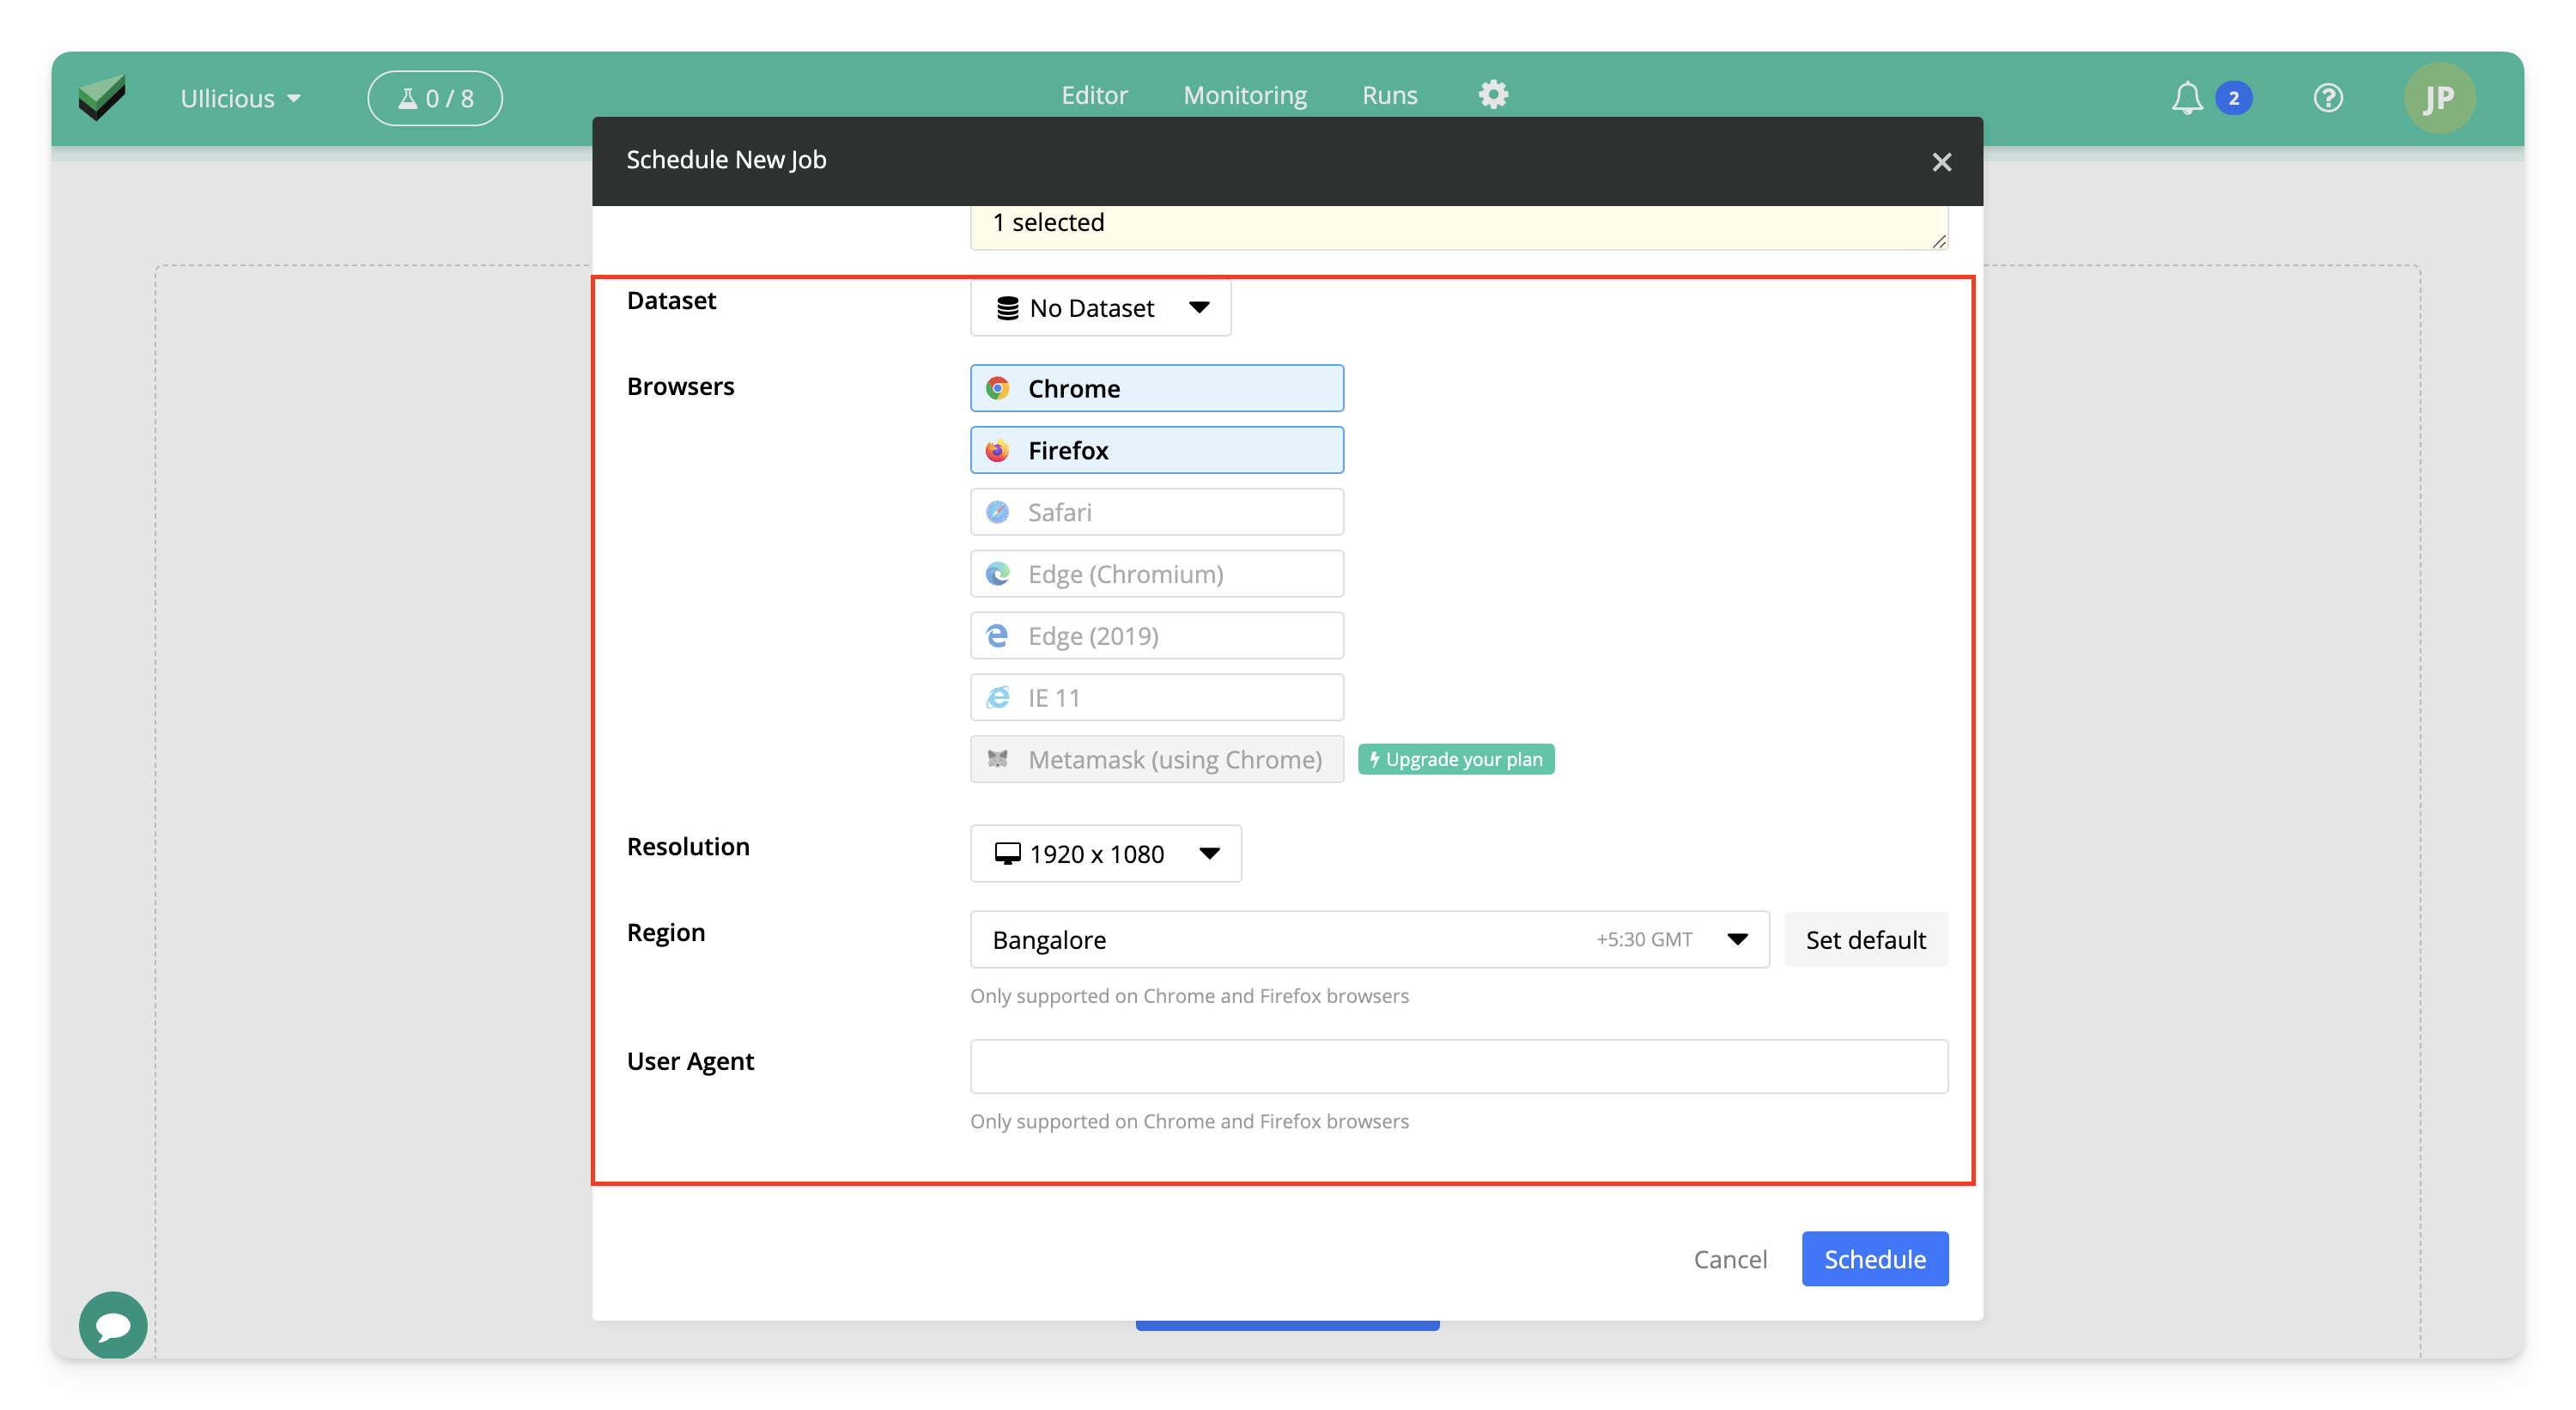
Then, choose the browsers, resolution, dataset, region, and user agent for running the tests. You may select more than one browser, and the job will run each test with each selected browser.
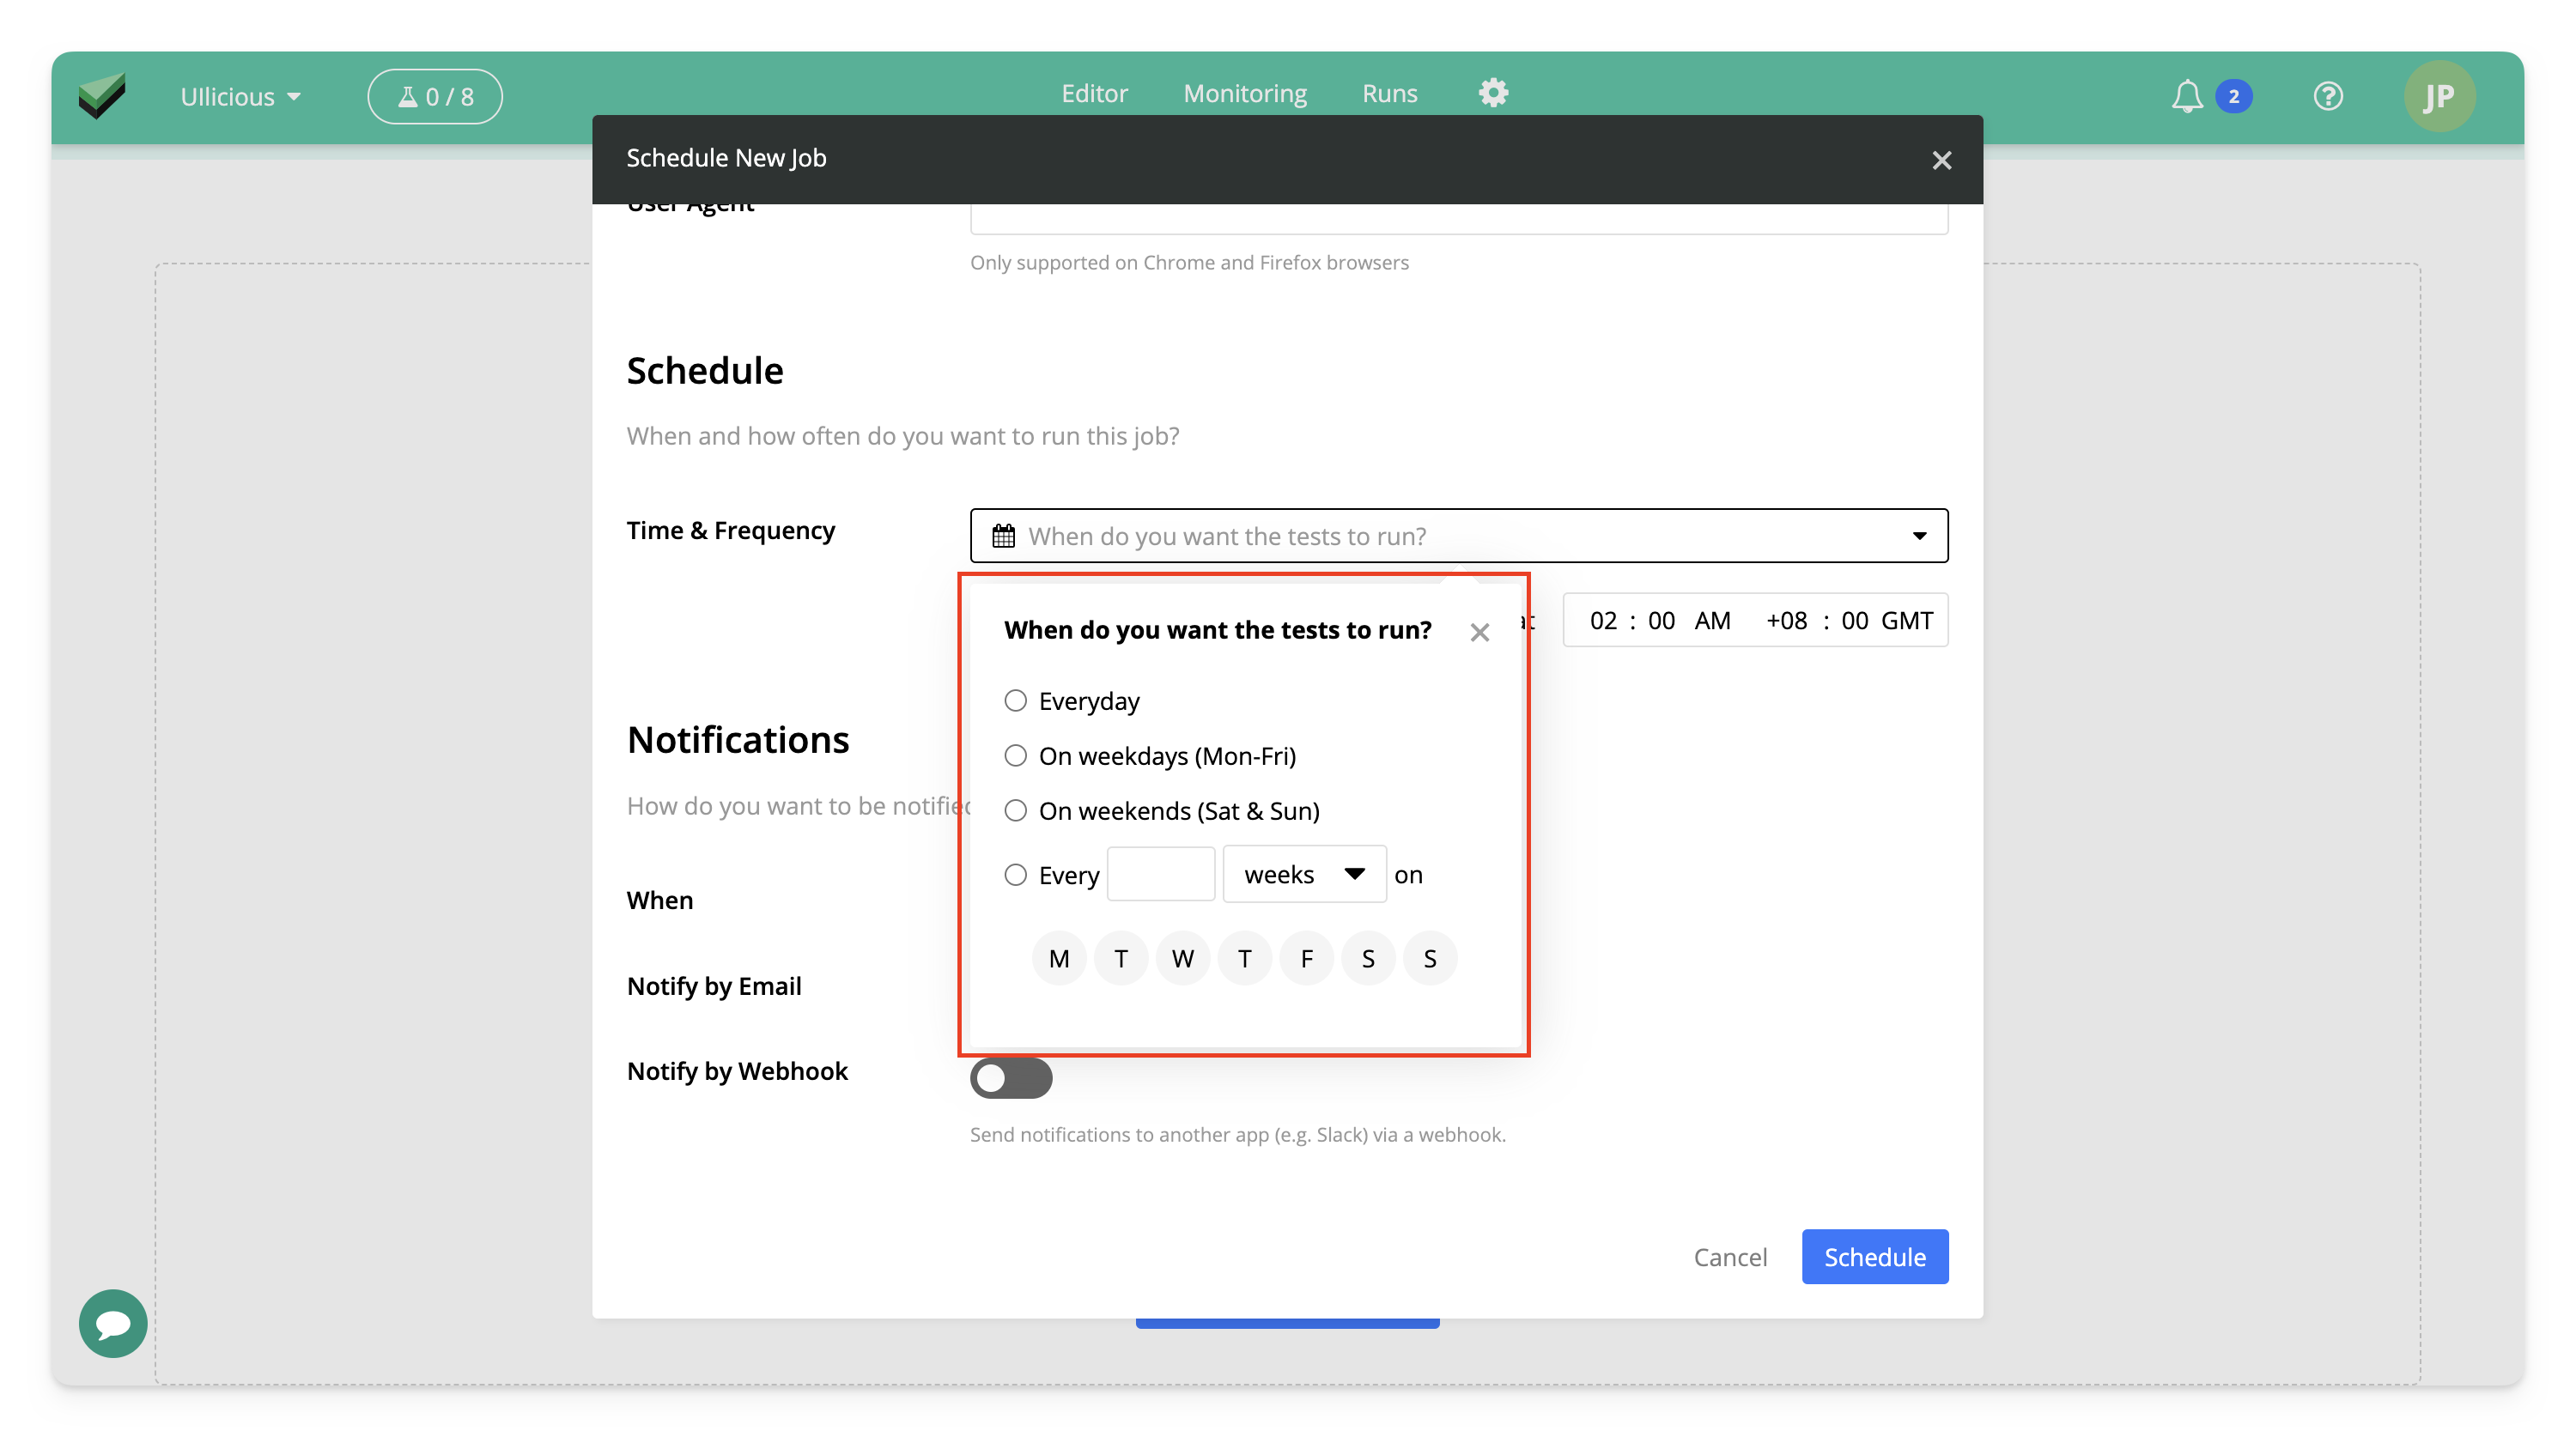
Finally, configure the schedule for running the job.

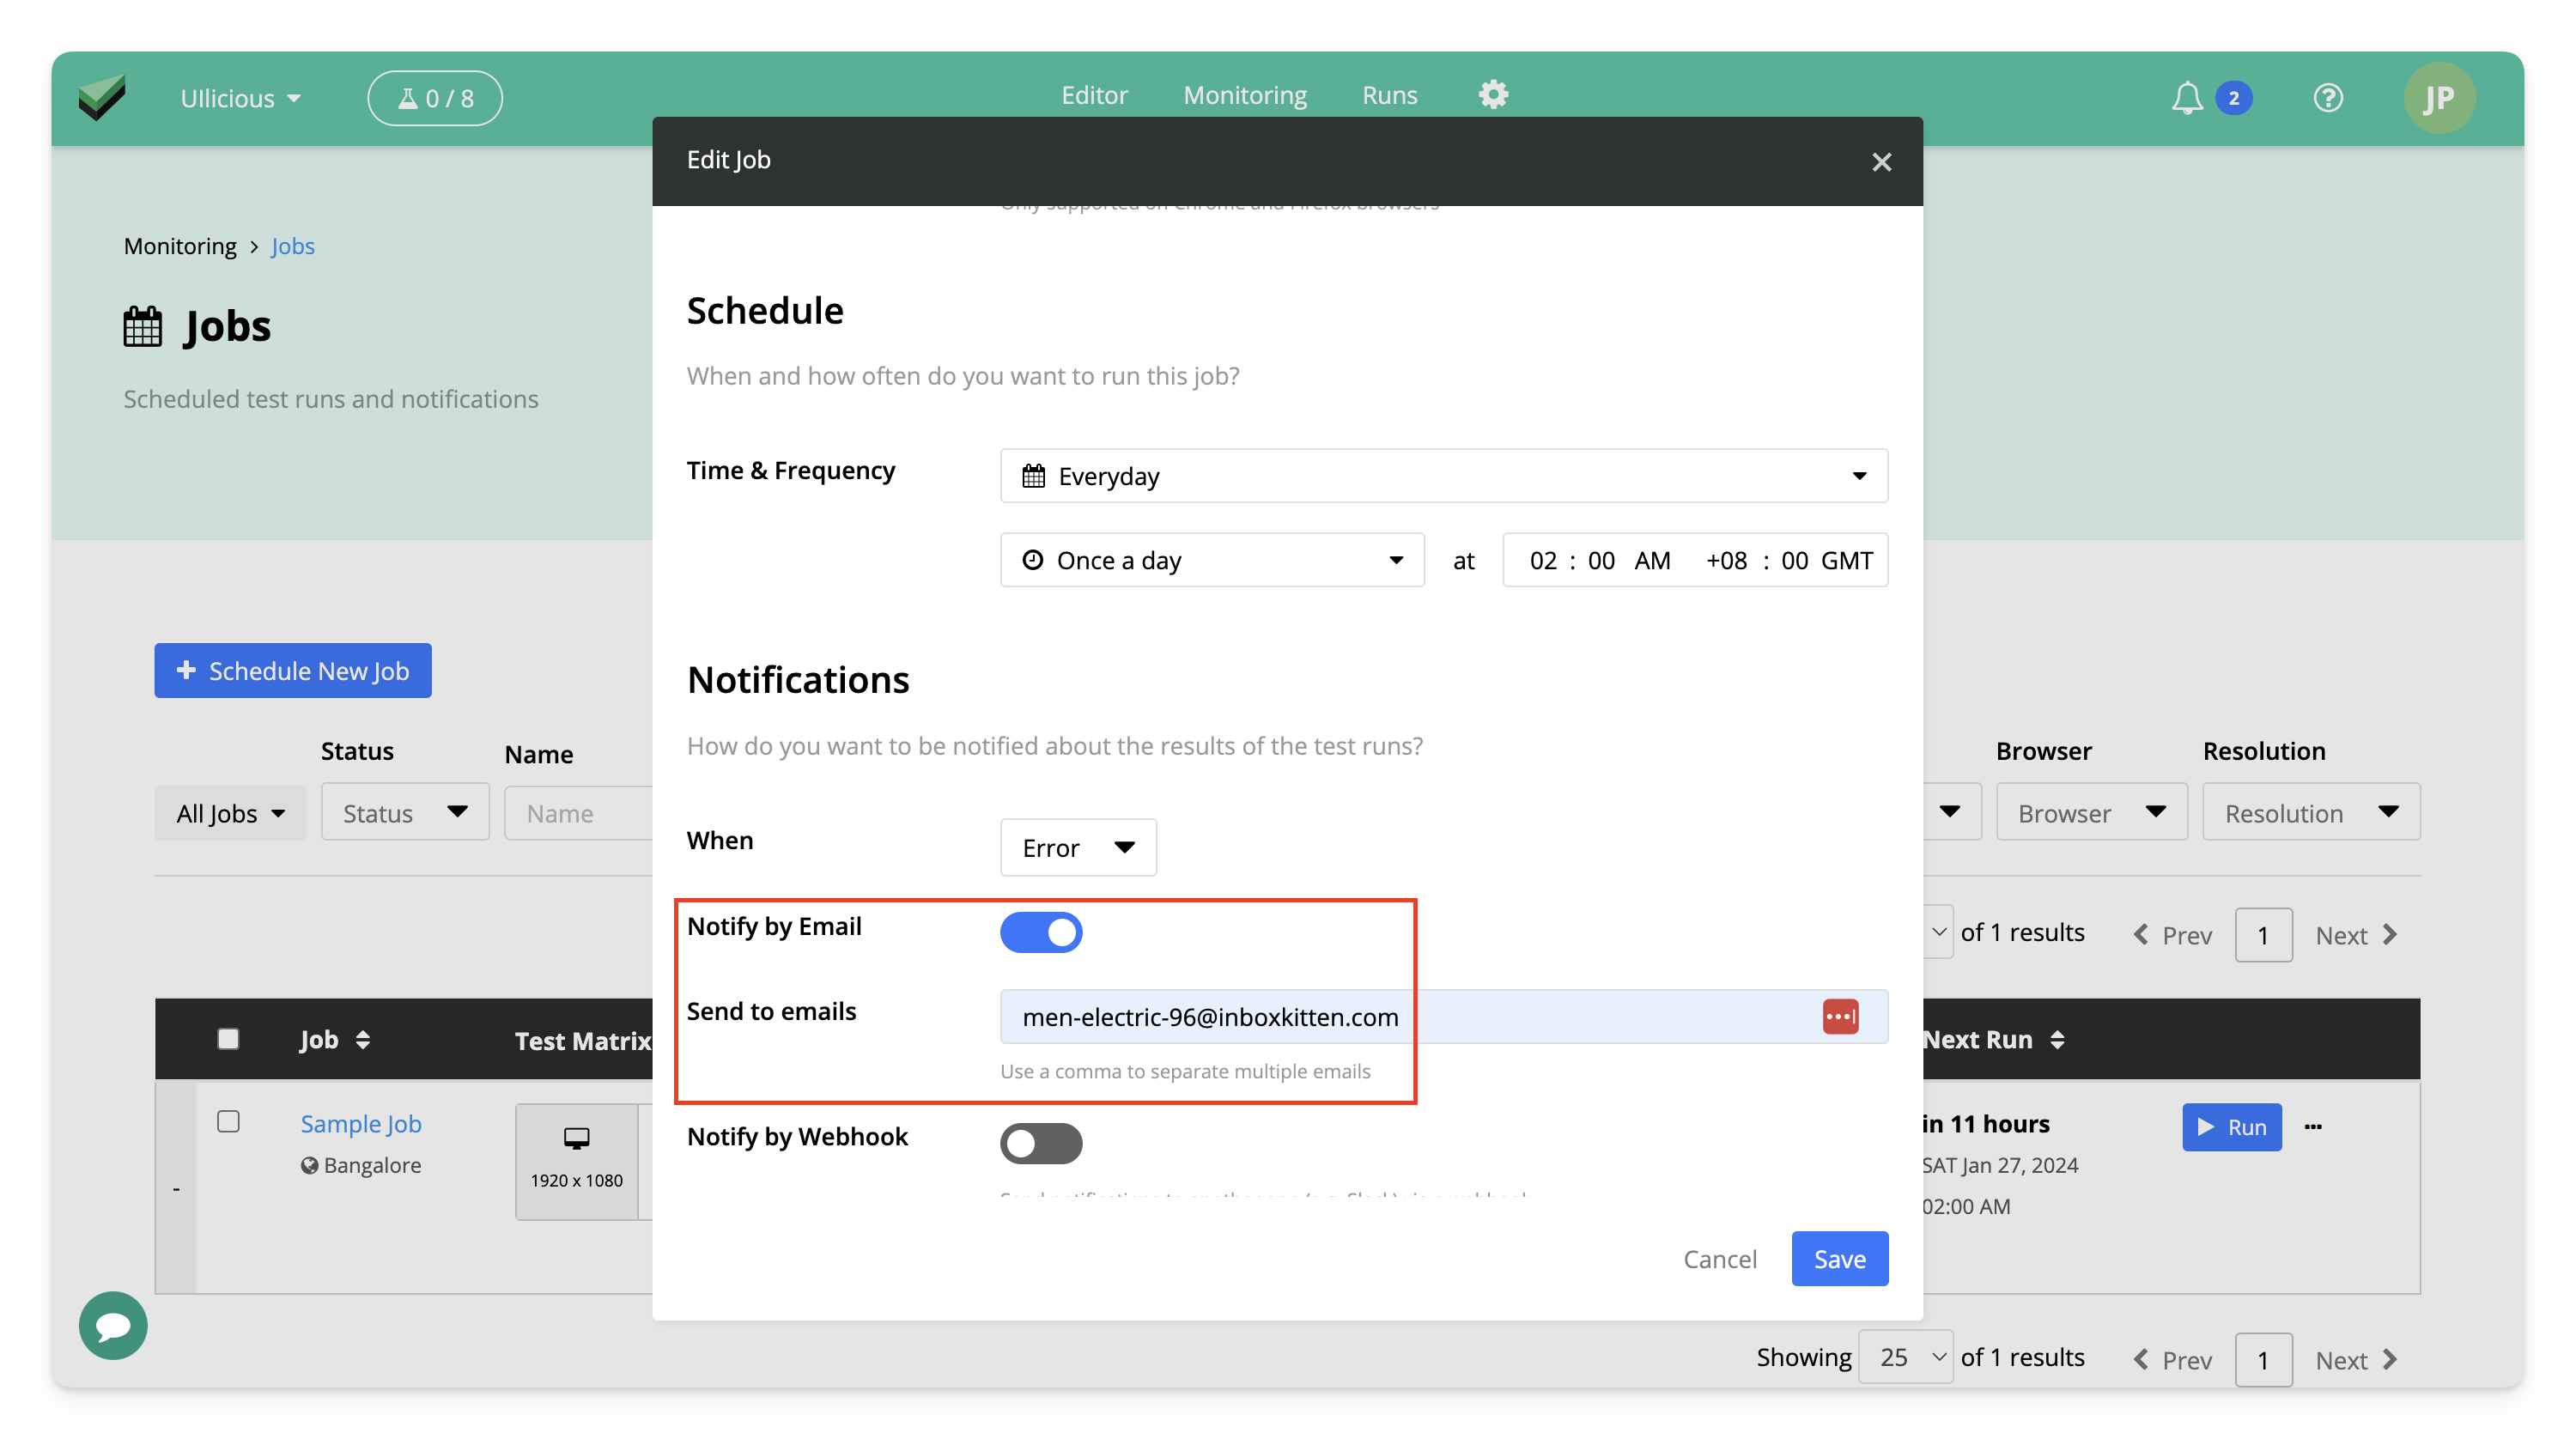
Optionally, you can setup notifications for the test outcomes. You can select whether you want notifications for all test outcomes When: "Always" or only when tests fails When: "Error". You can setup email notifications and notifications for chat applications via webhooks. Check out these guides for setting up notifications for specific applications:
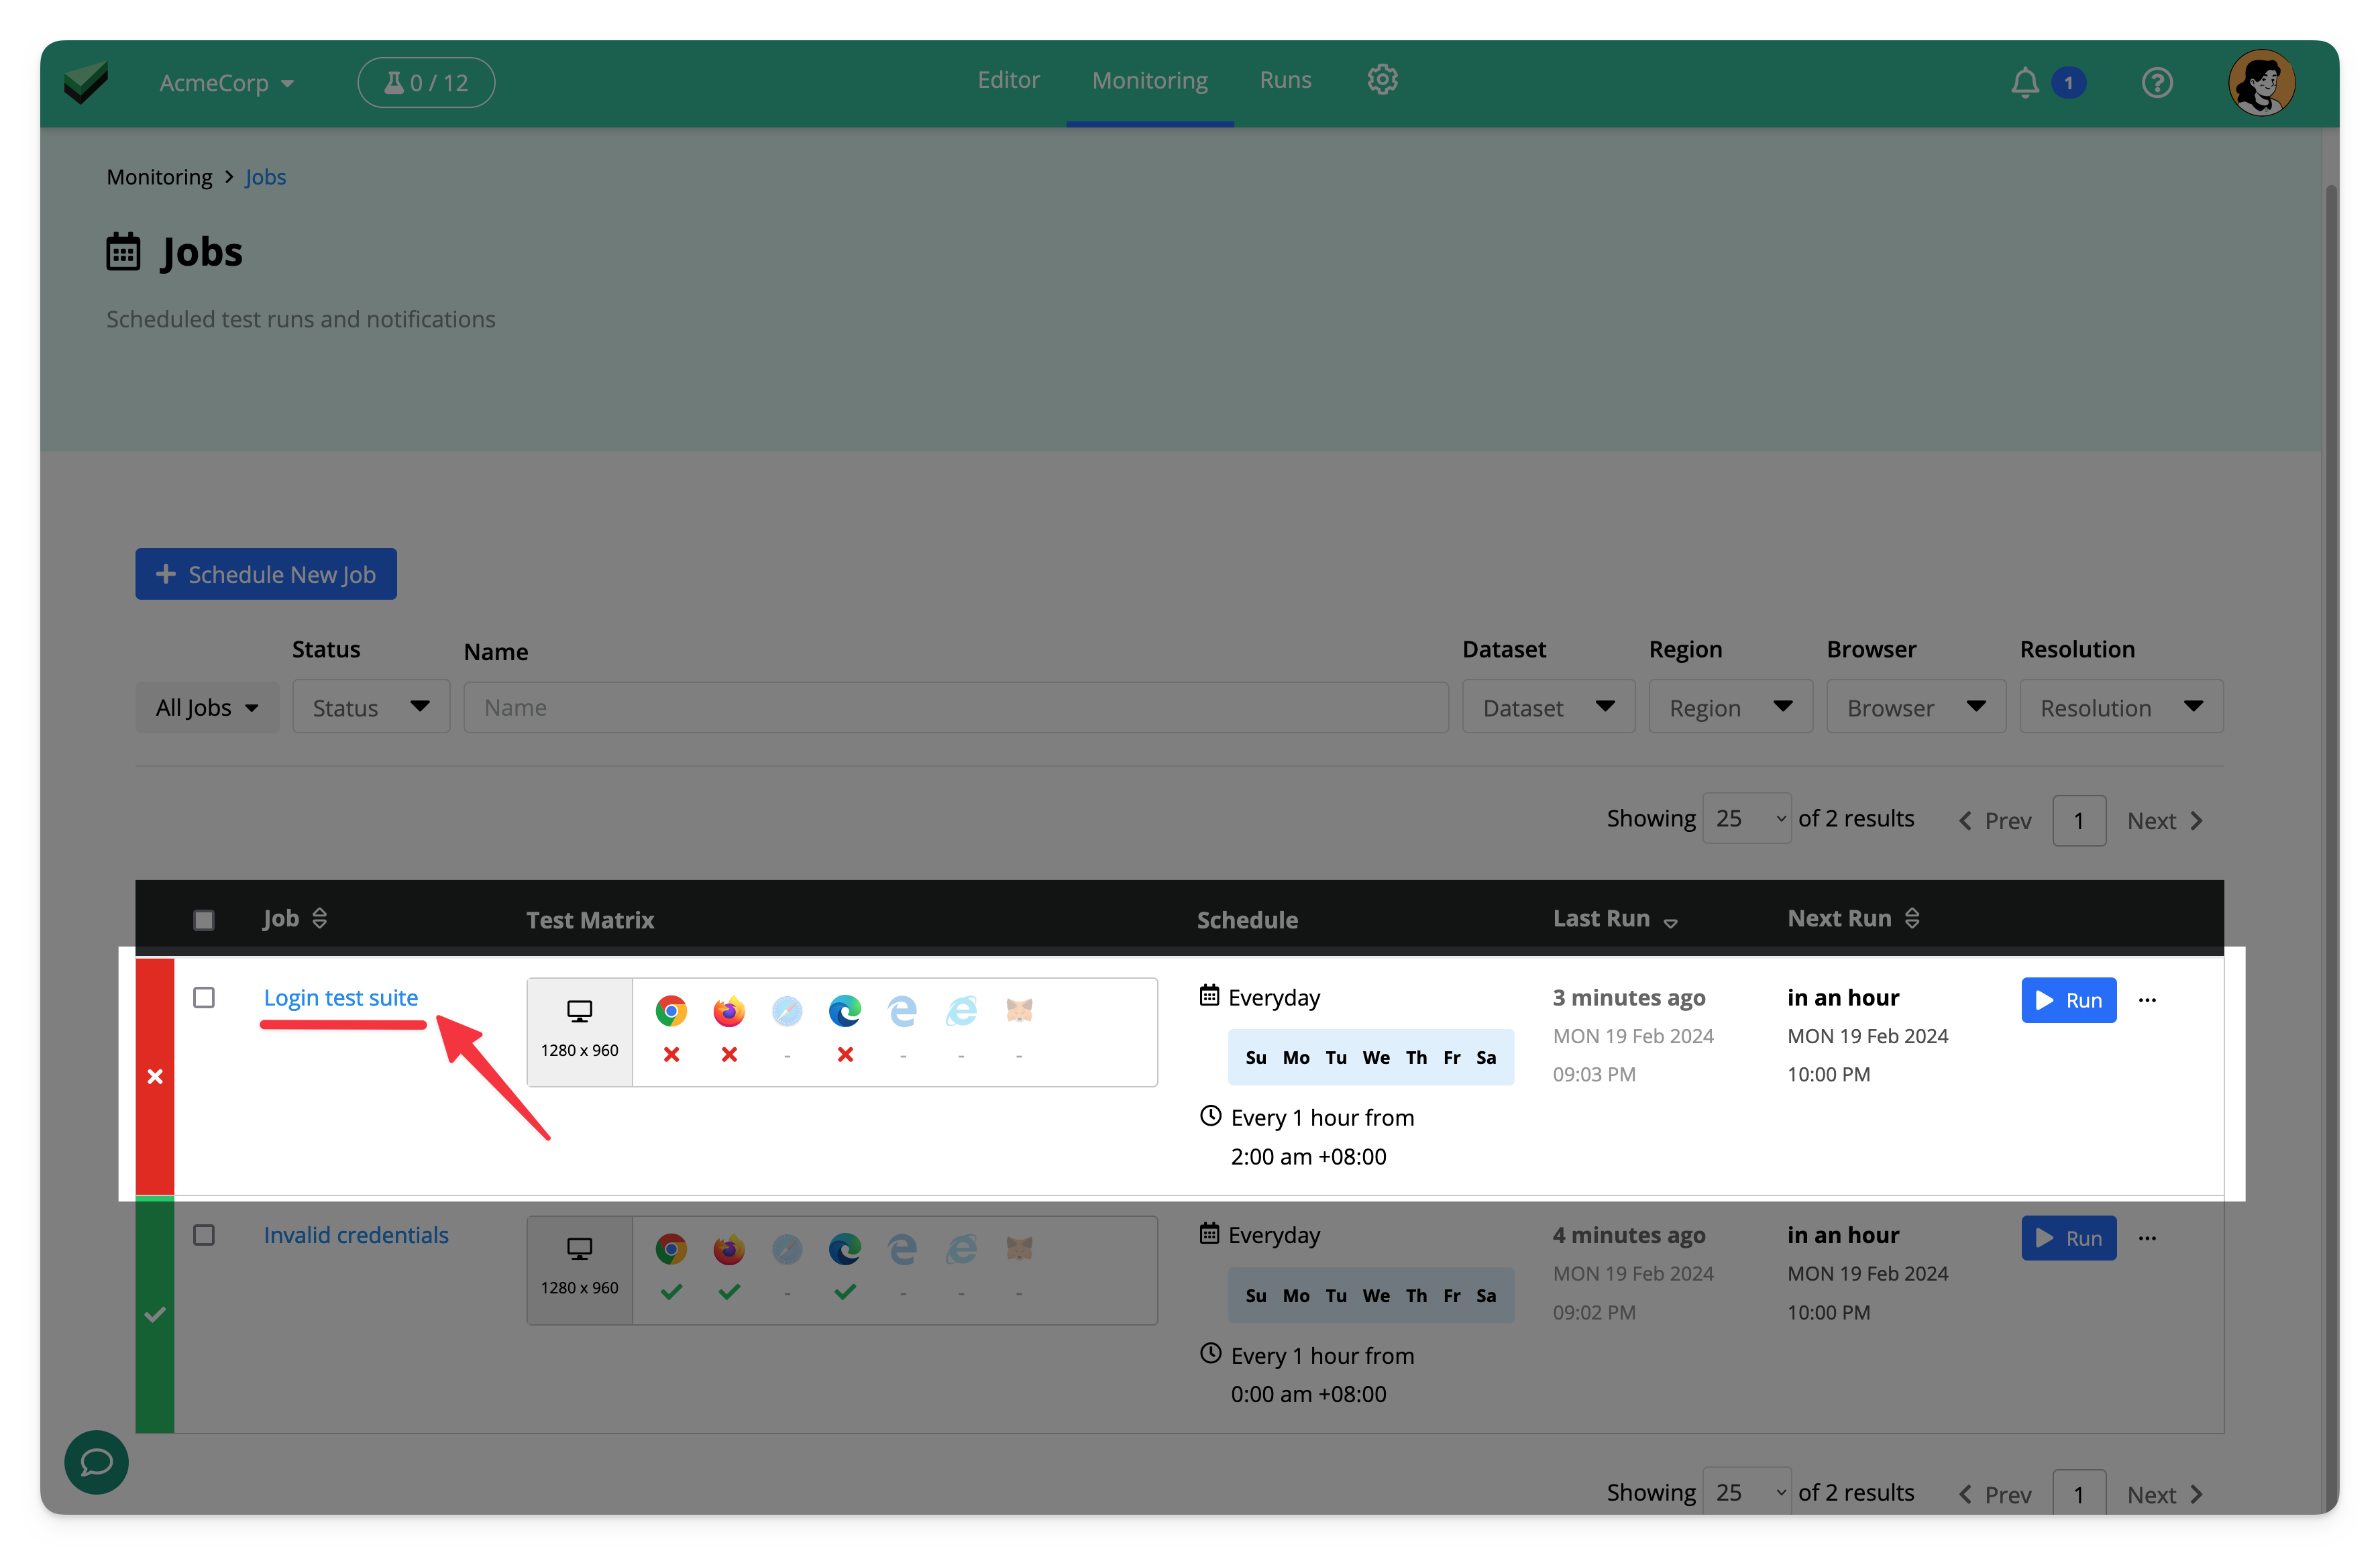
Once you save the job, you can view its status from the Monitoring View, and click on the name of the job to view its past runs and manage the job.
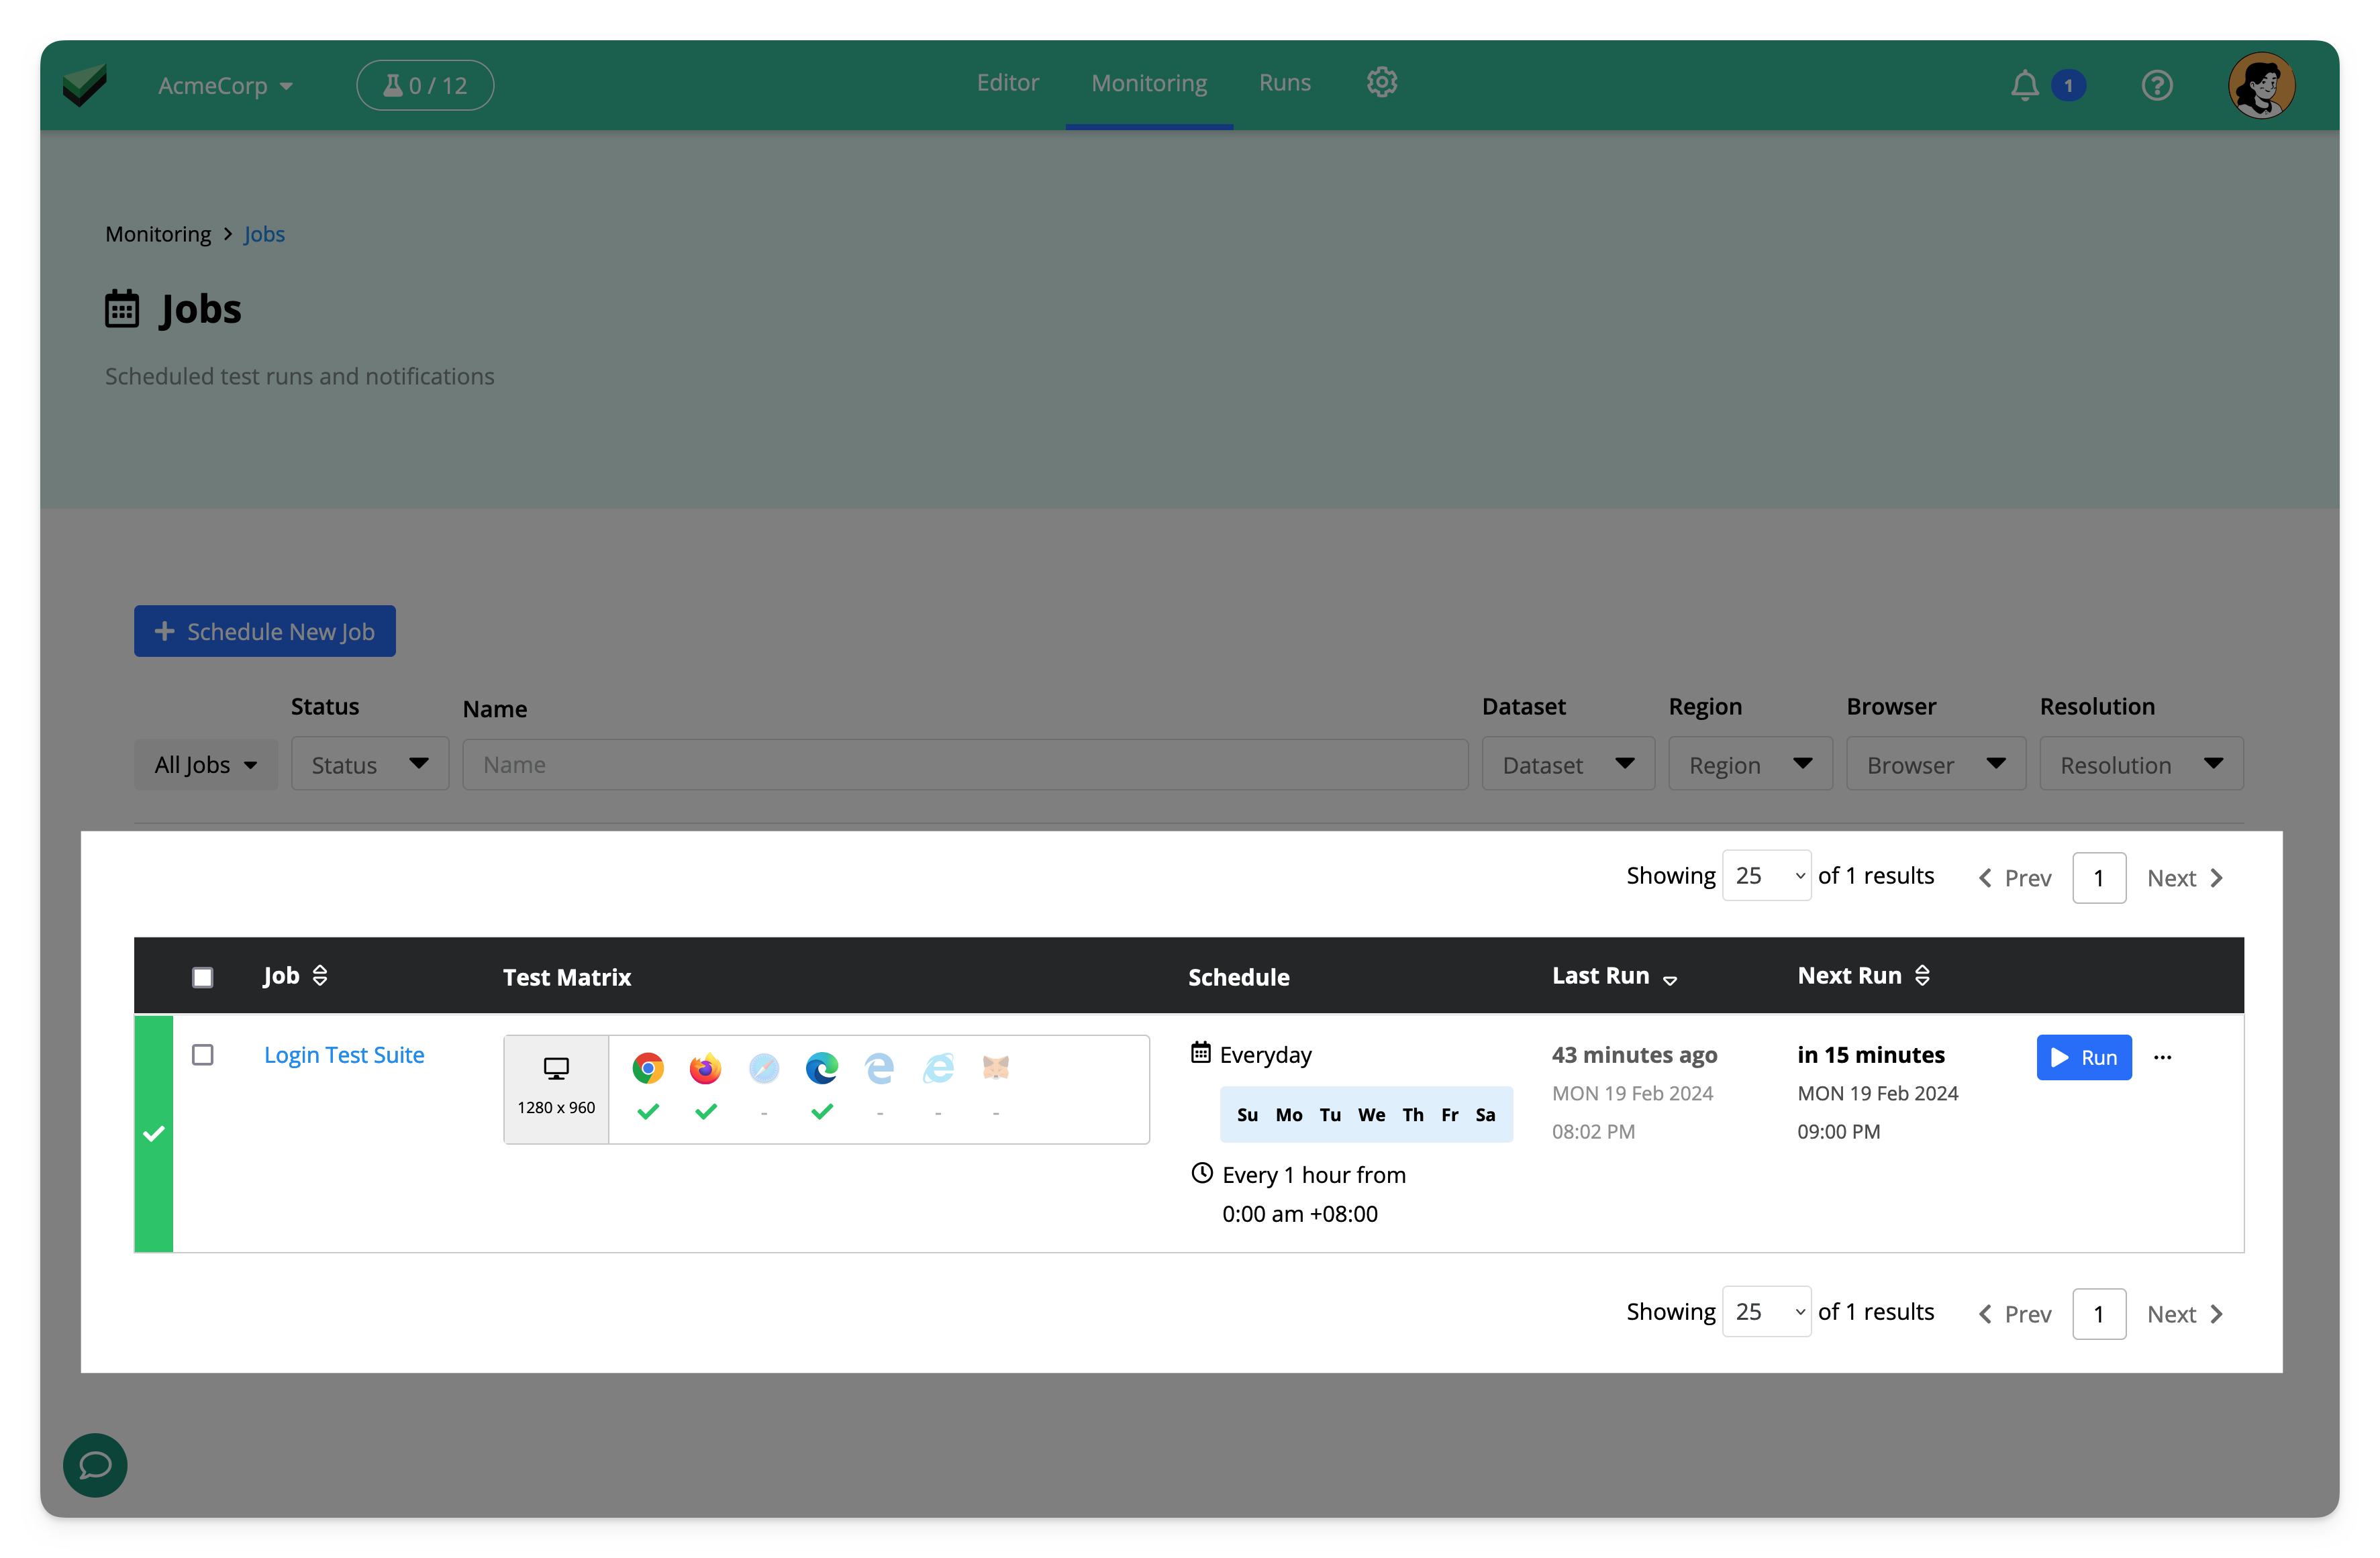
The Monitoring View
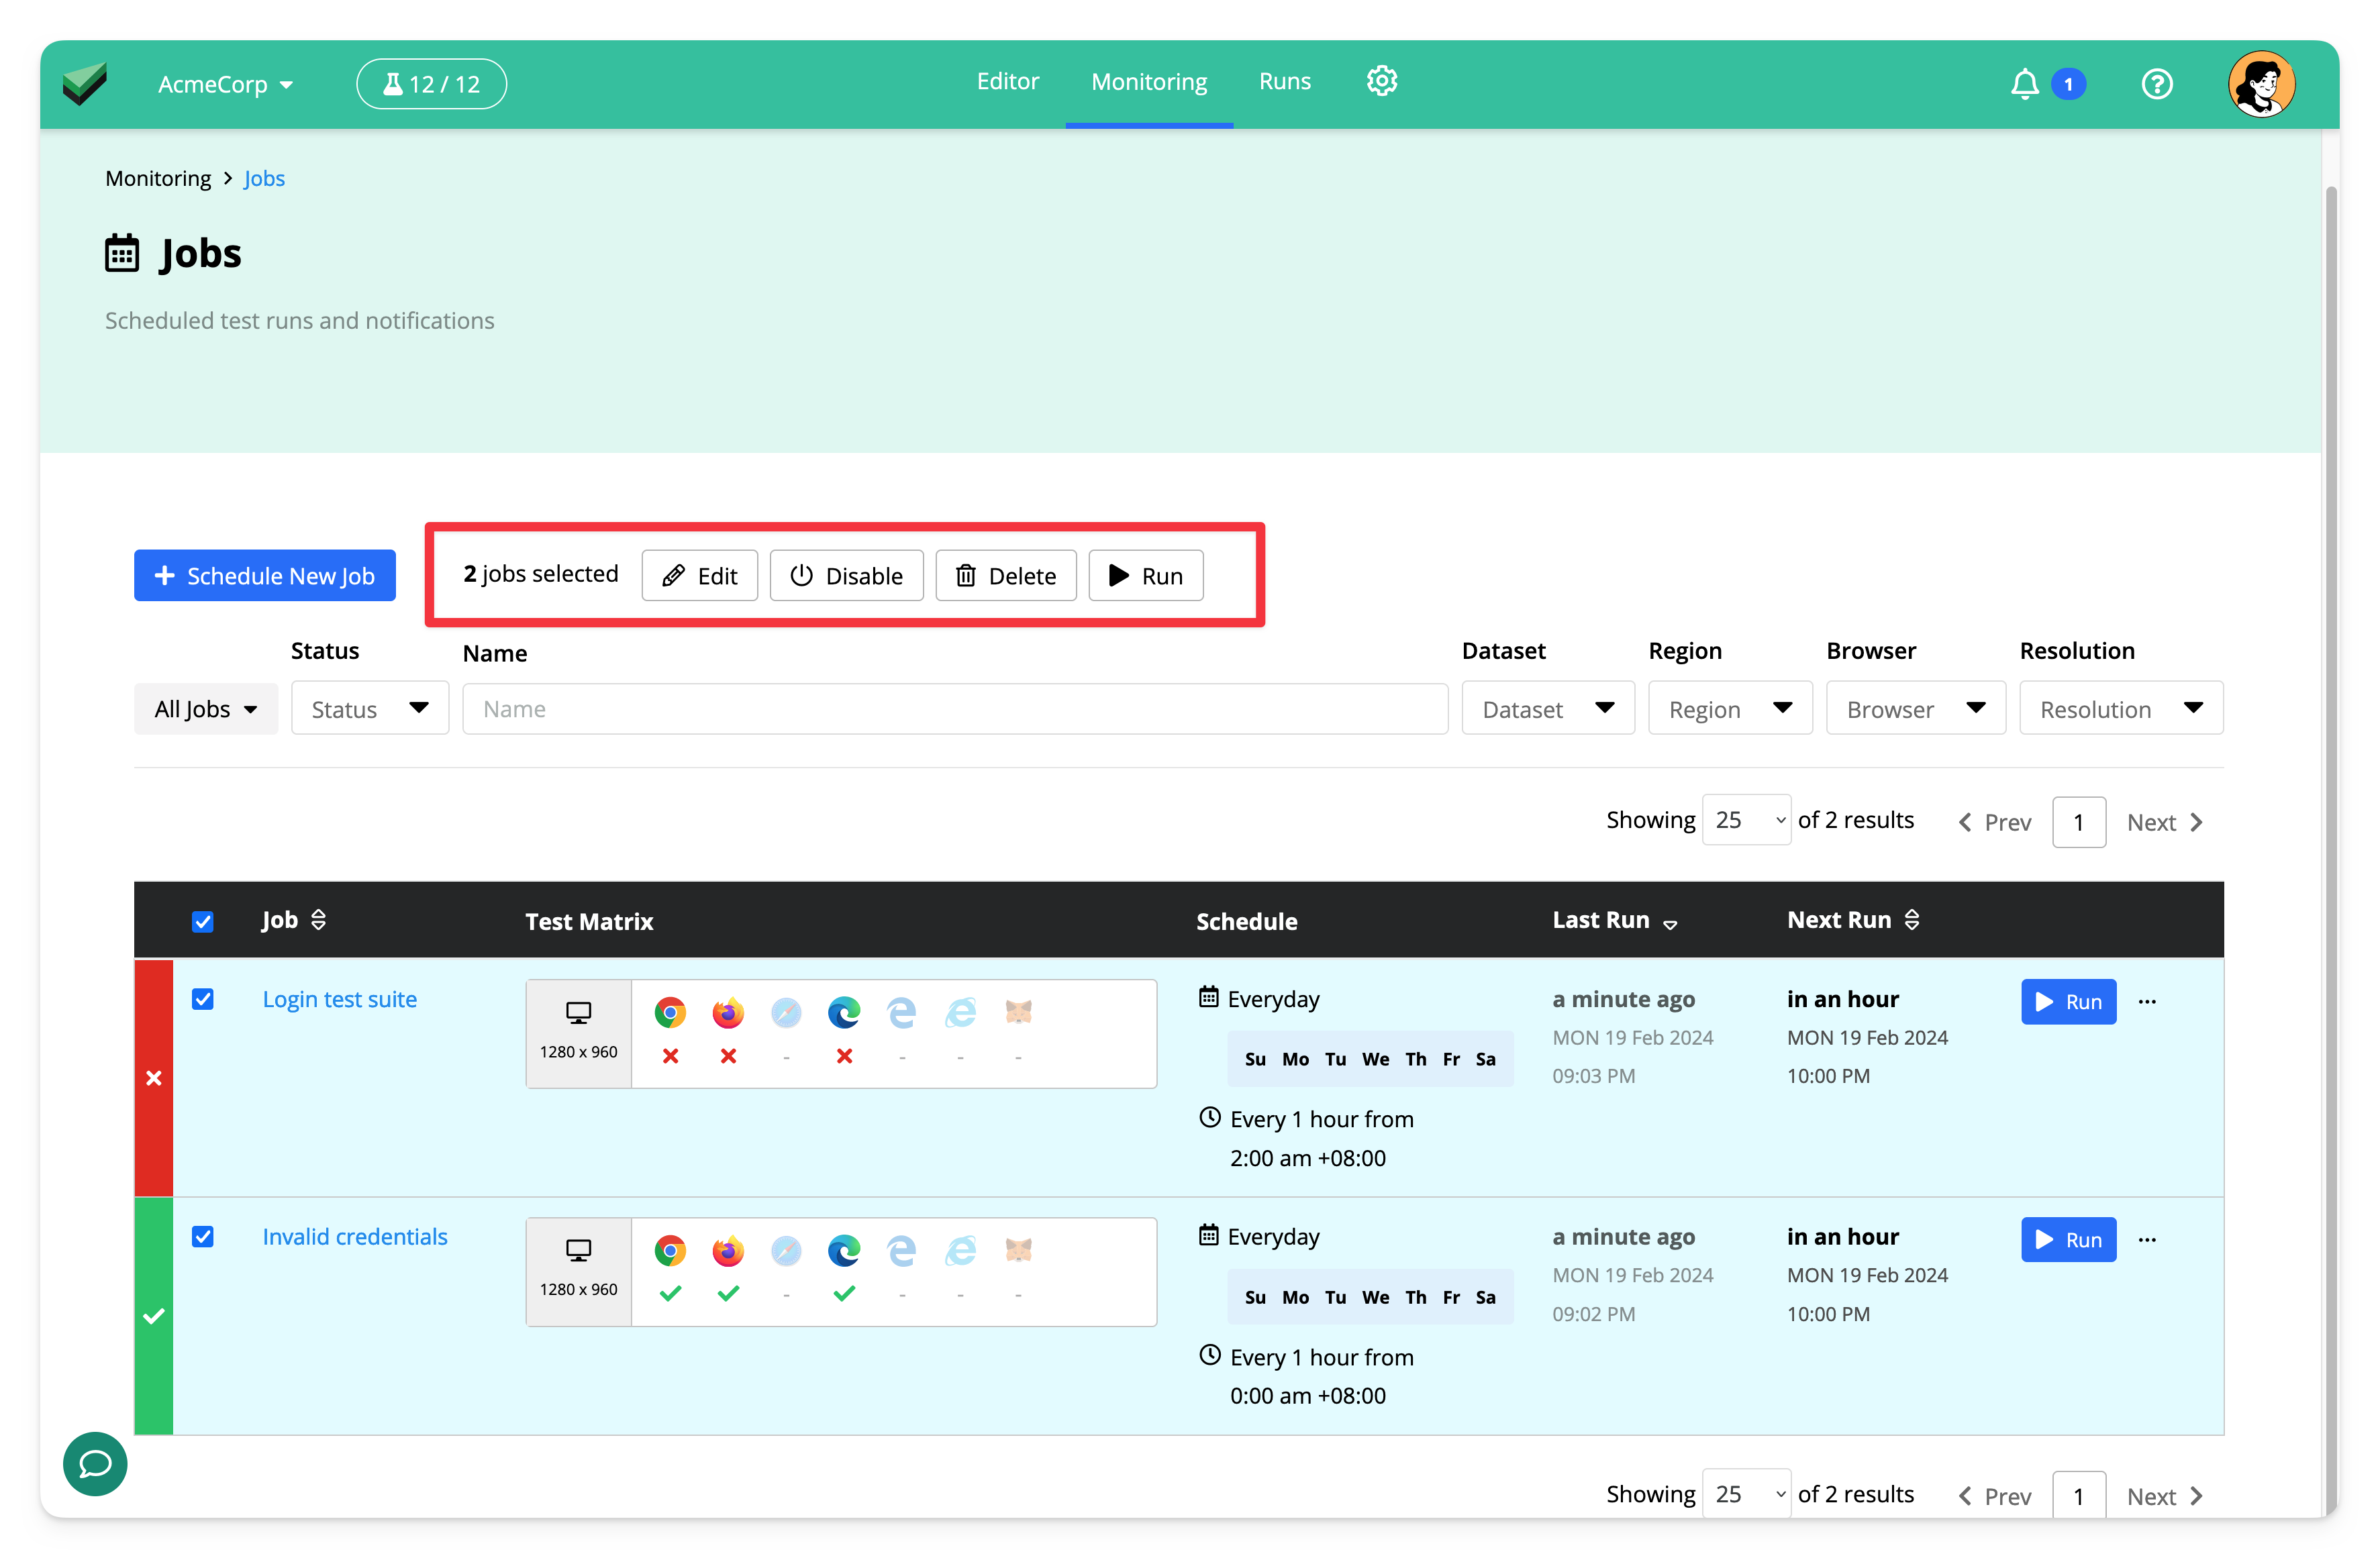
The Monitoring View shows you a summary of all jobs and their most recent status.
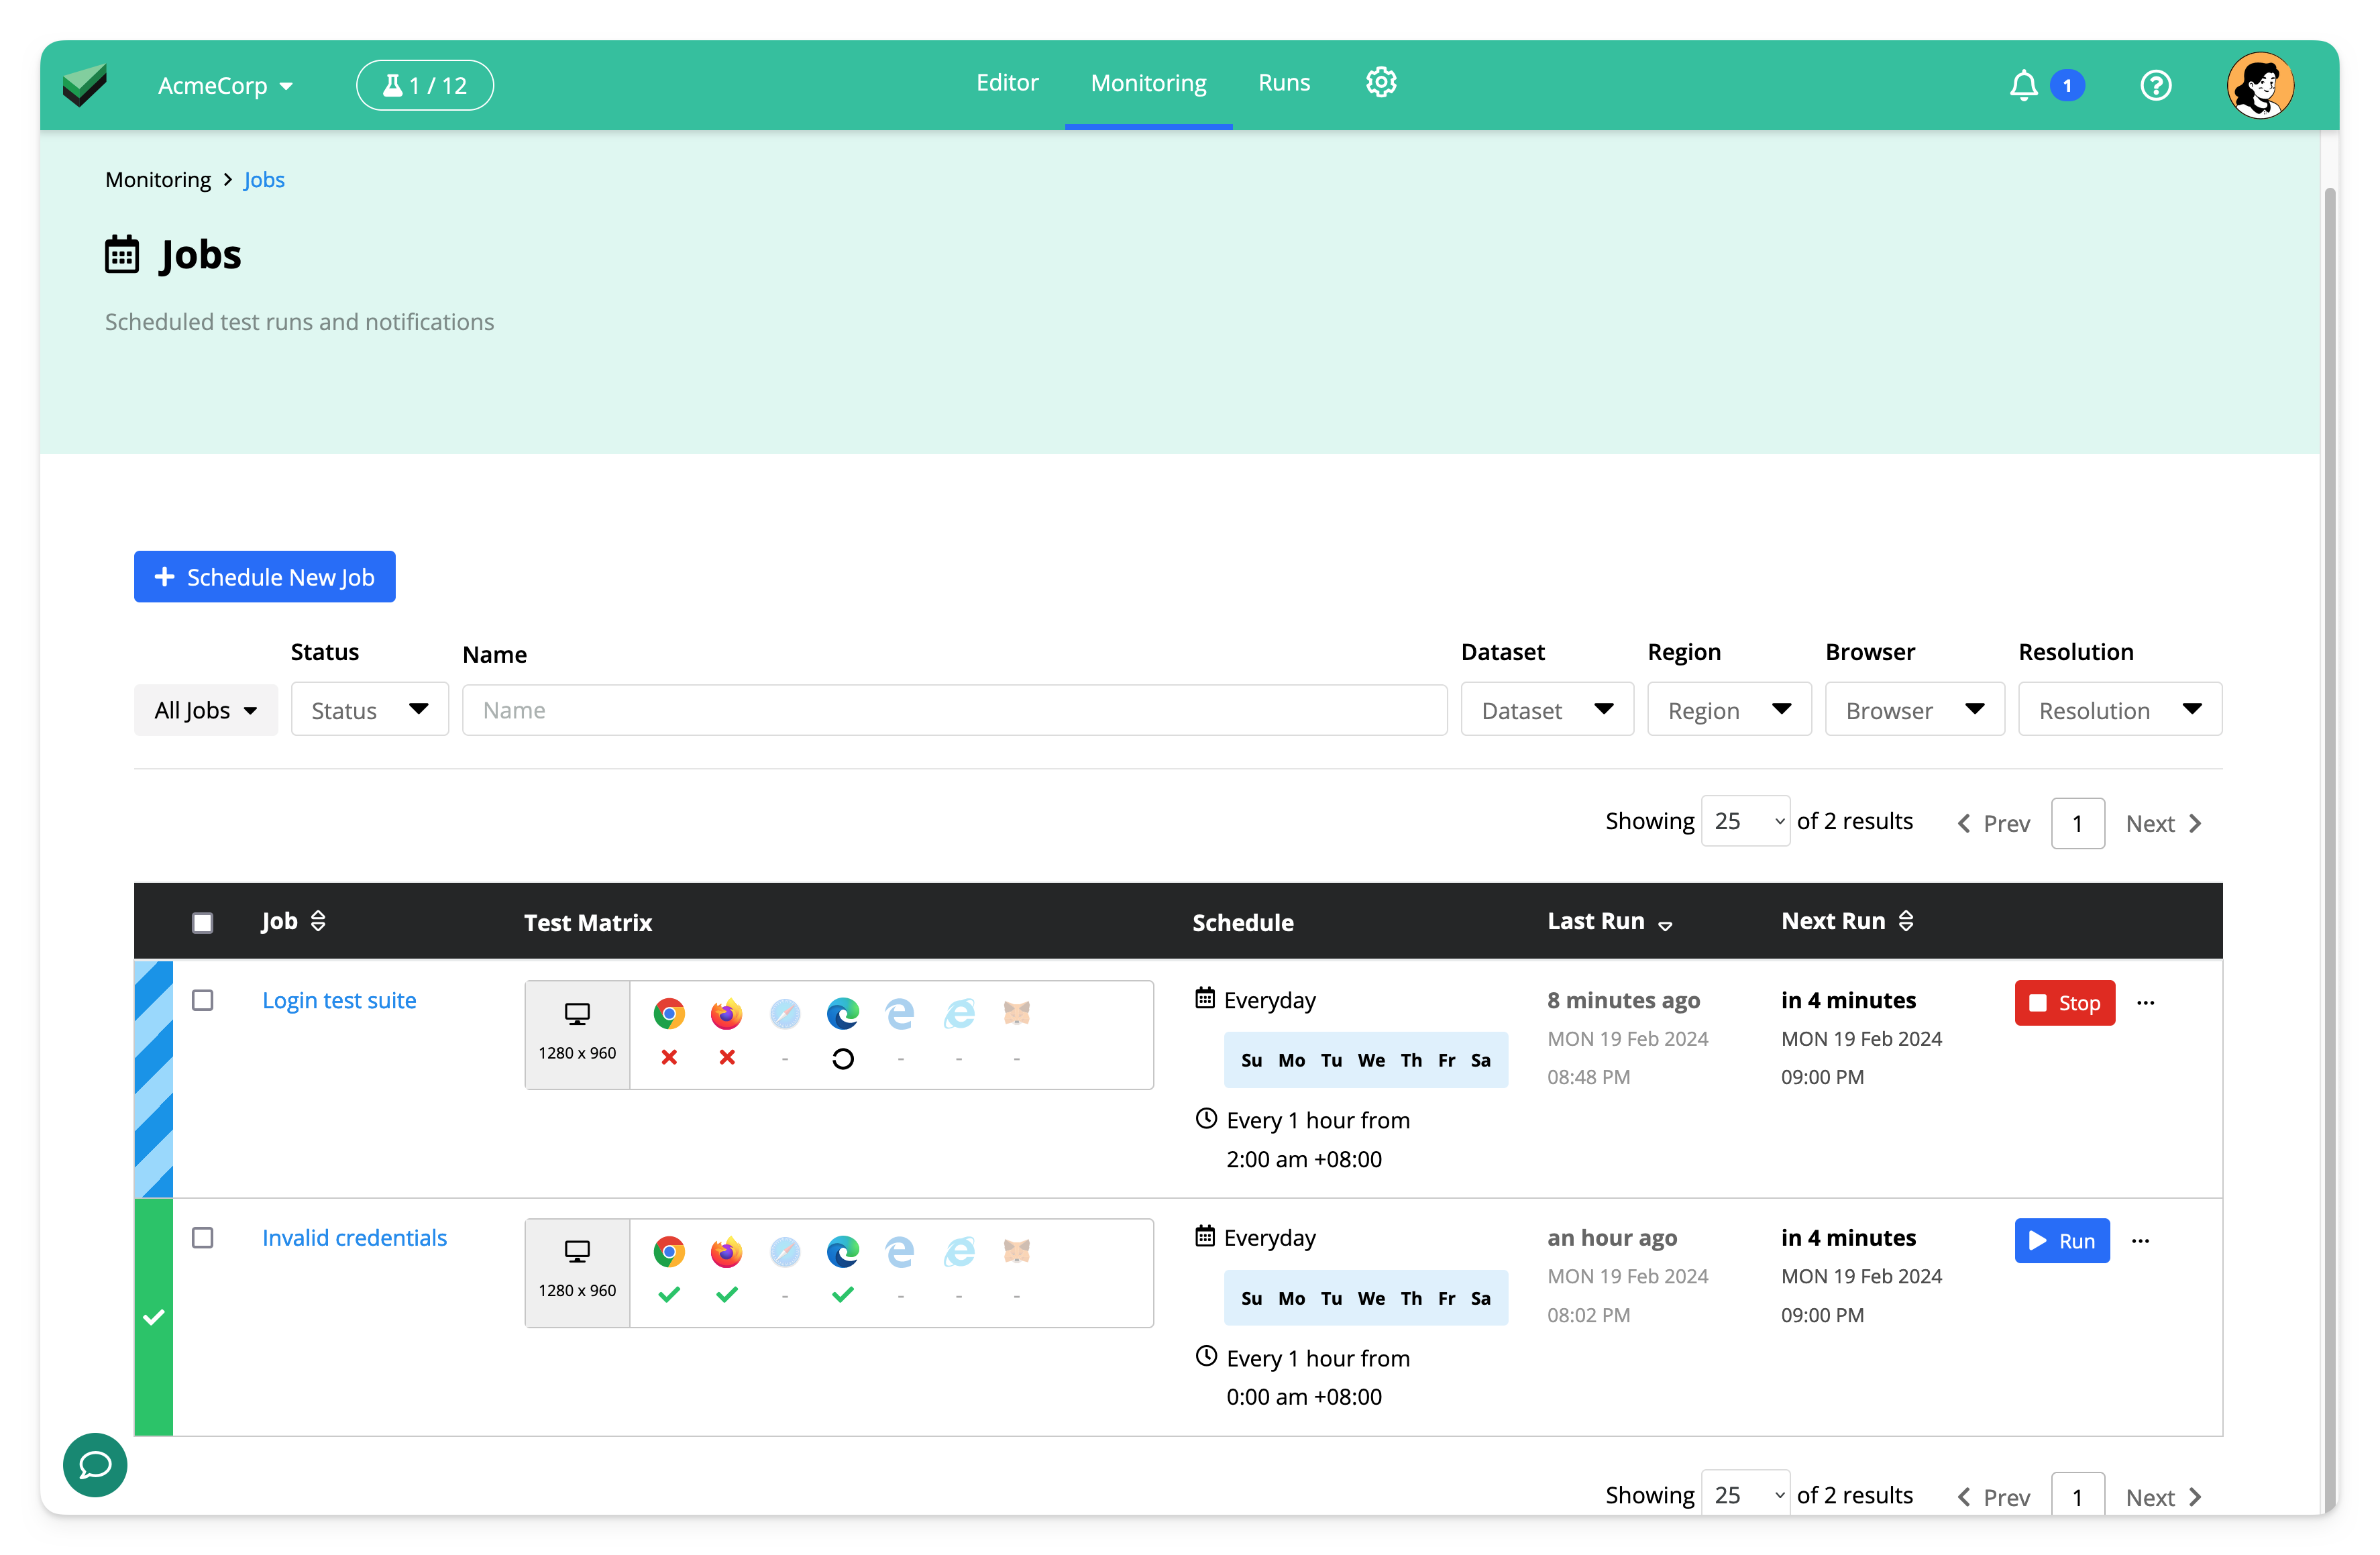
You can also select multiple jobs to bulk edit their run settings, schedule, and notifications.
Viewing Past Runs
You may view past runs for a job by clicking on the name of the job from the Monitoring View.
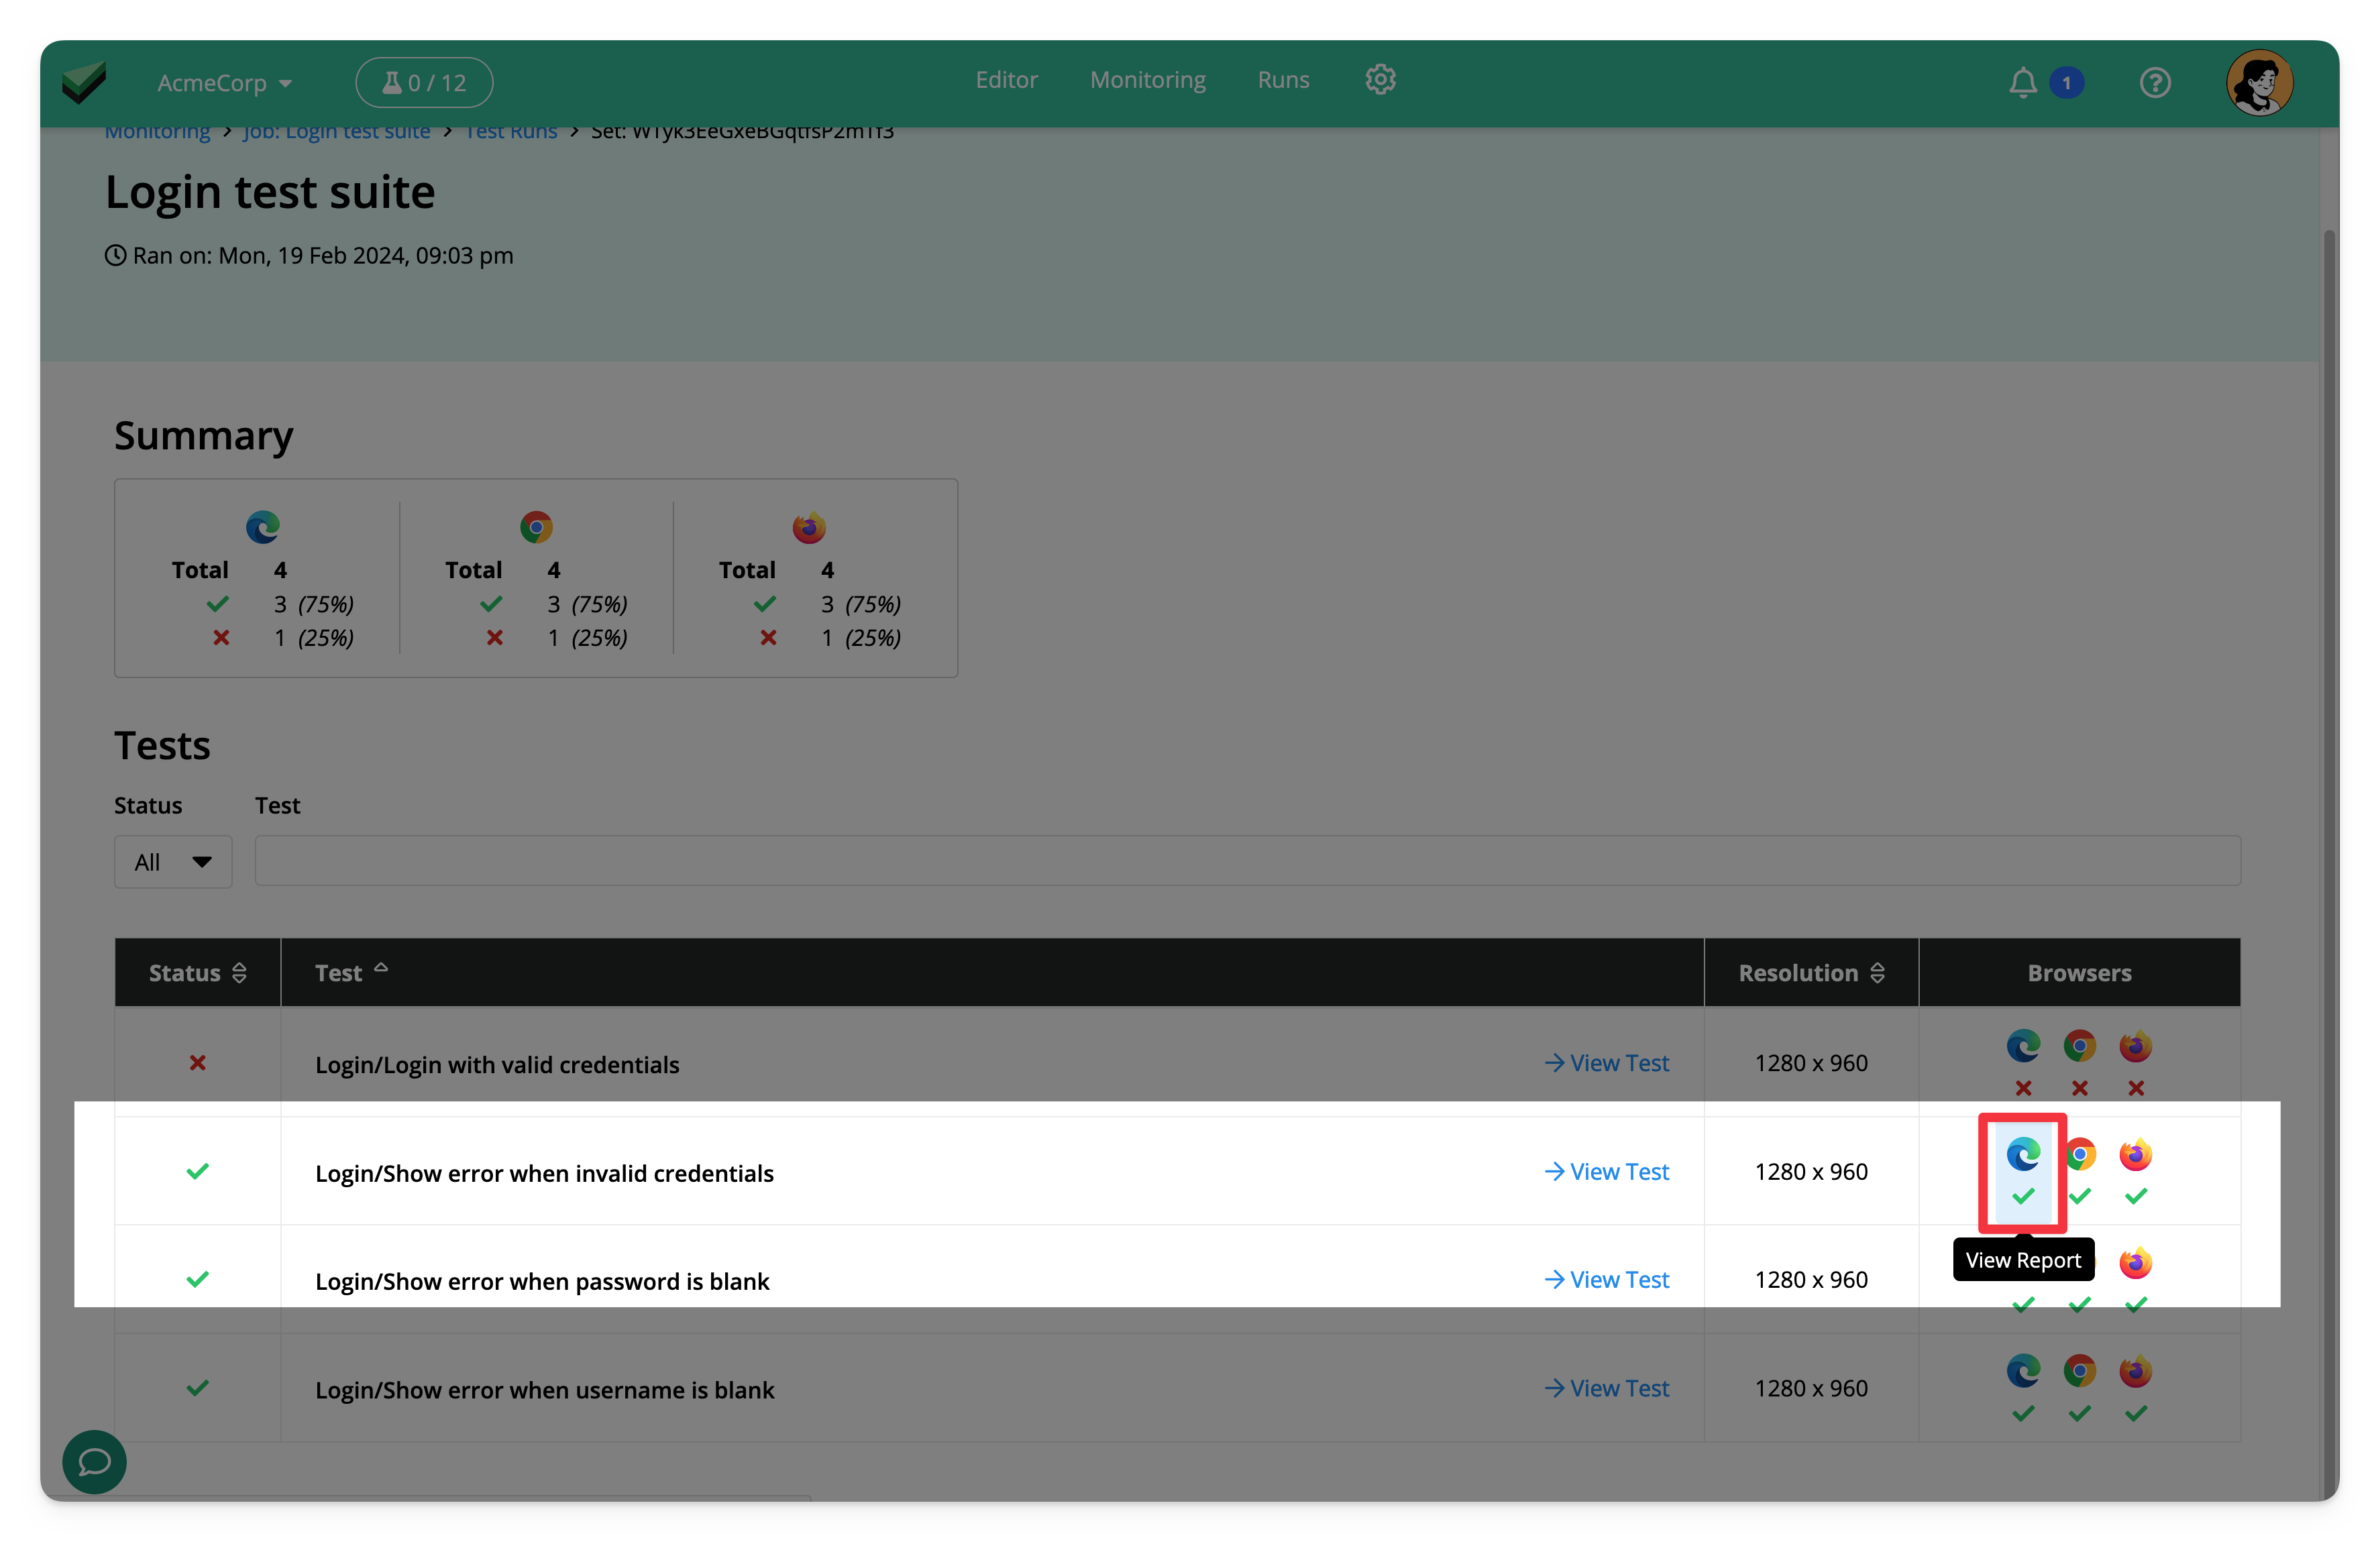
The past runs page will show a summary of past test runs, indicating number of passing and failing tests by the browsers.
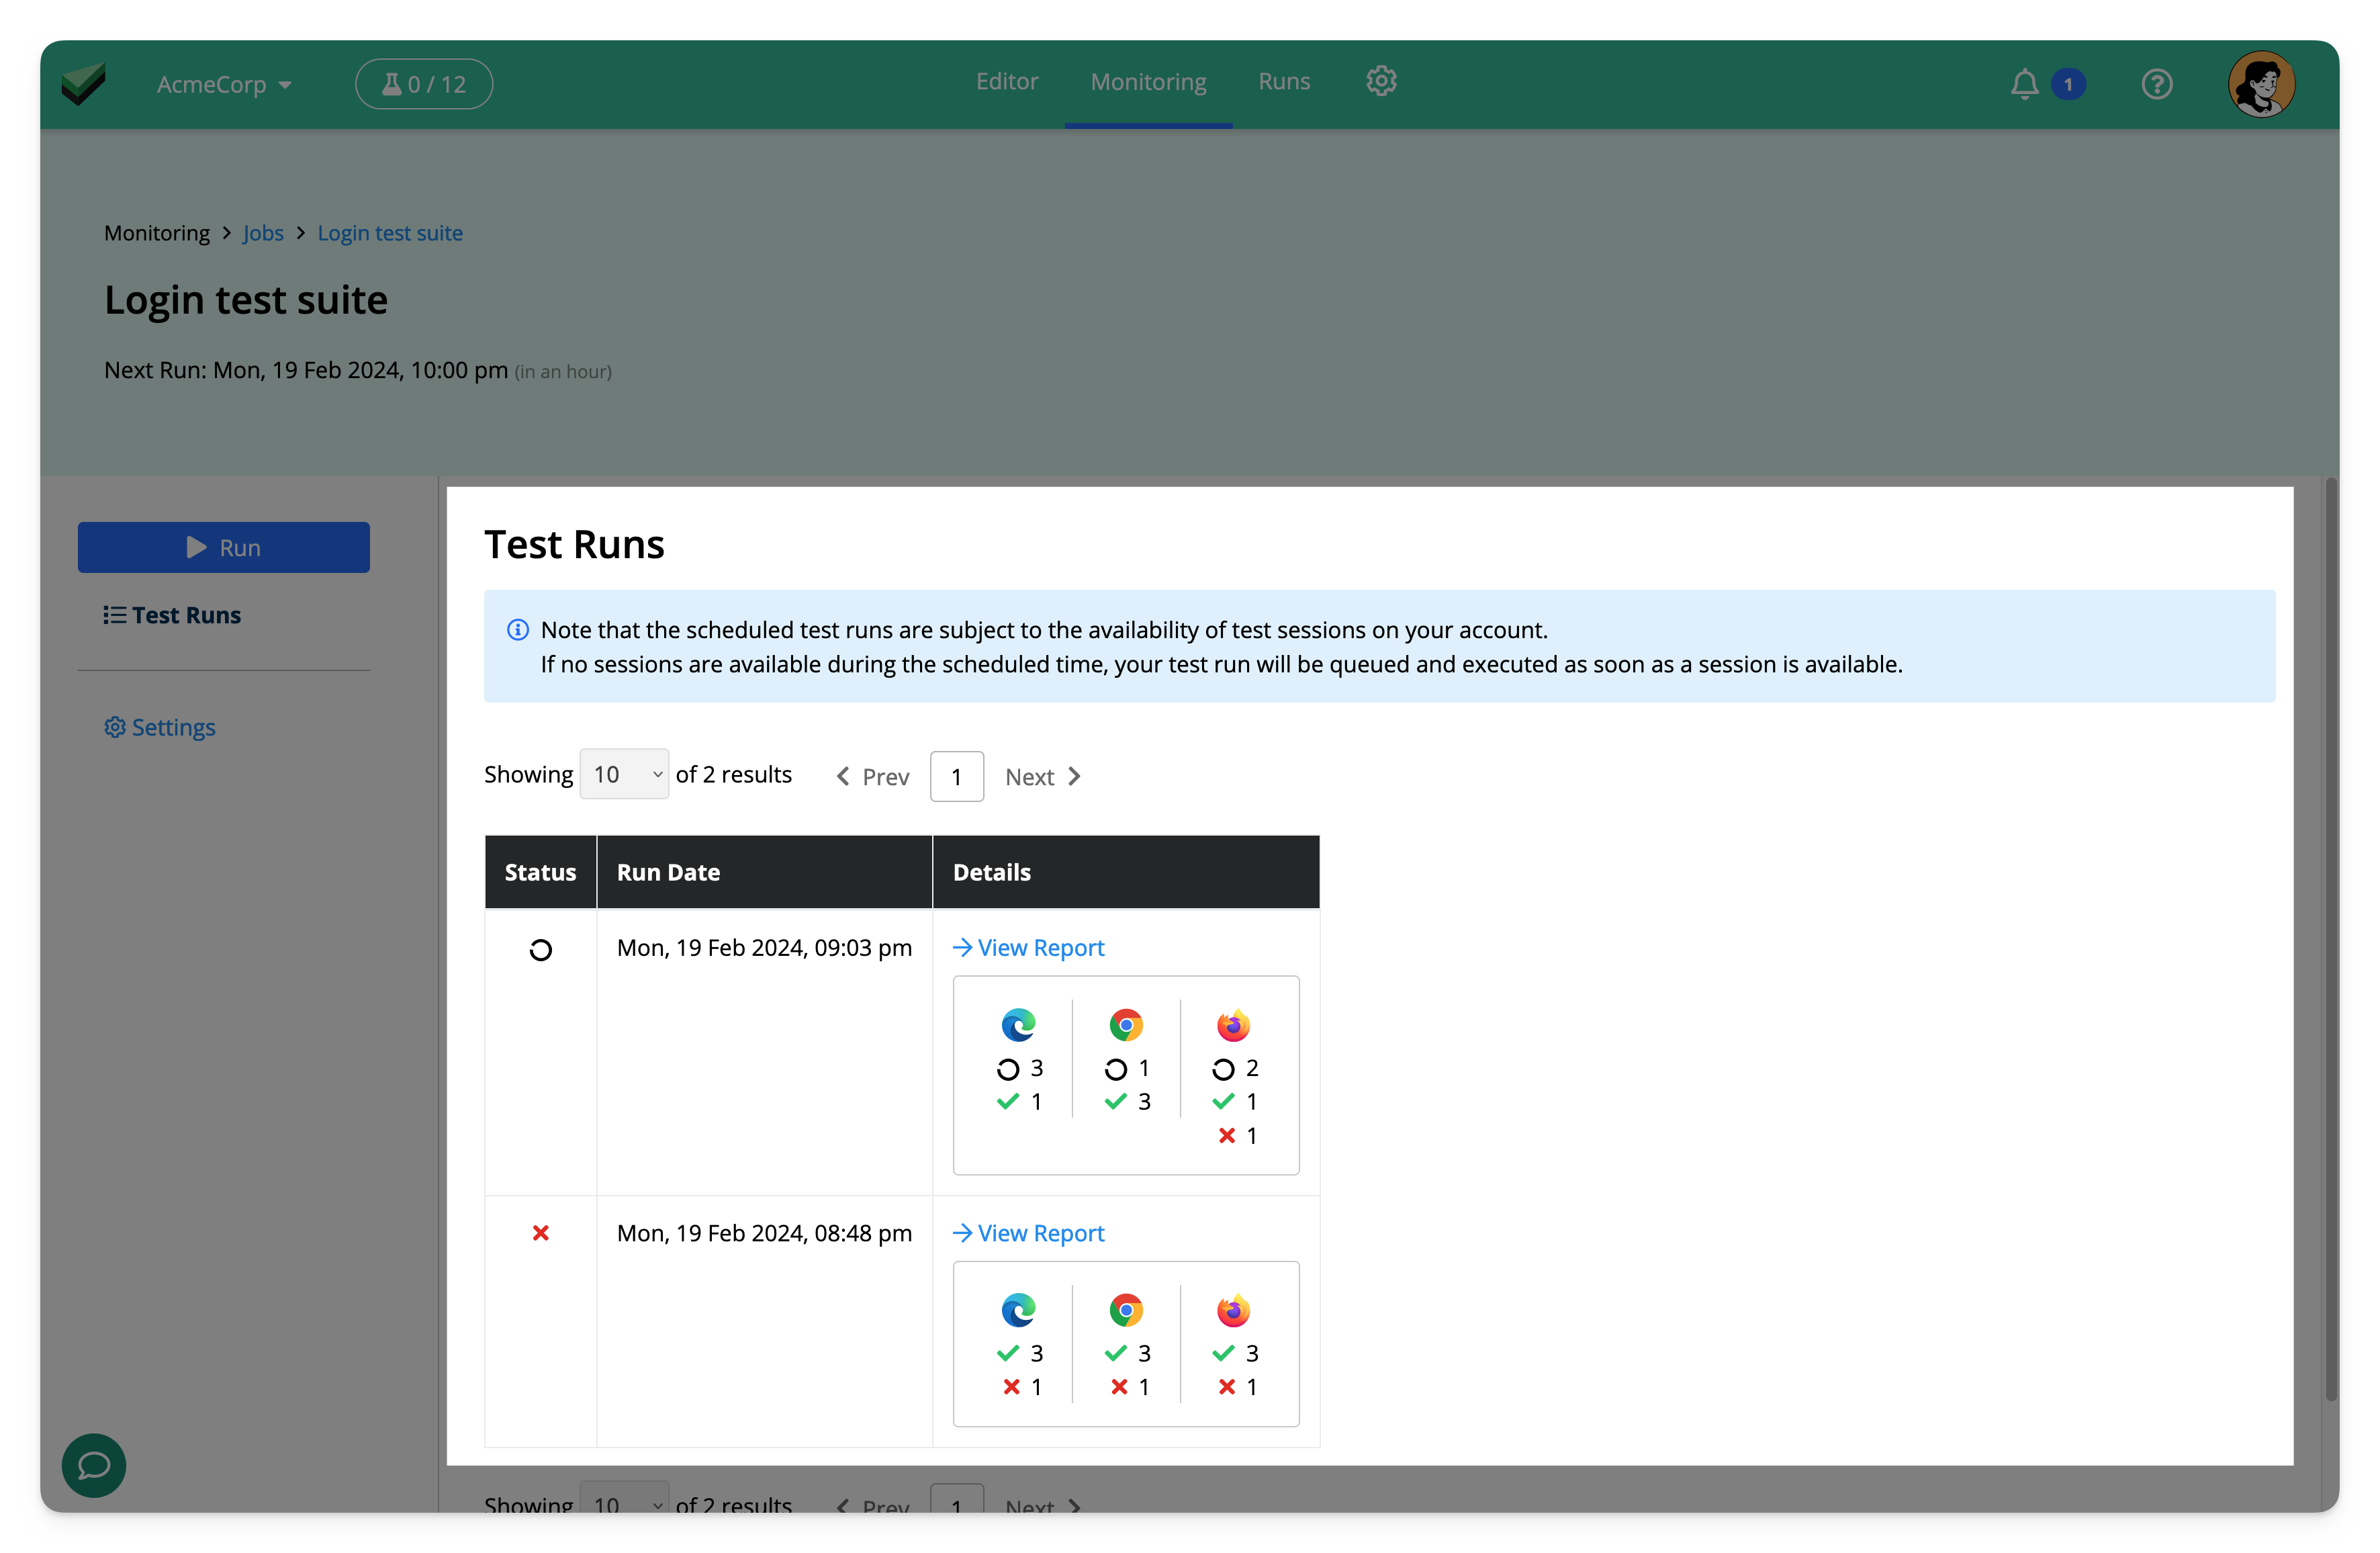
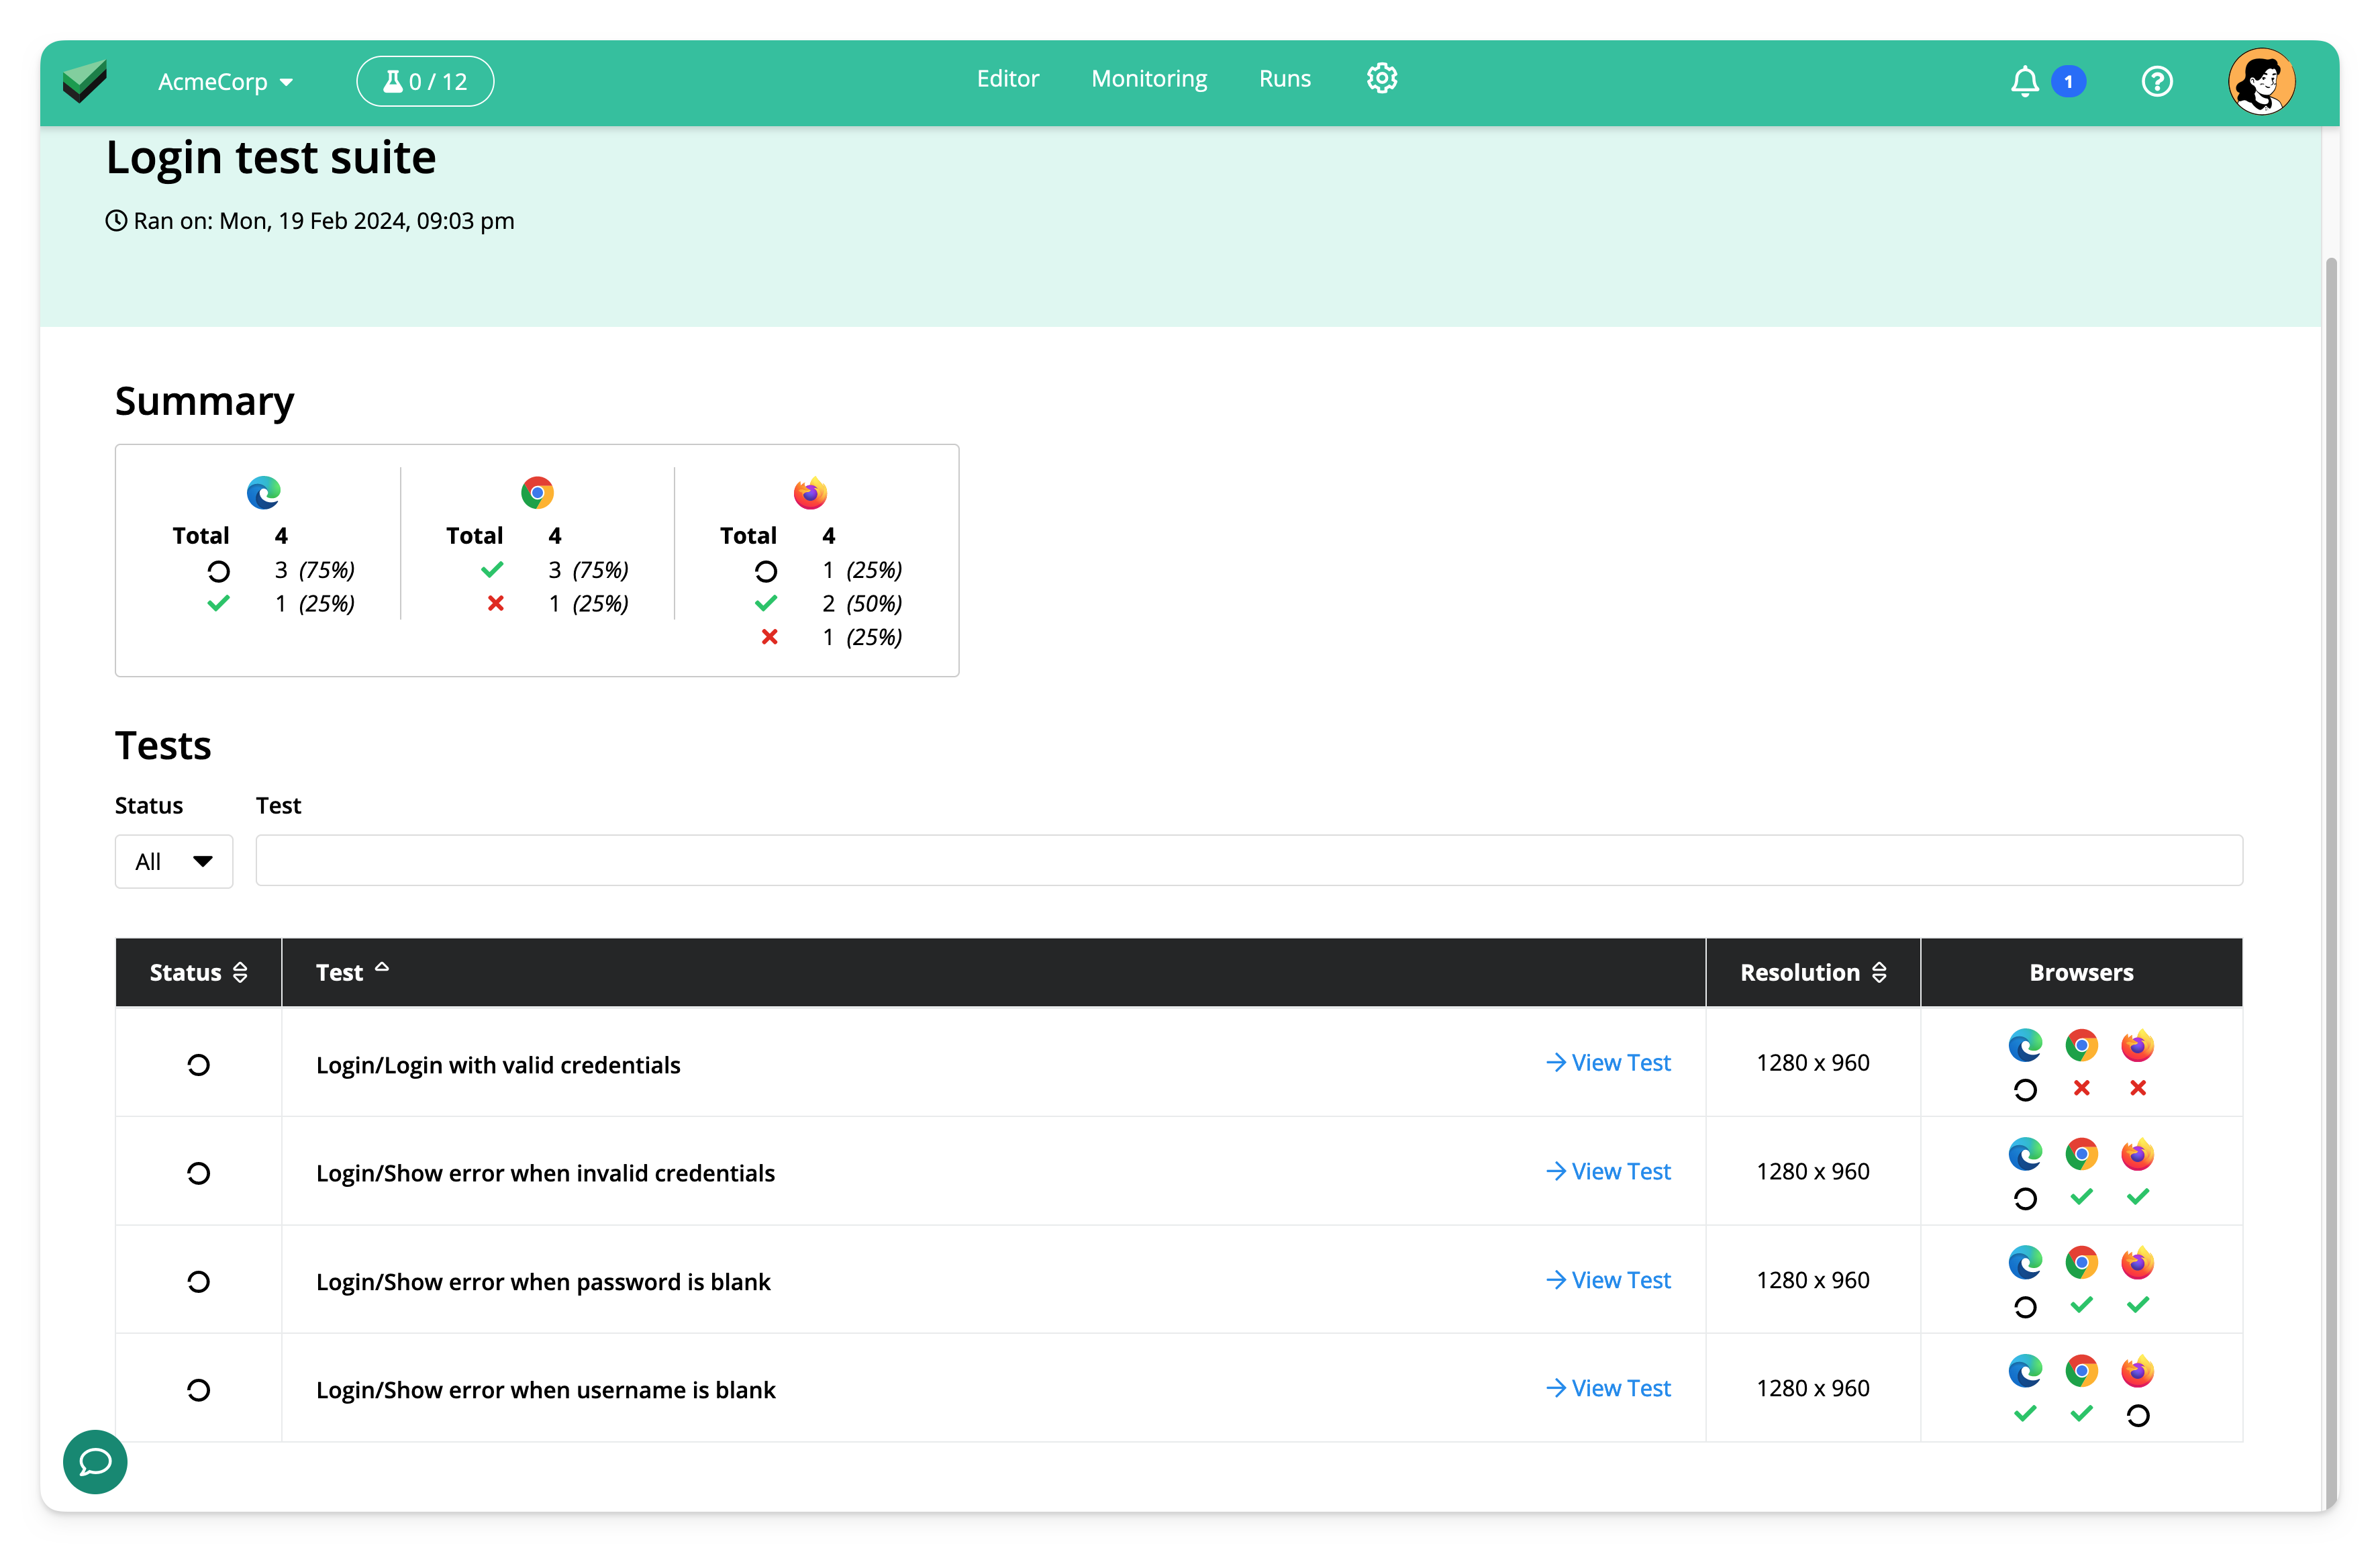
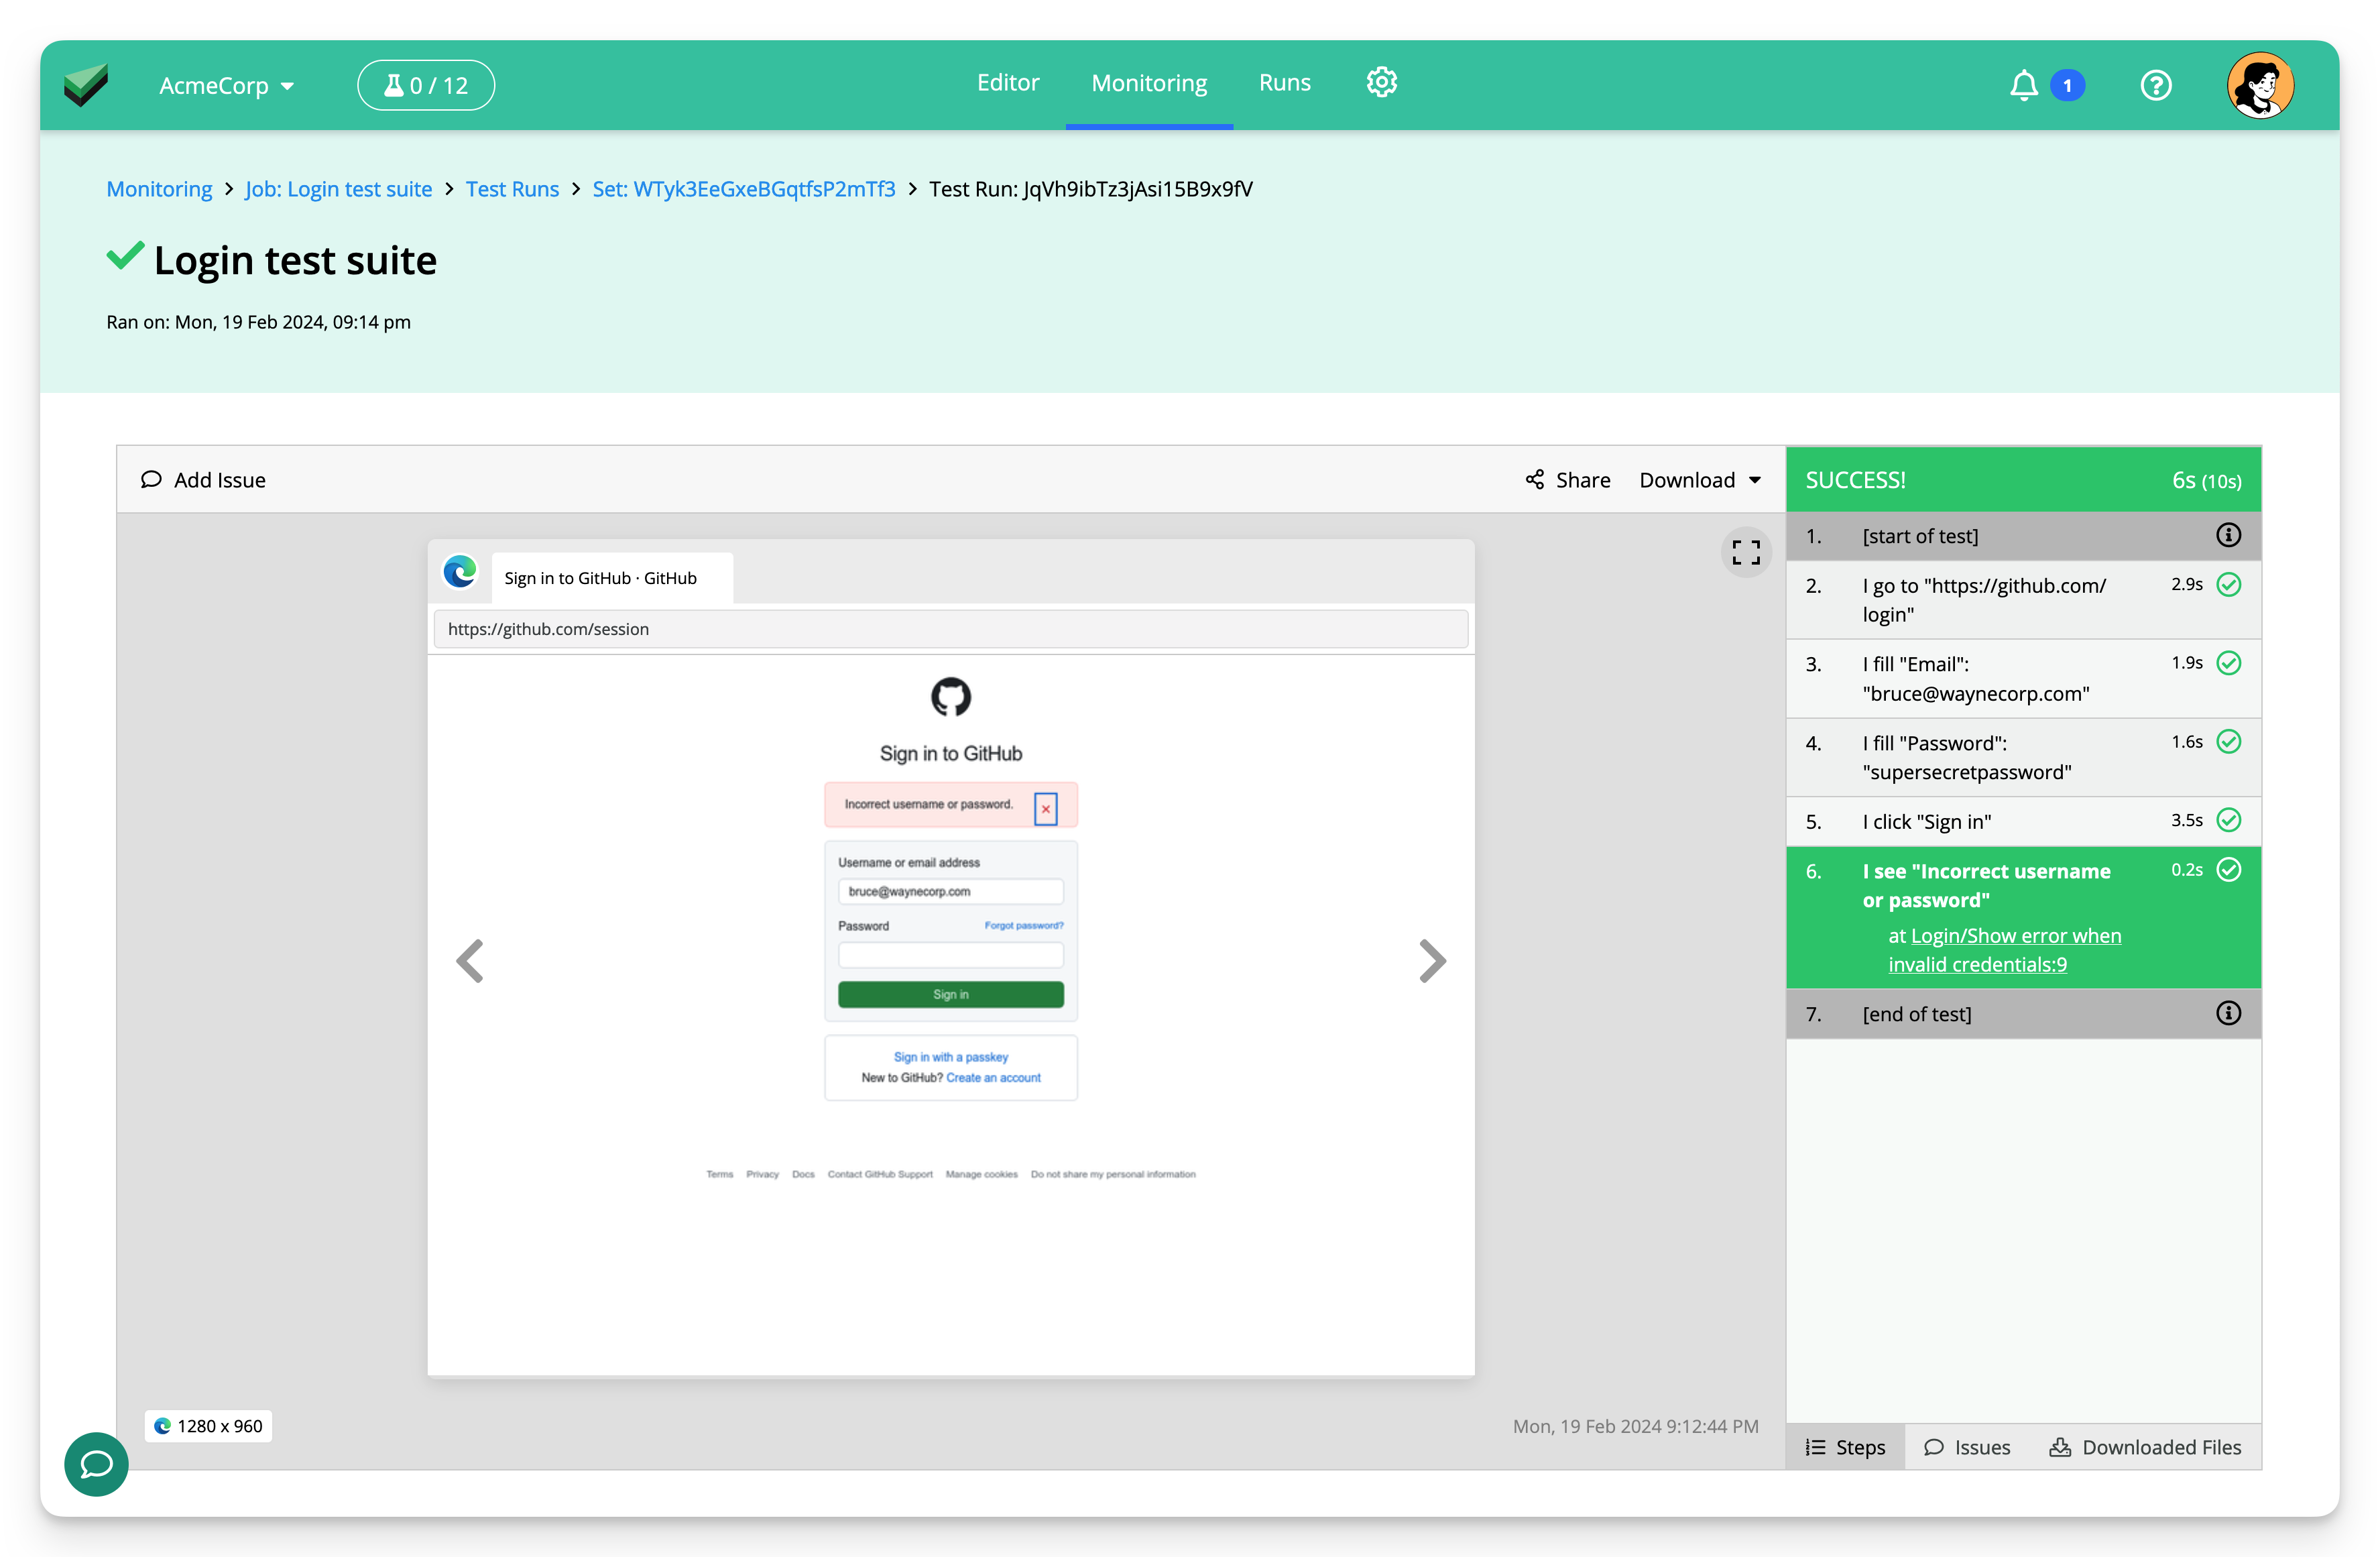
Click on "View Report" to view the full report of a run, which will show the result of each individual test.
You can view the Test Run Report for an single test run by clicking on its status.
Disable / Enable a job
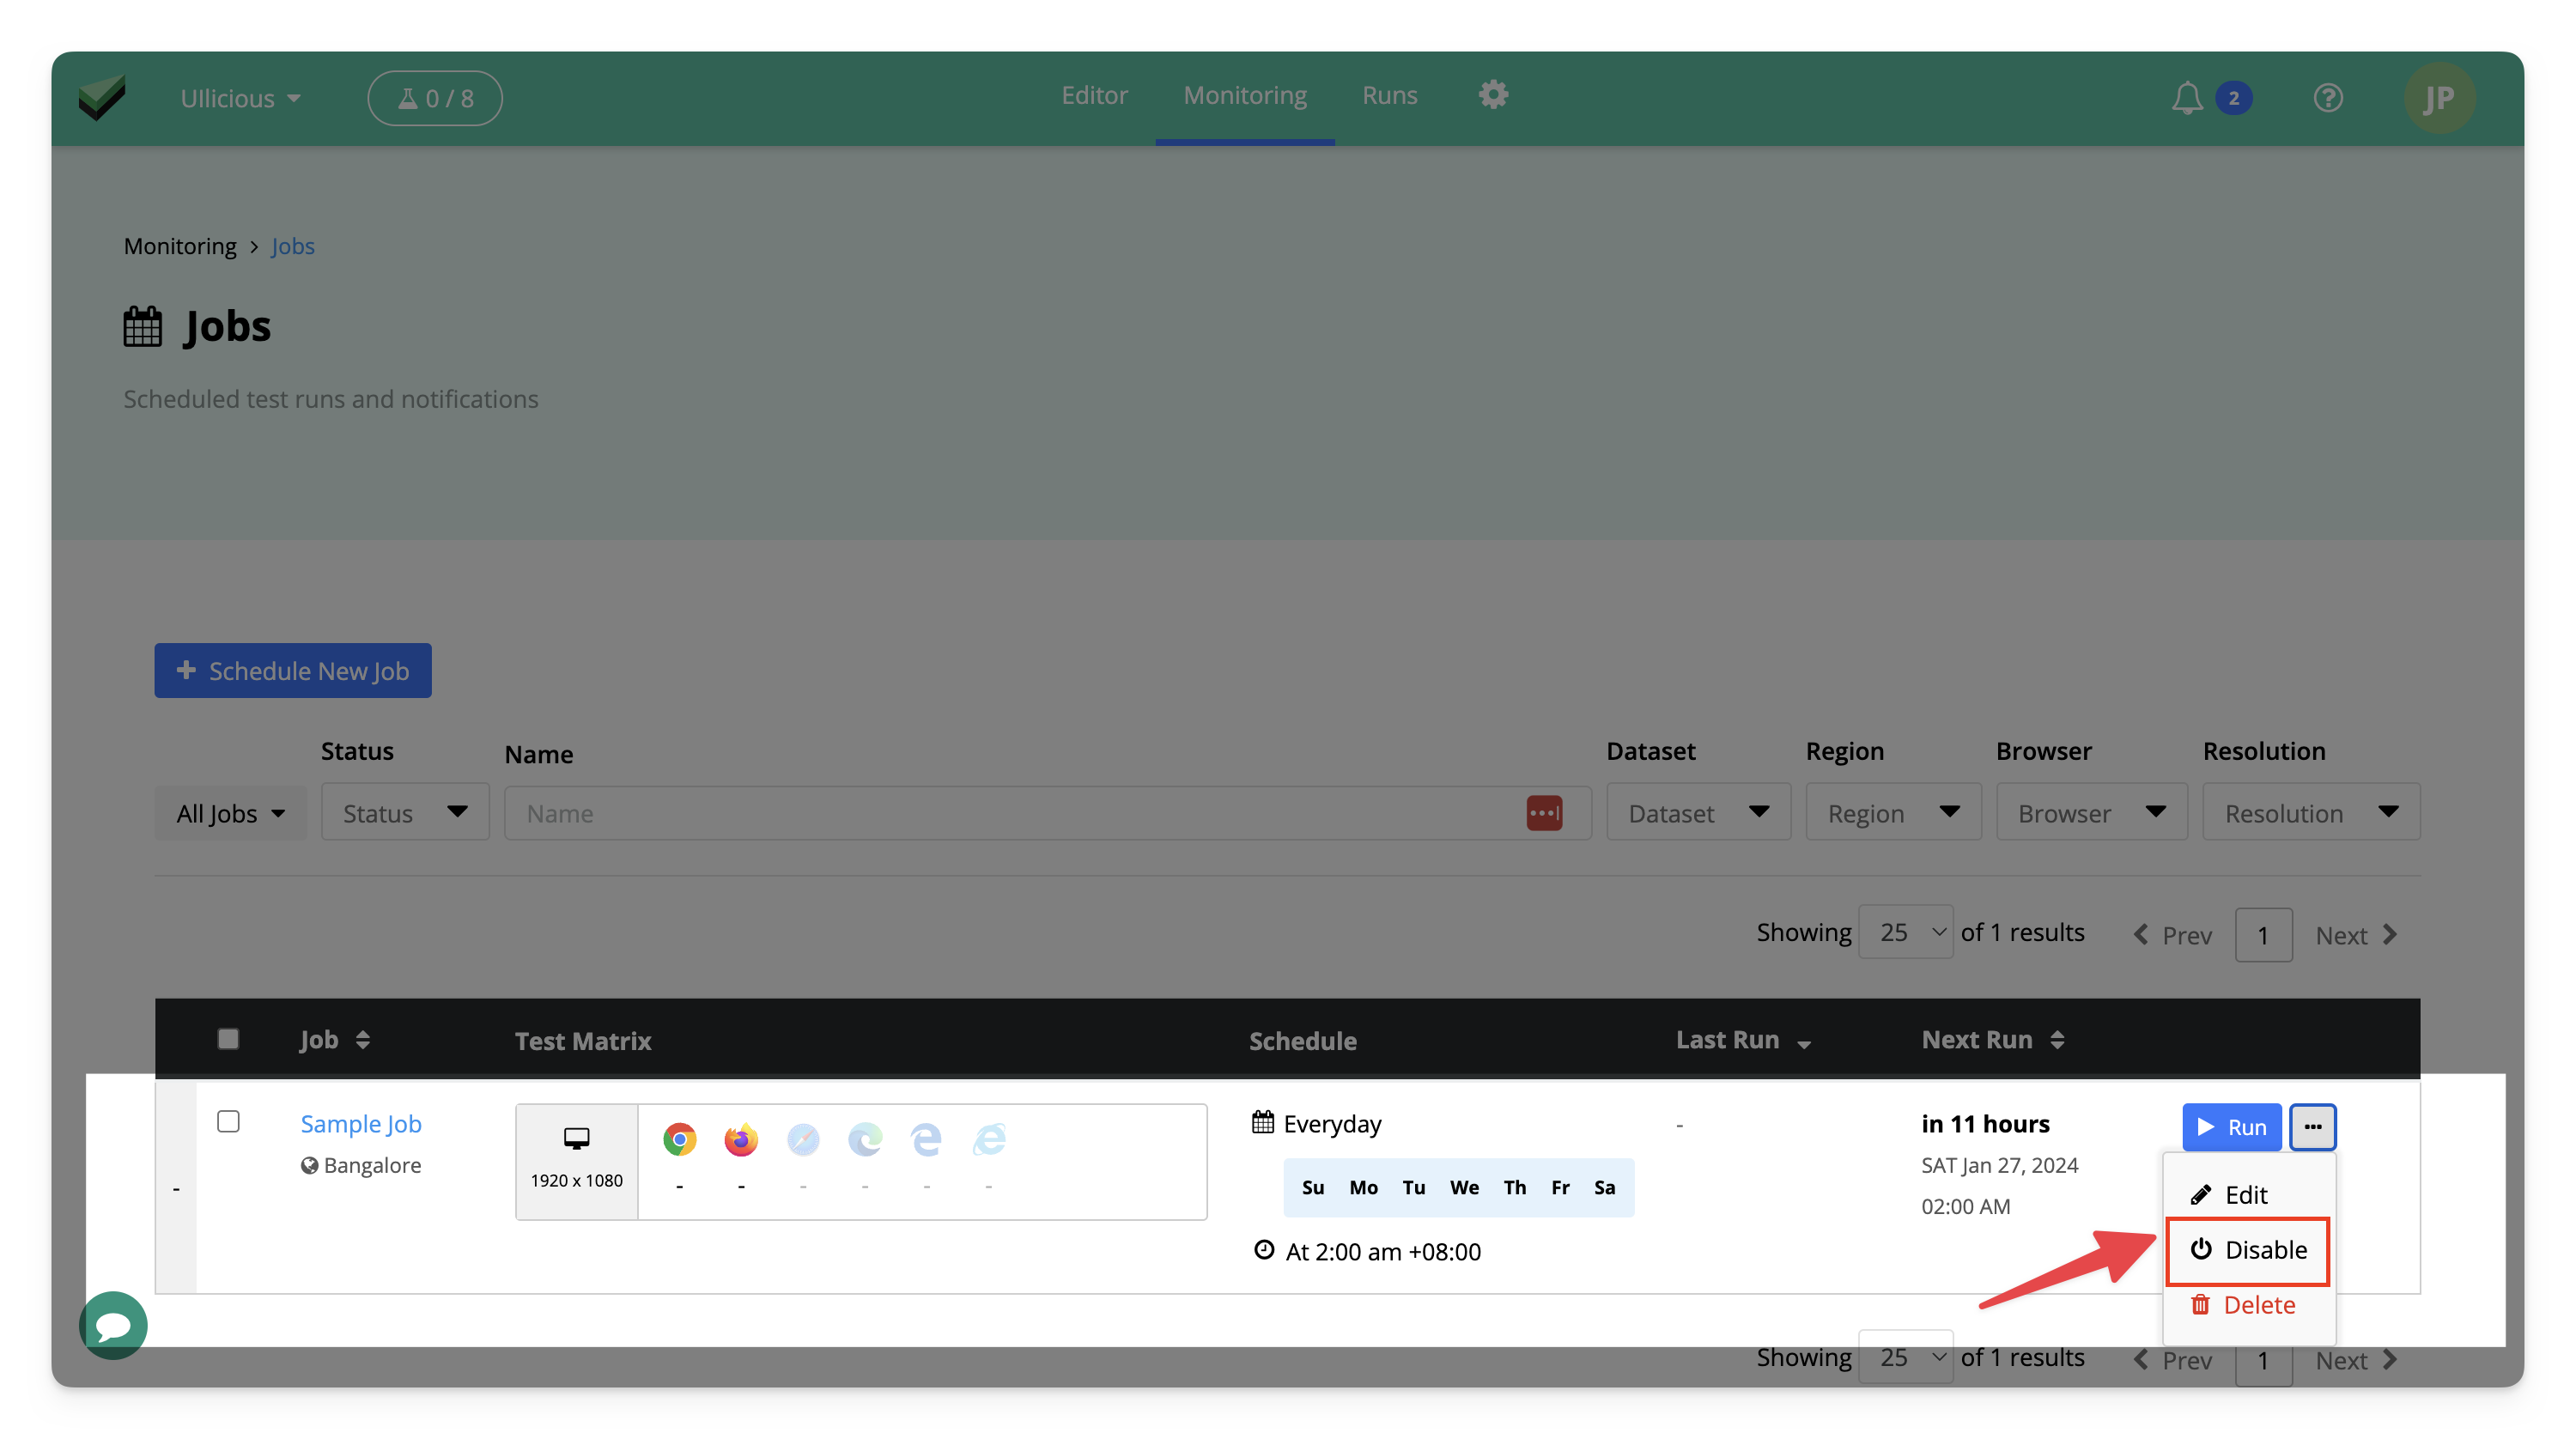
You may disable a job to stop it from running at schedule times temporarily. This may be useful when you expect test failures due to changes in the application and want to pause the job while the test script is being updated. To disable a job, click the "..." button to show more actions and click "Disable" to disable the job.
Delete a job
To delete a job, click the "..." button to show more actions, and click "Delete".
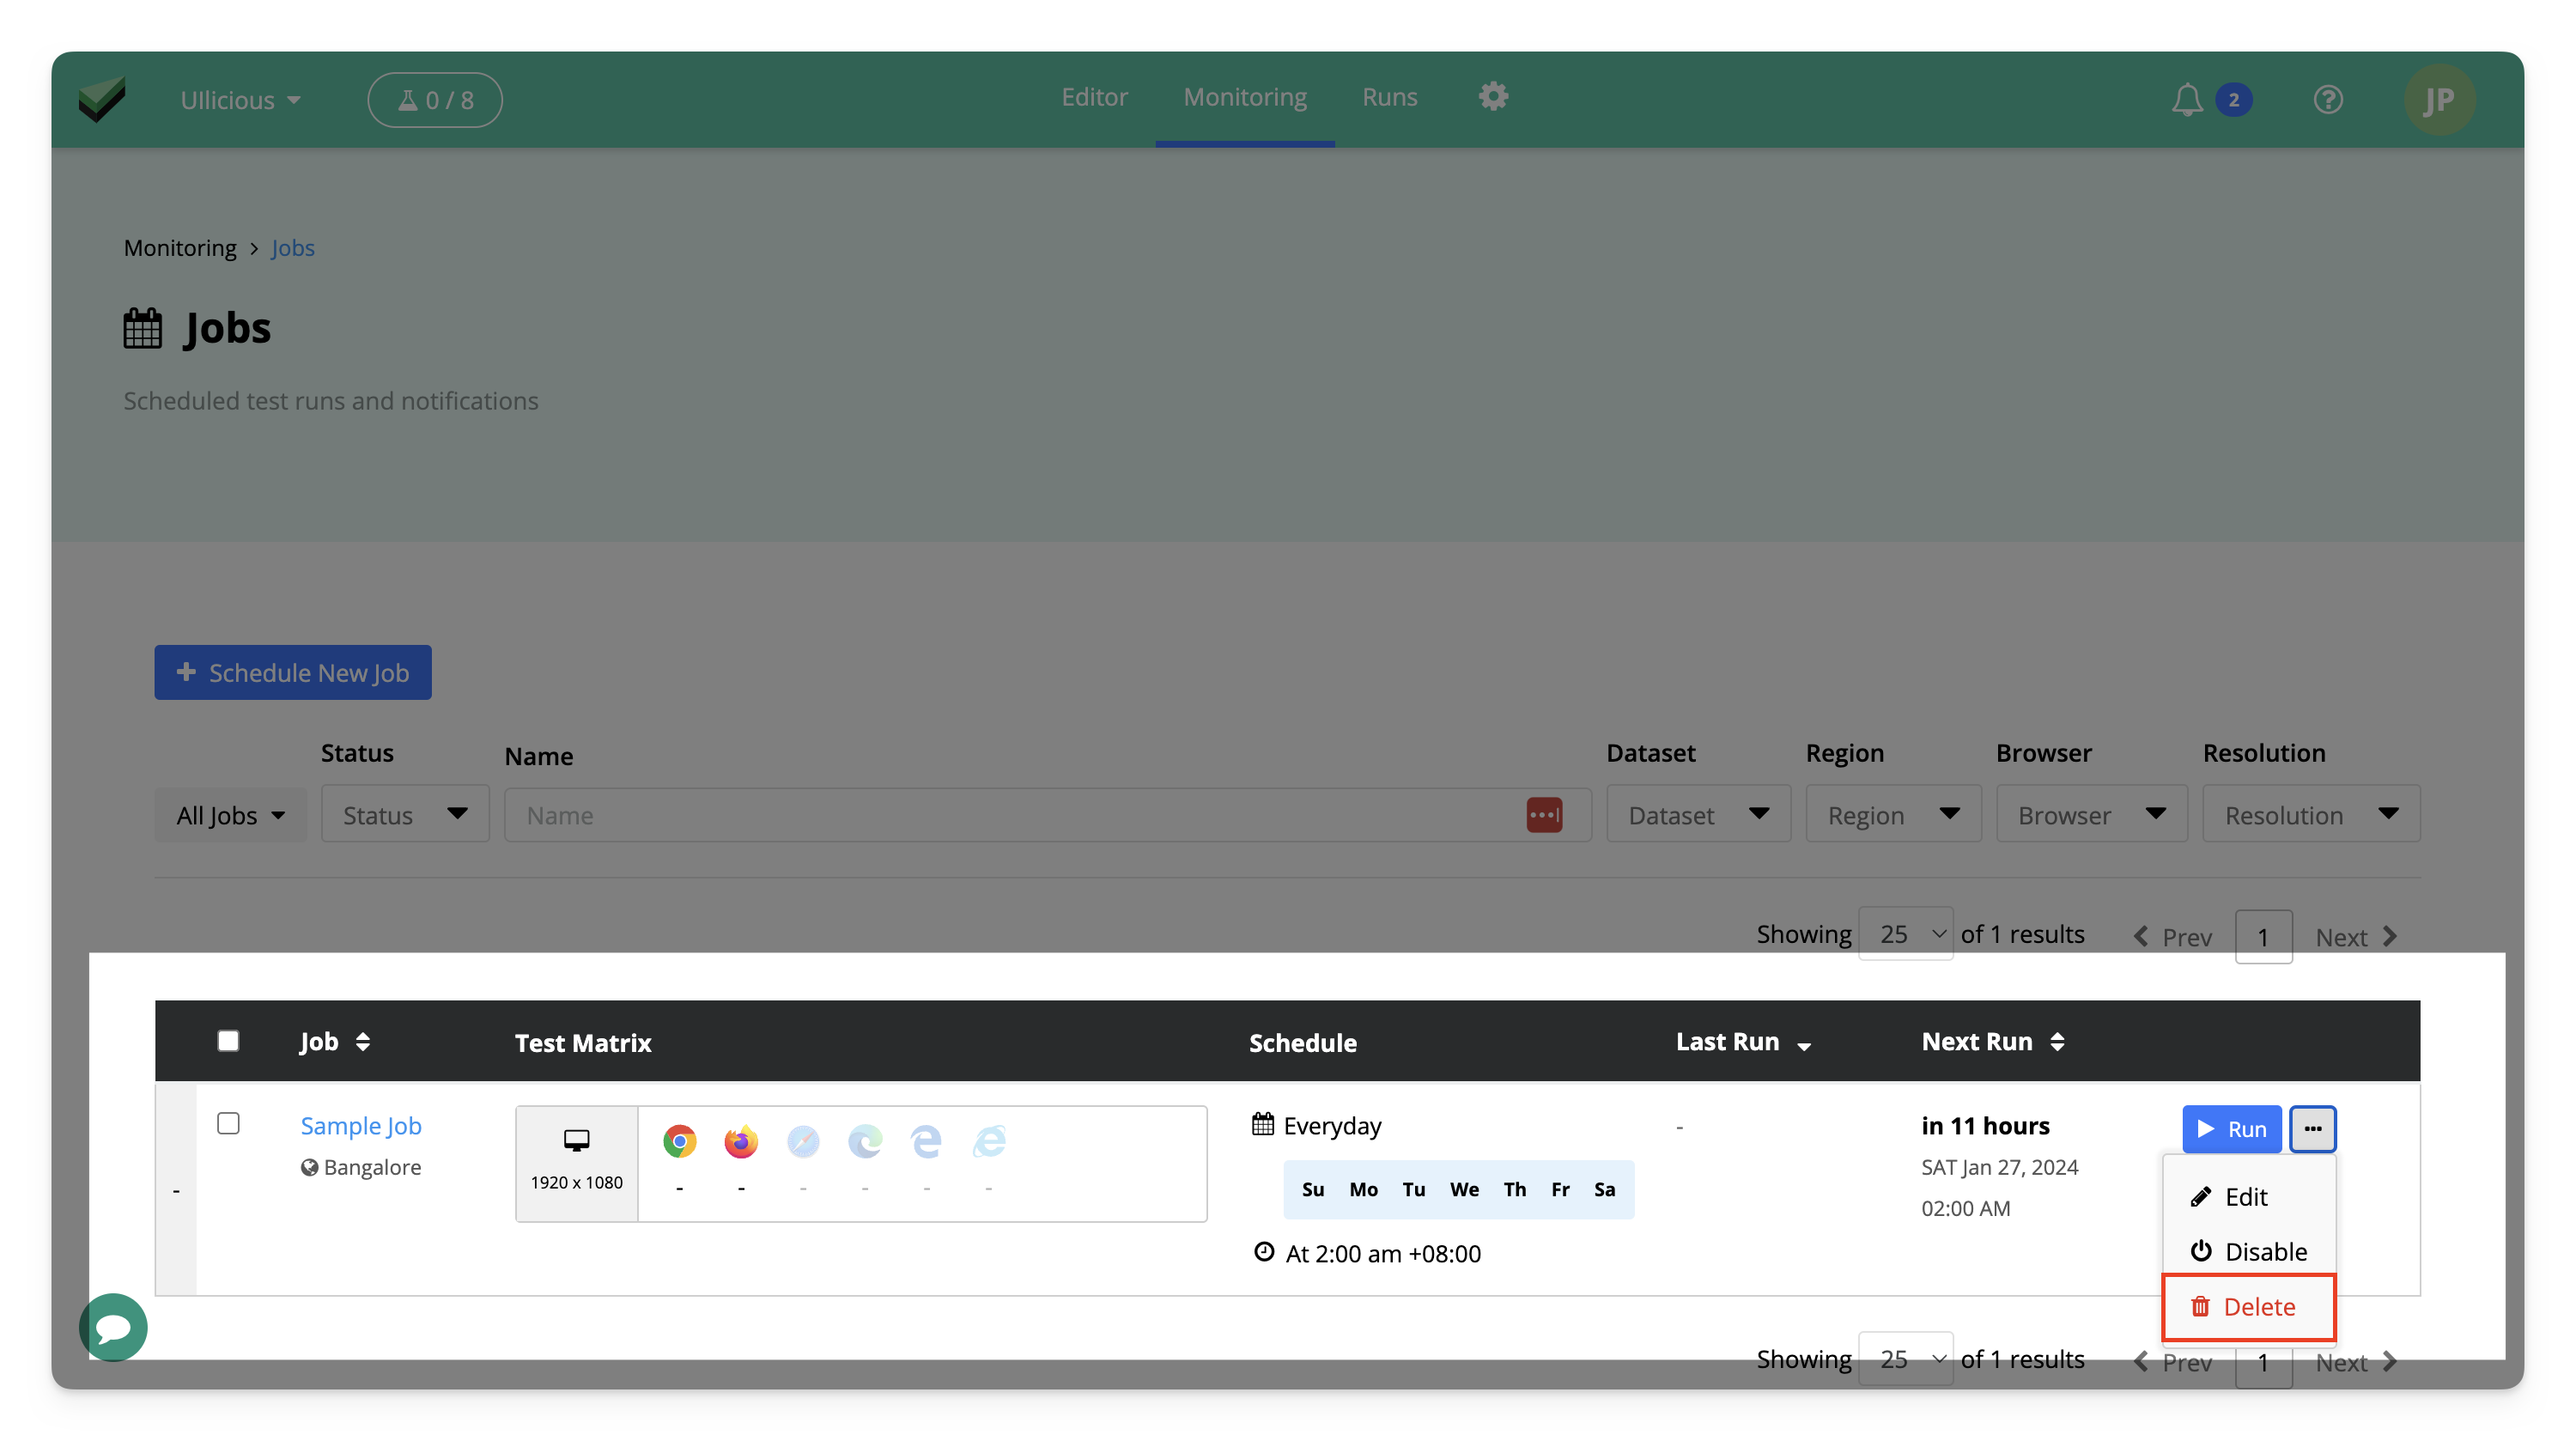
Once the job is deleted, you will no longer be able to access the past runs page for this job and view the aggregated run reports. To view past runs for this job, you will need to go to the "Runs" view and search for the individual test run reports.
Note that this is a permanent and irreversible action. If you wish to pause a job instead, we suggest disabling the job instead.